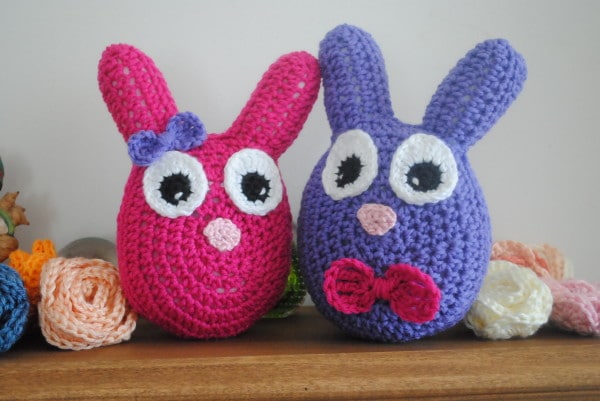
Easter Bunny Stuffy
Bunny and Clyde
Well it’s that time of year… the time of year when I have no idea what to get my kids for Easter since we don’t really eat a lot of candy and sweets. I let them have a little something but it’s just never enough to fill their baskets.
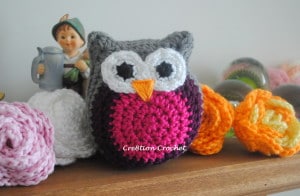
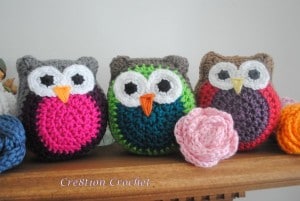
This year I decided to make these sweet little bunny plushes for my youngest daughter. I’ve been working on some little owl plushies (pattern to be released soon) and it got me thinking. Hmmm… can I make an easy and simple Easter Bunny too?Well the answer is yes, and here’s the proof. You don’t have to be proficient at amagarumi to make these adorable little creatures.
They are created by making two simple appliques and stitching them together. I hope you find it as easy as I did!
Materials:
5.5mm (I) Hook
Worsted weight yarn in your choice of colors (I used Red Heart Classic and Red Heart Super Saver)
Lighter weight yarn for the eyes and nose (I used Caron’s Simply soft which is also WW but much thinner)- black, white and pink Tapestry needle
Stuffing material

Pattern:
Make two for each bunny
1- Mc/r with 8hdc. Join round with sl st
2- Ch1. *1hdc in each of the next 3sts. 2hdc in next st. Repeat from * around. Sl st into 1st hdc to join round (skipping over the ch1) <10>
3- Ch1. 2hdc in ever st around. Sl st into 1st hdc to join round (skipping over the ch1) <20>
4- Ch1. 1hdc in each of the next 4sts. 2hdc in each of the next 5sts. 1hdc in each of the next 5sts. 2hdc in each of the next 5 sts. 1hdc in the next st. Sl st into 1st hdc to join round (skipping over the ch1) <30>
5- Ch1. 1hdc in each of the next 6sts. 2hdc in each of the next 5sts. 1hdc in each of the next 10sts. 2hdc in each of the next 5sts. 1hdc in each of the next 4sts. Sl st into 1st hdc to join round (skipping over the ch1) <40>
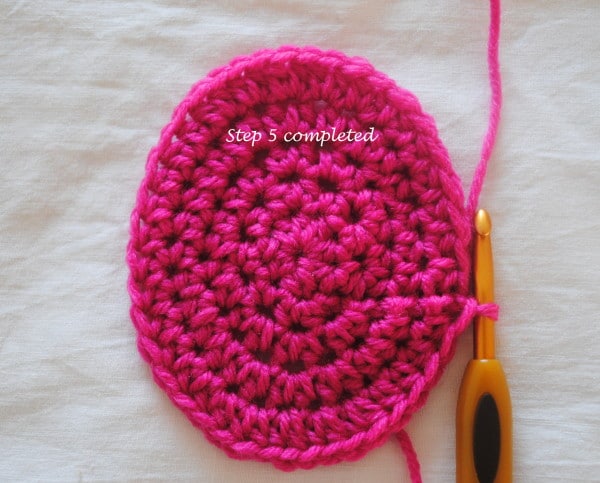
6- Ch1. *1hdc in each of the next 3sts. 2hdc in next st. Repeat from * around. Sl st into 1st hdc to join round (skipping over the ch1) <50>

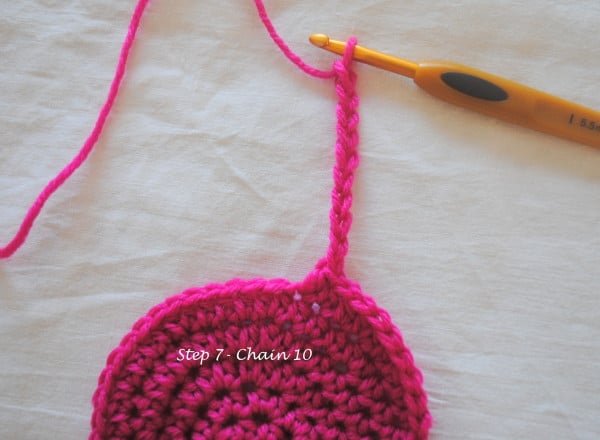
7- Ch1. 1hdc in each of the next 4sts. 2hdc in the next st. 1hdc in each of the next 3sts. Ch10. 1hdc in each chain (back down). 1sl st into the same st as the last hdc. 1hdc in the next st. 2hdc in the next st. 1hdc in each of the next 3sts. Ch10. 1hdc in each chain (back down). 1sl st into the same st as the last hdc. 2hdc in the next st. *1hdc in each of the next 4sts. 2hdc in the next st. Repeat from * around. Sl st into 1st hdc to join round (skipping over the ch1) <60 plus the two ears>
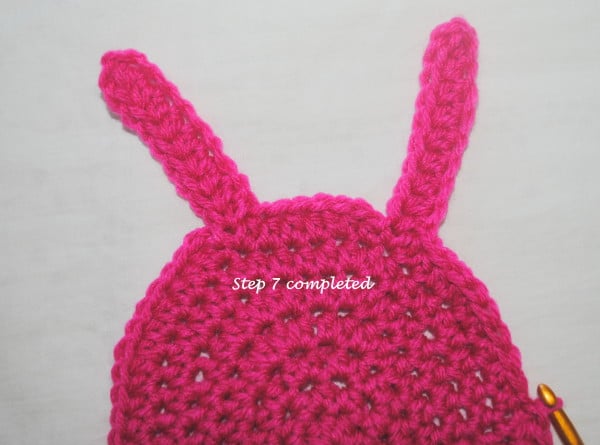

8- 1sc in each stitch around body. 1hdc in each st around ears. Sl st into the 1st sc to join round. <60 plus two ears>
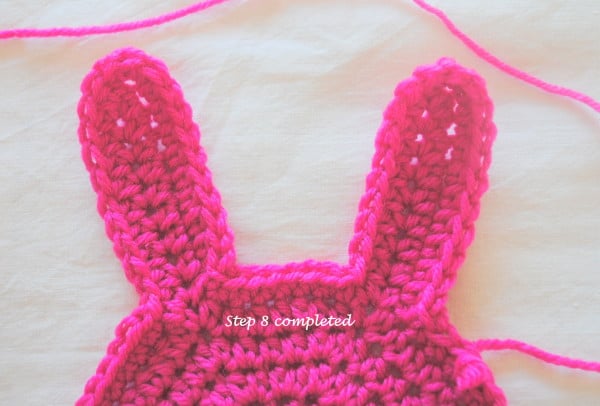
9- 1sl st in each st around body. 1sc in each st around ears. Fasten off and weave in all ends.
Eyes:
1- Make two for each bunny
2- Mc/r with 6sc. Join round with sl st
3- Ch1. 2sc in each st around. Sl st into 1st hdc to join round, (skipping over the ch1), change to white on sl st <12>
4- Ch1. 2sc in each of the next 2sts. 2hdc in each of the next 2sts. 2dc in next st. 2tc in each of the next 2sts. 2dc in next st. 2hdc in each of the next 2sts. 2sc in each of the next 2sts. Sl st into 1st hdc to join round (skipping over the ch1) <24>
5- 1sl st in each st around. Fasten off leaving a long (15-18” tail). Pull short tails tight, tie to secure and cut short.
Nose:
1- Ch2. 3sc in 2nd ch from hook.
2- Turn piece completely over and stitch across. 1sc in 1st st. 2sc in 2nd st. 1sc in 3rd st. <4>
3- Turn and stitch across. 1sc in 1st st. 2sc in 2nd st. 2sc in 3rd st. 1sc in 4th st. <6>
4- Fasten off leaving long (6-8” tail)

Assembly:
Attach eyes using long tail to weave on, place highlight in black of eye. I placed a needle into the center of bunny to make sure the eyes were in the correct position
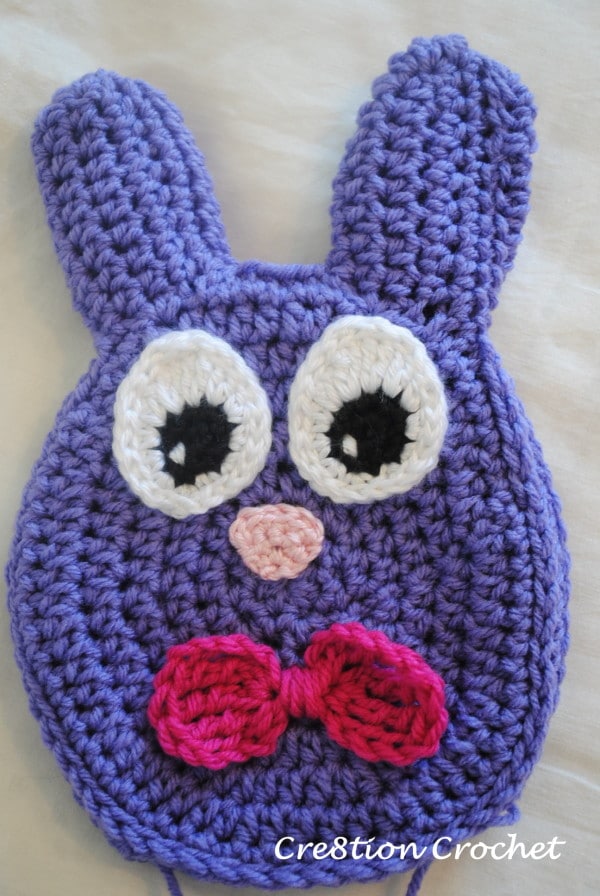
Stitch on nose using long tail to weave on. You may choose to also stitch on a mouth. I personally didn’t like the way it looked so I left it off of mine.
Add optional embellishments . Bows and flowers can be found in The Flower Repository.
Place both good sides together and line up front and back. Start at the bottom, about 2-3 inches left (or right) of center and work your way up. Be sure to only stitch together the sc stitches, leaving the sl st’s out. You will be weaving under the outside two loops of each side.
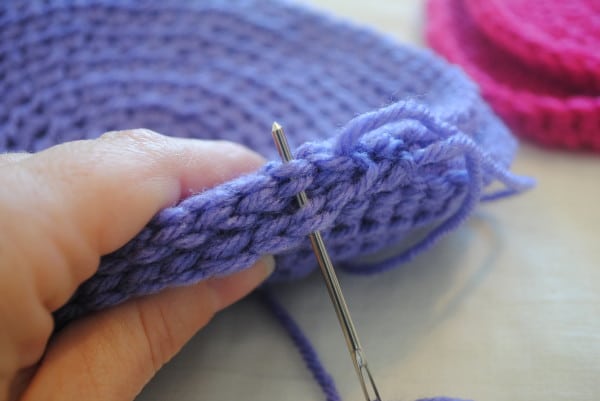
Since the ears were finished with sc and not sl st they will be slightly different to stitch. Make sure you have four loops over your needle for each stitch.
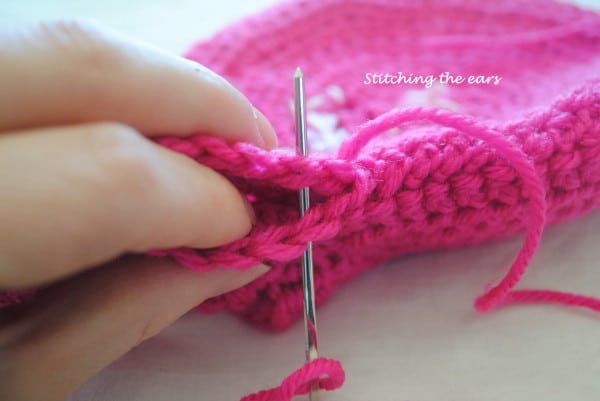
Continue around until you are another 2-3 inches away from the center (leaving a 4-6” opening in bottom).
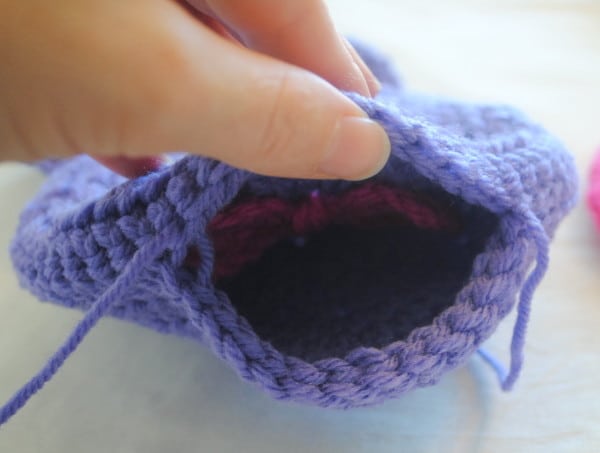
Turn bunny inside out and stuff, be sure to get the ears good. Make sure you stuff completely
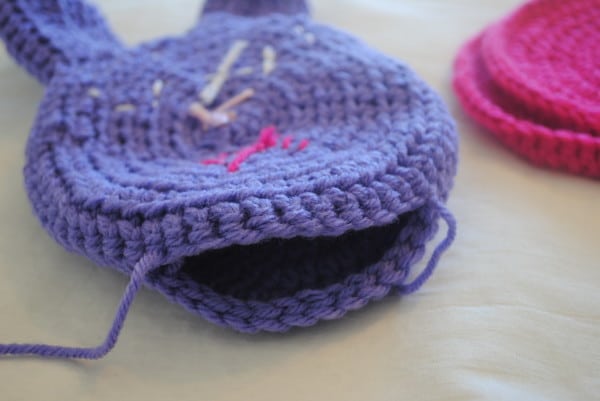
Now you will finish stitching the bunny up… this time you will be stitching on the two inside loops of each side. Fasten off and weave needle through each side a couple times to secure. Cut tail short so that it is hidden inside.
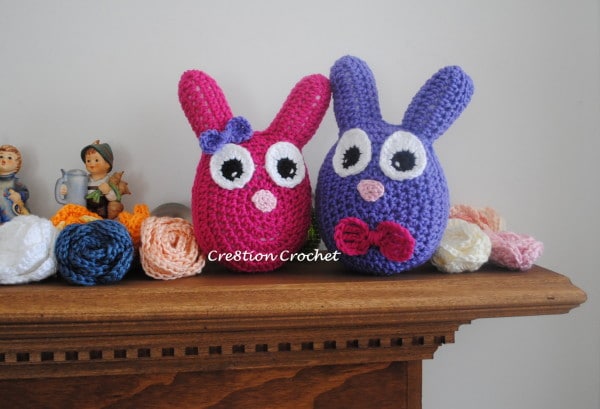
There you go… you now have one bunny! I made two, a boy bunny and a girl bunny.
I hope you enjoyed this Easter Bunny stuffy tutorial. If you like what you see, please share it. Have fun, and as always….
Happy Easter Hookin’
If you liked Bunny and Clyde, you’ll LOVE this Owl Stuffy free pattern