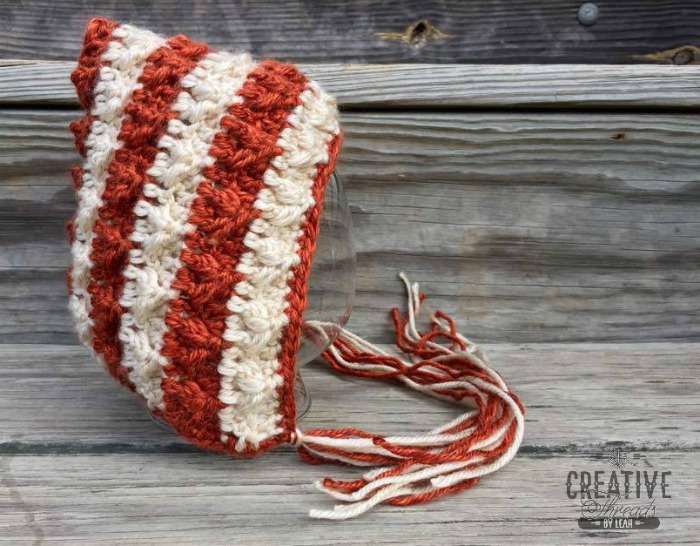
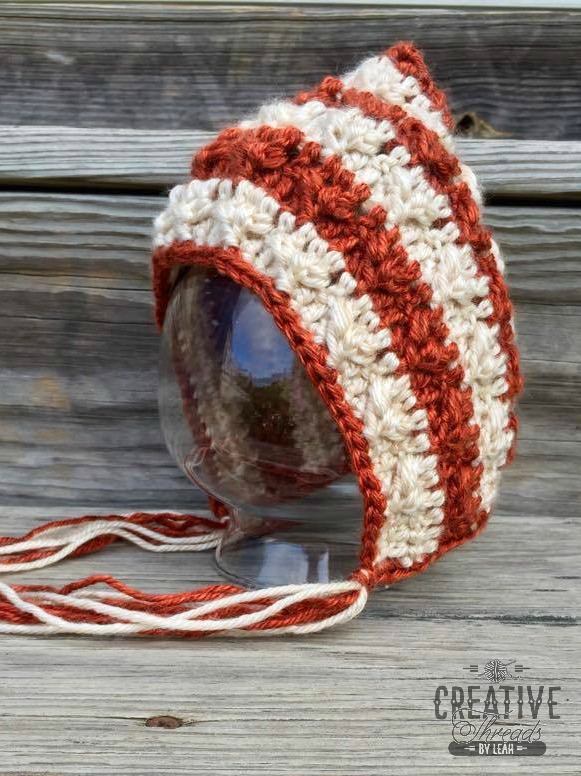
Little Flame Pixie Bonnet
My best friend just recently had a baby which made me start thinking baby items. She named her little boy Aidan which means “little fire”. I started looking for a stitch that made me think of fire and came across this one which also looks like little hearts and the Little Flame pattern line was born!
This pattern was designed by Leah Feild of Creative Threads by Leah, exclusively for Cre8tion Crochet
-
- This post may contain affiliate links
- By using this pattern you agree to the Pattern Terms of Use set forth by CREATIVE THREADS BY LEAH.
You may sell any products/finished items created from patterns designed by Creative Threads by Leah; however, pattern credit must be given and you may not sell the pattern in whole or part. If using one of my patterns for instructional purposes, please refer them to the pattern and have them access or purchase the pattern for themselves. Do not reproduce the pattern for use in a class.
Click HERE to add this pattern to your Ravelry Favorite
Click HERE to Pin It for later
YARN
#4 Worsted Weight
MATERIALS
5.0mm/ H hook
Tapestry/Yarn Needle
Ribbon (optional)
DIFFICULTY
Intermediate
SIZE(S)
Newborn (13.5”)
0-3m (16”)
3-6m (17”)
6-12m (18”)
12-24m (19”)
Toddler (20”)
GAUGE
2 rows in lcl pattern = 1 inch
2 rows in lcl pattern = 1 inch
STITCH GUIDE
ch(s) – chain(s), sc – single crochet, dc – double crochet, st(s) – stitch(es), lcl – leaf hopper cluster, fdc – foundation double crochet, lp(s) – loop(s), hk – hook, yo – yarn over
SPECIAL STITCHES
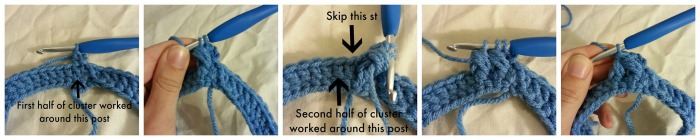
leaf hopper cluster – *yo, insert hk from front to back around post of st below previous st and pull up a lp* twice, pull through four lps on hk (2 lps on hk), sk next st, *yo, insert hk from front to back around post of next st and pull up a lp* twice, pull through four lps on hk (3 lps on hk), pull through three remaining lps
NOTES
- Turning ch does not count as st.
- Pattern is written in newborn with changes in parentheses for 0-3m, 3-6m, 6-12m, 12-24m, Toddler
PATTERN
Row 1: Fdc 45 (45, 53, 61, 69, 69). <45 (45, 53, 61, 69, 69)>
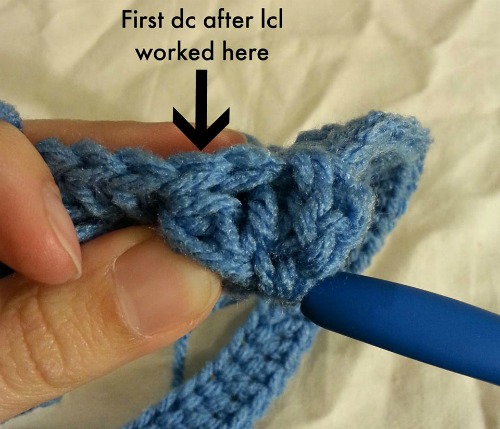
Row 2: Ch 2, turn. Dc 2, lcl over next 3, *dc in st that last part of lcl was worked around and next 2, lcl over next 3* across to last 2 sts. Dc in last 2 sts. <11(11, 13, 15, 17, 17) lcl, 34 (34, 40, 46, 52, 52) dc>
Row 3: Ch 2, turn. Dc across. <45 (45, 53, 61, 69, 69)>
Row 4: Ch 2, turn. Dc 4, *lcl, dc in st that last part of lcl was worked around and next 2* across to last st. Dc in last st. <10(10, 12, 14, 16, 16) lcl, 35 (35, 41, 47, 53, 53) dc>
Row 5: Ch 2, turn. Dc across. <45 (45, 53, 61, 69, 69)>
Newborn Repeat 2-5 once and row 2 one more time. Finish off. Go to finishing section.
0-3m Repeat 2-5 once and row 2 and 3 one more time. Finish off. Go to finishing section.
3-6m Repeat 2-5 once and then 2-4 one more time. Finish off. Go to finishing section.
6-12m Repeat 2-5 twice and row 2 one more time. Finish off. Go to finishing section.
12-24m Repeat 2-5 twice and then 2-4 one more time. Finish off. Go to finishing section.
Toddler Repeat 2-5 three times and row 2 one more time. Finish off. Go to finishing section.
FINISHING
For Braided Ties or ribbons attached at the corners: Turn right sides together and attach yarn with sl st and sl st back seam along foundation row from top to bottom. DO NOT FINISH OFF. Turn right side facing. Ch 1, sc along edge with 2 sc in each row end, ch 2, turn to work along front edge, sc in each st, ch 2, sc along edge with 2 sc in each row end. Join with sl st and finish off. Use ch 2 sps at corners for braided ties or ribbon ties. Ribbon can also be woven through the last row of sts. A ch tie can also be woven through the stitches to secure the bonnet.
For ties worked off the corners: Turn right sides together and attach yarn with sl st and sl st back seam along foundation row from top to bottom. DO NOT FINISH OFF. Turn right side facing. Ch 1, sc along edge with 2 sc in each row end, sc in corner, ch 51, sl st in 2nd ch from hook and each, sc in corner, turn to work along front edge, sc in each st, sc in corner, ch 51, sl st in 2nd ch from hook and each, sc in corner, turn to work along edge, sc along edge with 2 sc in each row end. Join with sl st and finish off.
I hope you enjoyed Little Flame Pixie free bonnet crochet pattern.
Check out all other contributor patterns by Creative Threads by Leah
 Leah is the owner of Creative Threads by Leah. She has been crocheting for more than 20 years. Her favorite things to design are girls’ and women’s accessories and clothes. You can find Leah on Facebook, Ravelry, and on her blog. Leah is the owner of Creative Threads by Leah. She has been crocheting for more than 20 years. Her favorite things to design are girls’ and women’s accessories and clothes. You can find Leah on Facebook, Ravelry, and on her blog. |


