Functional and Stylish
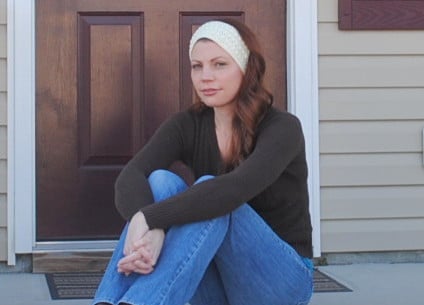
Sleek and Skinny Headband/Ear Warmer
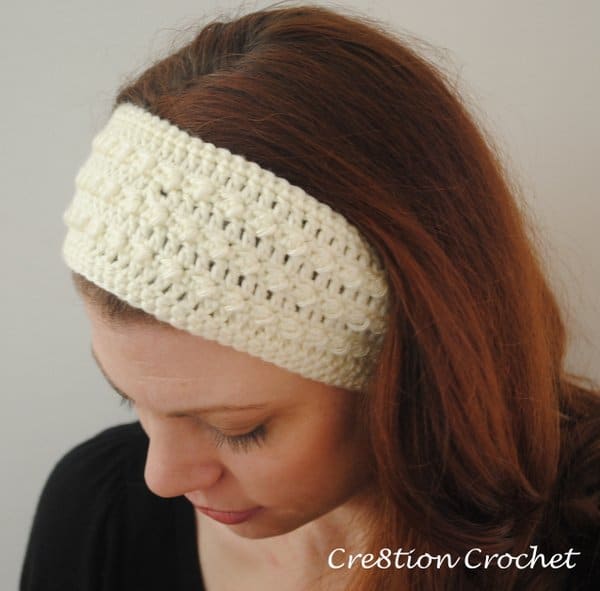
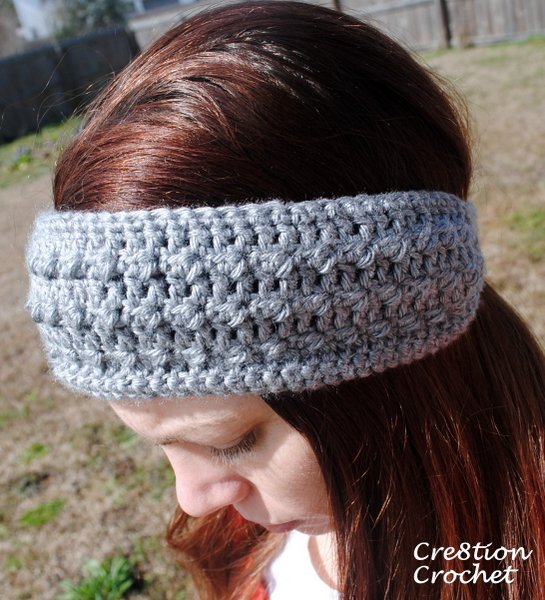
This ear warmer was designed to be slim and slender to the wearer. It has some architectural appeal created by the alternating stitches of dc, puff stitch and sc. This particular pattern is written in adult but is adjustable to two different sizes.
The Sleek and Skinny Ear Warmer/ Headband pattern was originally featured in the April Issue of Inspired Crochet Magazine. The matching Sleek and Skinny Cowl will be coming soon.
Finshed Size:
24” long by 3” wide
Washing Instructions:
I really do not like the way Simply Soft looks after a machine washing/drying.
I recommend hand washing in a gentle detergent and lying flat to dry.
Cost of Materials:
less than $2.00 for yarn plus button
One skein makes 3 headbands with left over
Suggested Retail Price:
$18-25
Abbreviations and stitches used:
ch– chain
st– stitch
sp– space
sl st– slip stitch
insert hook, yarn over, pull through, (two loops on hook), pull loop closest to hook through other loop
sc– single crochet
insert hook, yarn over, pull through (two loops on hook), yarn over, pull through both loops
dc– double crochet
yarn over, insert hook, yarn over, pull through (three loops on hook), yarn over, pull through first two loops on hook, yarn over and pull through last two loops
dc2tog– dc two together
insert hook, yarn over, pull through, (two loops on hook), insert hook in next space, yarn over, pull through, (three loops on hook), yarn over, pull through first two loops on hook, yo again and pull through last two loops on hook
hps– half puff stitch
yarn over, insert hook, yarn over, pull through (three loops on hook), yarn over, insert hook into same space, yarn over, pull through (5 loops on hook), yarn over and pull through all loops on hook
Notes:
-Finished ear warmer is adjustable, but how adjustable will depend on the placement of the button to secure. You may want to size it to your head before you secure the button in place.
-One side of this headband will be less stitches than the other side, this is achieved by dec2tog at specific points in the pattern. This ensures that the headband will be straight and will not curve to one side when completed.
-Stitch counts for each row will be placed inside brackets (<>)
-As with every pattern I recommend that you read each step in its entirety before beginning that row
-All important points to consider while making this pattern will have an arrow up (^) in front of them
Materials:
Caron’s Simply Soft Yarn in your choice of color
4.0mm (G) hook
thin tapestry needle (eye large enough to weave yarn through but thin enough to sew on a button)
button of your choice measuring ½ -1” in diameter
Video, filmed by Sedie of Yarn Obsession, available as well
written pattern below
Instructions:
Row 1: Ch 101
Row 2: 1sc in each sp <100>
Row 3: Turn, 1sc in each of the next 15sp. 1dc in each of the next 70sp. 1sc in each of the next 15sp <100>
Row 4: Instead of working back along the stitches just completed you will instead work along the other side of the original chain. As such, when you come to the end of the previous row turn the entire piece over and sc back along the “bottom” of the piece, working over the tail, crochet along as follows: 1sc in each of the next 15sp. In the next 70sp you will alternate between hps and sc, beginning with a hps. ^This part can be slightly tricky… be sure to place your stitches in the correct position (one stitch in every “hole” of the chain) and be sure to count your stitches. Each ps will be on an odd number and sc will be on an even number. Then 1sc in each of the next 15sp <100> (This will give both sides of the ear warmer the same shape (bevel) when completed)
Row 5: Turn (working as normal), 1sc in each of the next 15sp, 1dc in each of the next 70sp. 1sc in each of the next 15sp <100>
Row 6: Turn, 1sc in each of the next 15sp, in the next 70sp you will alternate between hps and sc, beginning with a hps. 1sc in each of the next 2sp. Ch3, skip 3spaces and 1sc into each of the next 3sp. Ch3, skip 3spaces and 1sc into each of the next 4sp <100>
Row 7: Turn, 1sc in each of the next 15 ^be sure you are placing the stitches in the correct place while working over the ch3 spaces. Dec2tog in next sp. 1dc in each of the next 32sp. Dec2tog in next sp. 1dc in each of the next 32sp. Dec2tog in next sp. 1sc in each of the next 15sp <97>
Row 8: Turn, 1sc in each of the next 15sp. In the next 67sp you will alternate between hps and sc, beginning with a hps. 1sc in each of the next 15sp <97>
Row 9: Turn, 1sc in each of next 15sp. 1dc in each of the next 16sp. Dec2tog in next sp. 1dc in each of the next 32. Dec2tog in next sp. 1dc in each of the next 15. 1sc in each of the next 15. <95>
Row 10: Turn, 1sl st into each of the next 15sp. 1sc in each of the next 65sp. 1sl st in each of the next 14sp. 2sc in last space. <96>
Row 11: ^From here on you will work around the entire piece. As such, sc along short end <no specific count but should be somewhere between 5-7sp>
Row 12: Now work along the long end- 2sc in 1st sp. 1sl st in each of the next 14sp. 1sc in each of the next 70sp, 1sl st in each of the next 14sp. 2sc in last sp. <102>.
Row 13: Sc along short end <again, no specific count>. 2sc in last sp.
Row 14: Fasten off leaving 12” long tail. Secure with knot and weave tail to center. Measure finished piece to your head to determine where you will place your button. If you are making the headband for someone else and do not have the model available I recommend securing button one inch from the end. Center button and secure on using long tail. ^Only go through each hole of the button one time, after the final hole, place needle back through to the top and wrap tail around the button 2x to secure, weave back to underside and fasten off with knot, weave in tail and cut.
I hope you enjoyed making this Sleek and Skinny Ear Warmer/ Headband free crochet pattern. If you like what you see, please share it. Your continued support allows me to continue to bring you FREE crochet patterns.
Have fun and as always…
happy hookin’
Check out these free crochet hat patterns
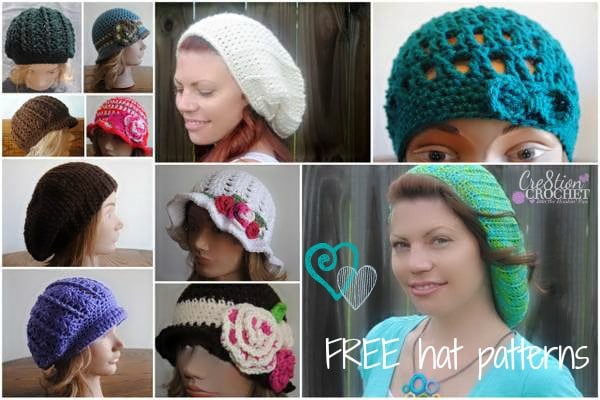
You may also enjoy my other FREE crochet patterns HERE


