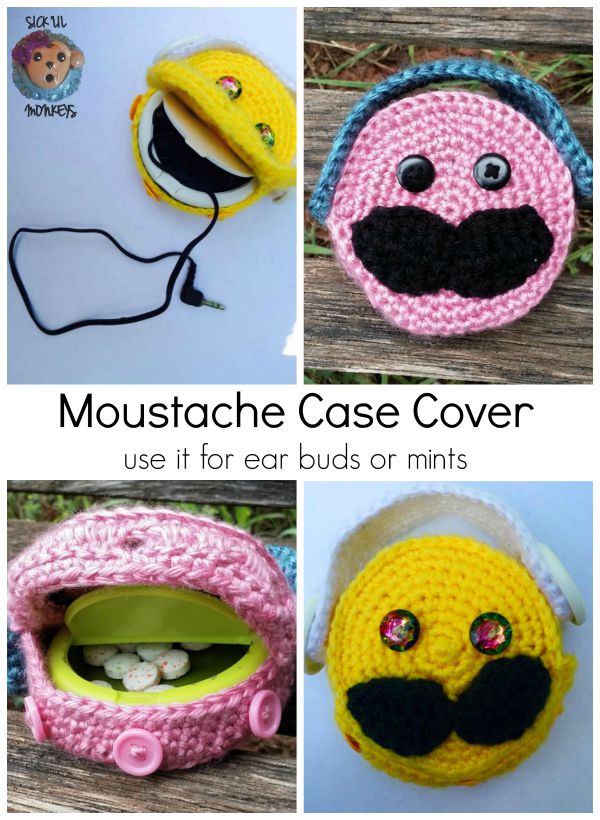
Mustache Ear buds/Ice Breakers Container Case
How cute would it be for your earphones to be “stashed” somewhere cute and cost effective? Meet The Mustache Earbuds Case!

This pattern was designed by SICK ‘LIL MONKEYS, exclusively for Cre8tion Crochet
-
- This post may contain affiliate links
- By using this pattern you agree to the Pattern Terms of Use set forth by SICK ‘LIL MONKEYS: This pattern is the intellectual property of Kelli Wohlgemuth. SICK ‘LIL MONKEYS reserves all rights to the photos and designs with in this document. Some photo credits to Leanne Lewis, Aimee Nickolas. You may sell all items made from this pattern but please credit SICK ‘LIL MONKEYS with the pattern. SICK ‘LIL MONKEYS operates with the goal of sponsoring one “sick little monkey” at a time making the world a tiny bit better than we found it.
Click HERE to add this pattern to your Ravelry Favorite
Click HERE to Pin It for later
YARN
Yarn of your choice in any weight or color. I used Hobby Lobby’s I Love This Yarn and an F/3.75mm Hook
MATERIALS
One Ice Breakers Mints container
A small piece of tape to keep the small end permanently closed
Any G/6 – 4.0mm crochet hook, such as a Bubble Hook By SICK LIL MONKEYS

You will need worsted weight scrap Yarn balls, about an ounce or so each. It just really depends on which type of face you want to make
2 – 1.5″ Buttons (headphones)
3 – 0.5″ buttons for button flap closure
2 – you choose buttons for eyes if desired (optional)
DIFFICULTY
Intermediate
SIZE(S)
One size – The size of your ice breaker container
GAUGE
5 SC x 5 Rows = 1″ x 1″
STITCH GUIDE
CH(s) – chain(s), SC – single crochet, FSC – Foundation Single Crochet, HDC – half double crochet, ST(s) – stitch(es), BLO – back loop only, RS – right side, WS – Wrong Side, SK- Skip, Rep – Repeat
NOTES
1) Crochet the top and bottom piece in the round, using a stitch marker or piece of yarn to mark your rounds.
2) Check the diameter of the worked piece to the icebreaker container to make sure it isn’t too big or small
PATTERN
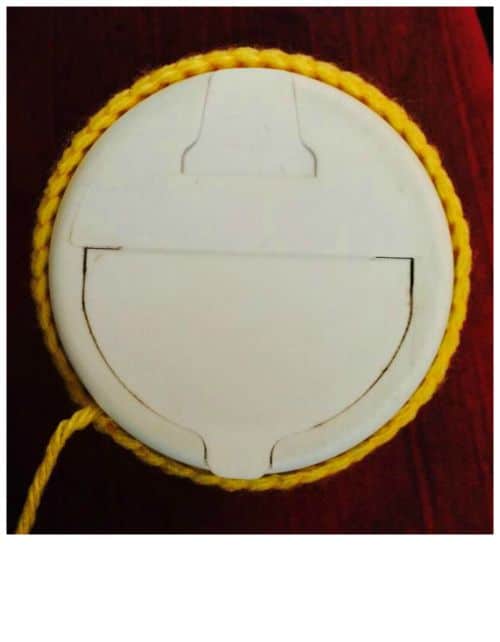
Begin by carefully peeling off the top and bottom stickers. The place a small piece of tape across the small opening to keep it permanently shut, then decide what kind of face you would like to make. I wanted a fun colored “Mustache Case”, so I went with a bright yellow face like a happy face and white “earphones”. (the Earphones on the holder double as an add on strap too!) You could make any type of face, add hair, make a clown, your imagine is the limit!
Top and Bottom: Make 2 Circles the same following the instructions below:
R1: Begin with a magic Circle, Ch1, SC 6, join to 1stSC with a SL ST <6 ST>
R2: Join to 1st SC with a the 1st ST of this round SC INC 6 around, Continue working in the round using stitch marker to mark rounds <12 ST>
R3: *(SC INC, SC), rep from * around <18 ST>
R4: *(SC INC, SC 2), rep from * around <24 ST>
R5: *(SC INC, SC 3), rep from * around <30 ST>
R6: *(SC INC, SC 4), rep from * around <36 ST>
R7: *(SC INC, SC 5), rep from * around <42 ST>
R8: *(SC 3, SC INC, SC 3), rep from * around <48 ST>
Finish Off. Should measure 3.25″ across
Sides:
R1: Join to the BACK RIDGE of any stitch from R8 on the WS of one of the circles you made. CH1, SC in BACK RIDGE of same ST, and in BACK RIDGE of each ST around, join to 1st ST with SL ST <48 ST>
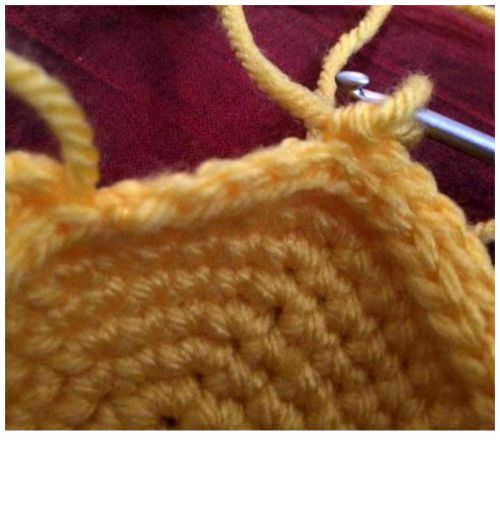
R2-R4: CH1, sc in same ST and in each ST around, join to first ST with SL ST <48 sT> Finish off
Joining of Top:
Join Yarn through a ST on R8 of 2nd Circle you made and the through any ST from R4 of the sides at the same time. CH1 and join sides together with SC in same ST as the CH 1, and in next 26 ST, then SC in the top circle only for the last 21 ST, so that it leaves a flap that will open. Finish off.
Button Flap:
R1: Join yarn to Back ridge of the first ST around the top of the last 21 SCs, Ch1, SC in BACK RIDGE of same ST and in BACK RIDGE of each of the next 20 ST. <21 ST>
R2: CH2, turn, DC in same ST, DC, *(CH1, SK next ST, DC 7), repeat from * 2 times total, CH1, SK next ST, DC 2 <21 ST, 3 button holes>
R3: CH1, SC 2, SC in CH1 Space, SC 7, SC in CH 1 Space, SC 7, SC in CH1 Space, SC 2 <21 ST>
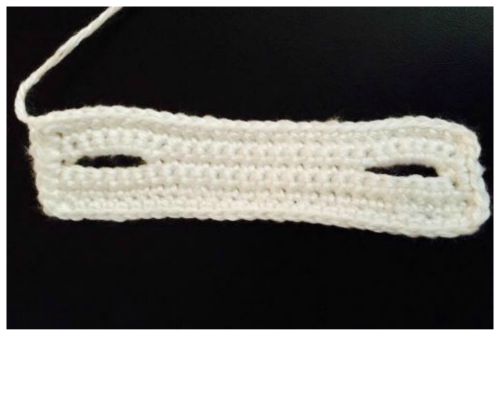
Head Phones Strap:
R1: CH28, SC in BACK RIDGE of 2nd CH from hook and to end <27 ST>
R2: CH1, turn, SC across <27 ST>
R3: CH1, SC 1, CH 6, SK 6 ST, SC 14, CH 6, SK 6 ST, SC 1 <27 ST, 2 button holes>
R4: CH1, turn SC 1, SC 6 in CH 6 space, SC 13, SC 6 in next CH 6 Space, SC 1 <27 ST
R5: CH 1, turn, SC across, (continue for edging) CH 1, SC 2 in corner, 1 SC at end of each row, 2 SC in corner, 1 SC in each ST across, join to first ST of R5. Finish Off. <64 STS>
Mustache (optional):
R1: CH 14, SC in 2nd CH from hook, HDC, DC, HTR, TR, DC, SL ST, DC, TR, HTR, DC, HDC, SC <13 ST>
R2: CH1, turn , SC, HDC, DC, HTR, TR, DC, SL ST, DC, TR, HTR, DC, HDC, SC<13 ST>
- Finish off leaving a long Tail for sewing on appliqué.
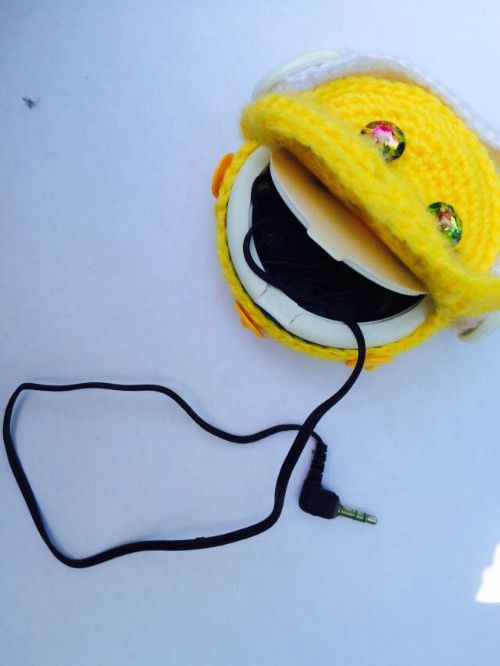
- Attach the big buttons on each side of the “head”. The three 1/2″ buttons to match up with the button flap on bottom on two for the eyes. Add the head phone strap to the big buttons to attach your cute case to the strap of whatever you like!
I Hope you’ve enjoyed the Mustache Ear Buds Case free crochet pattern! Check out all other contributor patterns by SICK ‘LIL MONKEYS
|
|
 Kelli Wohlgemuth is the owner of SICK ‘LIL MONKEYS. She has been crocheting for 24 years. Her favorite things to design are items for little girls to play with or wear, patterns that allow you to incorporate graphs, and sometimes women’s fashion items. She also carries a line of ergonomically comfortable polymer clay crochet hooks. You can find her on


