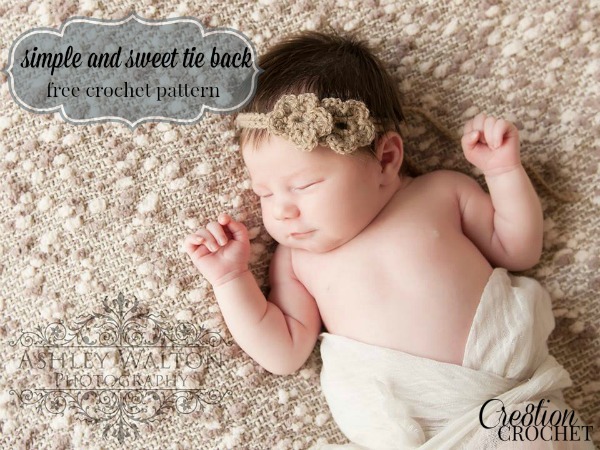
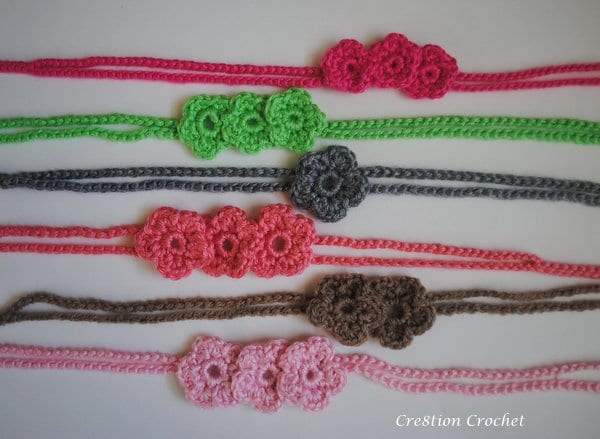
Simple and Sweet
Tie Back/ Headband
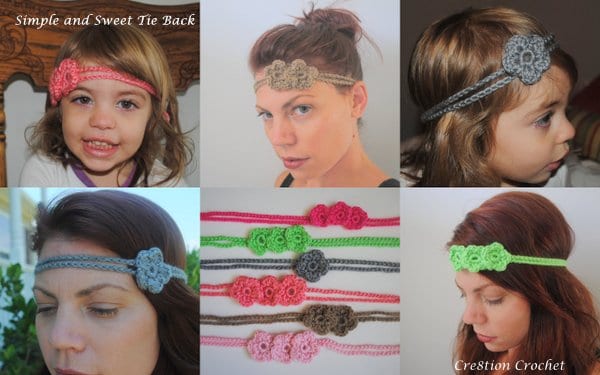
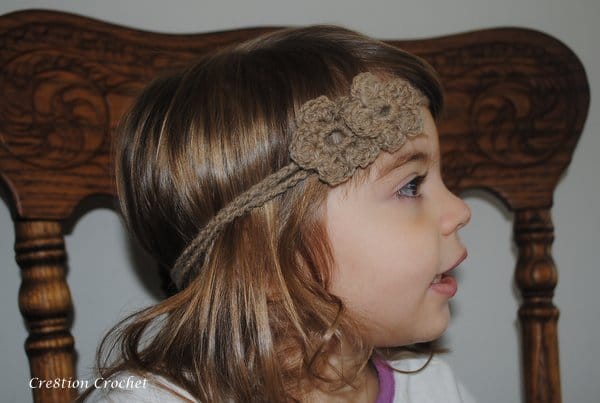
This adorable tie back features an easy one piece construction. They work up super quick and I predict they will be big sellers. Because the materials used are very inexpensive and they work up so quickly you can sell them at a very reasonable price. These simple and sweet tie back headbands are fun to wear too. Whether for an adult or baby, they are adjustable to fit anyone.
Finished Size:
Approximately 30” long
Washing Instructions:
These probably won’t need to be washed very often but if you find yours getting dirty simply soak it in some cool water with just a little touch of liquid soap or gentle liquid detergent. Do not rinse under running water as it will cause yarn to pill. Refill sink or basin with clean cool water and rinse in basin until all soap is gone
Lay flat to dry
Cost of Materials:
Less than $0.25 each
Time Involved:
20 minutes give or take a few
Recommended Retail Price:
$12.00-15.00
Gauge:
no gauge for this project
Notes:
-This tie back is made with one single piece of yarn though you will need to secure one of the two ties on each side of the flowers and I recommend also tacking the flowers down in place so that they are always in the right position. Double check your placement for the ties and the flowers BEFORE you sew them down, you don’t want to have to throw out your work because you stitched something wrong.
-I made some with 3hdc petals and some with hdc petals. You can easily modify this pattern for any flower. Singled, doubled, tripled, layered, etc.
Materials:
A small amount of any yarn
4.5mm(G)
small needle to finish off
Abbreviations and Stitches Used:
ch– chain
st– stitch
sp– space
sl st– slip stitch
insert hook into stitch or space, yarn over and pull through stitch, (two loops on hook), pull loop closest to hook through other loop
sc– single crochet
insert hook into stich or space, yarn over and pull through stitch (two loops on hook), yarn over, pull through both loops
hdc– half double crochet
yarn over, insert hook into stitch or space, yarn over and pull through stitch (three loops on hook), yarn over, pull through all three loops
Instructions:
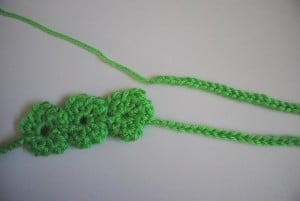
- Leaving a 12” long tail. Ch71. Turn and sl st into 2nd space from hook. 1sl st into each of the next 35 sts then ch 42.
- *1sl st into the 4th st from hook to form a ring. Ch1 and 10sc in ring. Sl st into the 1st sc to join ring **3hdc (or 5hdc) in the next st. 1sl st in the next st. Repeat from ** around ring (5 petals). Sl st into the back of the flower (anywhere in the back).
- Ch5 and repeat from * 2 more times for a total of 3 flowers (or you can do only one or two flowers and move on to the next st)
- Ch71. Turn and sl st into 2nd space from hook. 1sl st into each of the next 35 sts. Ch37. Fasten off and leave 12” long tail.
- Lay finished piece, face down on a flat surface. Line up all the flowers and the ties the way you want them to be. (I recommend having the raised side of the chain as the finished side).
- Secure loose tie on either side to the back of the flower using the left over tail. Use same piece to tack down the two flowers closest to where you are working.
- Repeat for the opposite side.
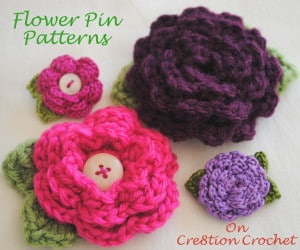
Now you are finished with your super simple and sweet tie back/ headband. These tie backs are great props for photographers. I use small projects like this to include as free gifts in all of my online sales. It is a great way to promote repeat business. Other small gifts that I sometimes include are these cute flower pins/brooches.
I hope you enjoyed this easy one-piece construction tutorial for my simple but sweet tie back/ headband. If you enjoyed this pattern please share it so that others can benefit from it as well. With your continued support, I am able to bring you more FREE crochet patterns and crochet business information.
Have fun and as always…
happy hookin’


