Almost Good Enough to Eat
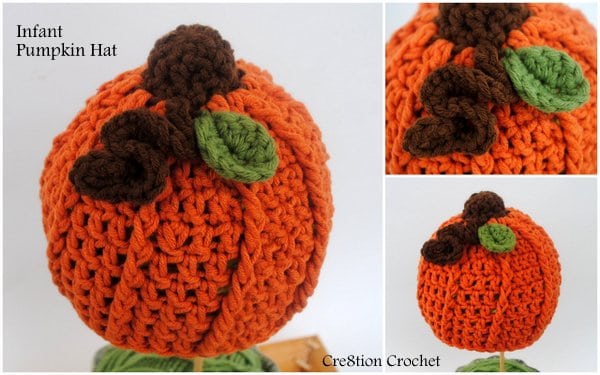
Infant Pumpkin Hat
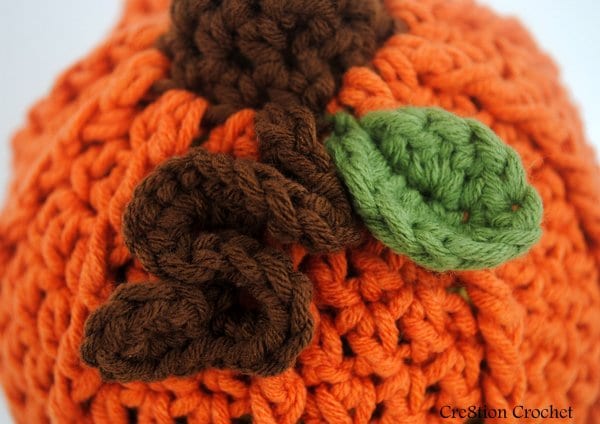
This sweet free crochet infant pumpkin hat pattern has texture galore. It is as realistic as a crochet pumpkin hat can get. I especially love vine curly-Q and the tiny leaf.
- This pattern contains affiliate links
- By using this pattern you agree to the Pattern Terms of Use set forth by Cre8tion Crochet
Click HERE to add this pattern to your Ravelry Favorites
Click HERE to Pin It for later
Finished Size
13” Diameter
Gauge
4 ¼” after Round 6
Washing Instructions
machine wash gentle
lay flat to dry
Cost of Materials
$2 or less
Time Involved
less than an hour
Recommended Retail Price
$25
Notes
You can use my seamless method for this hat. It gets a little tricky so I did not use the seamless method to write this pattern. You can find instructions and a video tutorial HERE
You can easily change the size of this hat using my article on
Designing your Own Custom Crochet Hat
Yarn
approx 1/3 of a skein of Baby Bee Cotton/Acrylic Blend in orange for hat
small amount of green and brown for stump, vine and leaf
Materials
5.5mm (I) hook – I used my Blackberry Candy Shop by Furls Crochet to make the Infant Pumpkin Hat
yarn needle
Abbreviations and Stitches Used
CA– color A- brown
CB– color B- orange
CC– color C- green
mc/r– magic circle/ring (watch this video tutorial)
ch– chain
st– stitch
sp– space
sl st– slip stitch
insert hook into stitch or space, yarn over and pull through stitch, (two loops on hook), pull loop closest to hook through other loop
hdc– half double crochet
yarn over, insert hook into stitch or space, yarn over and pull through stitch (three loops on hook), yarn over, pull through all three loops
dc– double crochet
yarn over, insert hook into stitch or space, yarn over and pull through stitch (three loops on hook), yarn over, pull through first two loops on hook, yarn over and pull through last two loops
fpdc– front post double crochet
same as double crochet except instead of crocheting in the normal space you insert hook under post in previous round (from front to back)

Instructions
Curly-Q Vine
Row 1: Using CA- Leaving 6” tail. Ch10
Row 2: 7sc in 2nd ch from hook, twist ch completely around, skip 1ch, 7sc in next ch, twist ch completely around, skip 1ch, 7sc in next ch, twist ch completely around, skip 1ch, 7sc in next ch, skip 1ch, 7sc in next ch, 2sc in next st. Fasten off, leaving 6” tail
Put aside and secure to finished hat
Leaf
Free pattern for Leaves HERE. I used Medium Fat Bottom Leaf
Hat
Round 1: Starting with CA mc/r 10hdc. sl st to join round <10>
Round 2: Ch2. 1hdc in each of the next 9sts. sl st into the top of the ch2 to join round <10> (weave in tail from mc/r now or you won’t be able to get to it later)
Round 3: Ch2. 1hdc in each of the next 9sts. sl st into the top of the ch2 to join round. Change color to CB on sl st. Be sure to tie tails of CA and CB together tightly to secure <10>
Round 4: Ch2. 1dc in the same st. 2dc in every st around <20>
Round 5: Ch2. 1dc in the next st. 1fpdc in the post of the same st. *1dc in the next st. 1dc in the next st. 1fpdc in the post of the same st. Repeat from * around. sl st into the top of the ch2 to join round <30>
Round 6: Ch2. 1dc in the next st. 1dc in the next st. 1fpdc in the post of the same st. *1dc in the next st. 1dc in the next st. 1dc in the next st. 1fpdc in the post of the same st. Repeat from * around. sl st into the top of the ch2 to join round <40>. Should measure approx 4 ¼”
Round 7: Ch2. 1dc in the next st. 1dc in the next st. 1fpdc in the next st. *1dc in each of the next 3sts. 1fpdc in the post of the next st. Repeat from * around. sl st into the top of the ch2 to join round <40>
Rounds 8-10: Repeat line 7
Round 11: Reverse sl st all the way around hat. Fasten off and weave in ends.
Finishing
Stitch on Curly-Q vine and small leaf
I hope you enjoyed this free infant pumpkin hat. To customize this hat to any size you can follow my tutorial Designing Your Own Custom Crochet Hat
Liked What You Just Read? Don’t Miss a Post.
Subscribe to Cre8tion Crochet by Email


