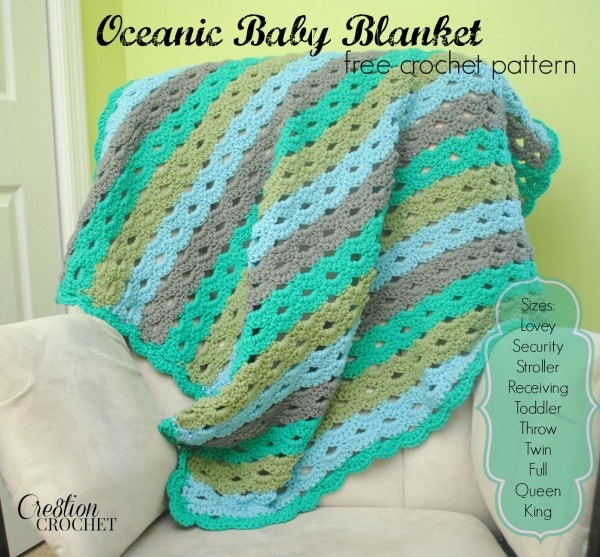
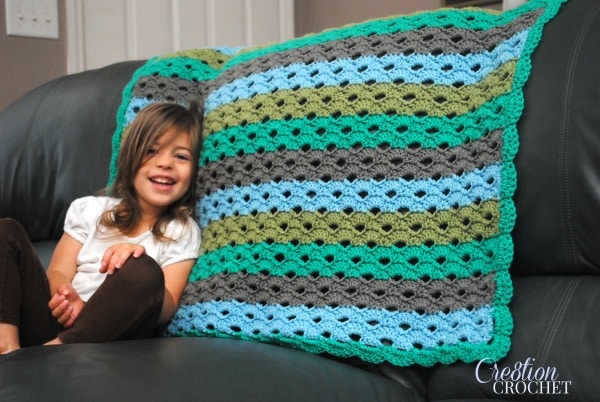
 This blanket is super soft and cuddly; it would be great in any size but is especially perfect for that new baby. I love the way the shells of this pattern resemble waves. It is ideal for any beach themed nursery or home. The Oceanic Baby Blanket is the perfect size for a baby blanket, stroller or swaddler. Pattern also includes directions to make blanket in any finished dimensions. It would also look awesome in any color combination. Think ombre or even one solid color.

We are expecting our third and last child in the end of June, and it’s a boy! We have decided to decorate the nursery in an ocean theme. This blanket is perfect for that look and it will serve as the inspiration to the rest of his room.
- This post contains affiliate links. You can click on any yarn or material highlighted to purchase
- By using this pattern you agree to the Pattern Terms of Use set forth by Cre8tion Crochet
Click HERE to add this pattern to your Ravelry Favorites
Click HERE to Pin It for later
Materials
click on any link below to purchase item from Amazon.com
With Love by Red Heart Yarns approx 1/2 skein each. Sample shown in
– Ice Aqua
– Jadeite
– Celery
– Pewter
6.0mm hook
Yarn needle
Gauge stitches- 3 pattern repeats/18sts = 5” rows- 3 pattern repeat rows/12rows = 6”
Finished Dimensions 34” x 36”
To Customize This blanket can be made in any size either customize your own (start with a chain in multiples of 6 +2) or use one of the sizes below.
Lovey– Start with a chain of 38 and complete 20 rows plus border
Security– Start with a chain of 56 and complete 28 rows plus border
Stroller– featured as sample/pattern
Receiving– Start with a chain of 146 and complete 84 rows plus border
Toddler– Start with a chain of 158 and complete 108 rows plus border
Throw– Start with a chain of 194 and complete 120 rows plus border
Twin– Start with a chain of 206 and complete 172 rows plus border
Full– Start with a chain of 314 and complete 180 rows plus border
Queen– Start with a chain of 332 and complete 192 rows plus border
King– Start with a chain of 374 and complete 192 rows plus border
Stitch pattern chart available HERE
For this sample I changed color every 4 rows
PATTERN
Row 1: Chain 122. 1sc in first ch. Ch1 and skip 1 ch. 1sc in each of the next 3 chs. *Ch 3 and skip 3 chs. 1sc in each of the next 3 chs. Repeat from * to last 2sts of chain remain. Ch1 and skip 1 ch. 1sc in the last ch.
Row 2: Ch3 and turn. 2dcs in first Ch1. Skip 1sc and 1sc in next (middle) sc. *5dc in next Ch3. Skip 1sc and 1sc in next (middle) sc. Repeat from * to ending Ch1. 2dc in Ch1. 1dc in the last sc.
Row 3: Ch1 and turn. 1sc in the first st. 1sc in the next st. *Ch3. Skip 3sts (sts skipped are 1dc, 1sc, 1dc). 1sc in each of the next 3dcs. Repeat from * until last 5dc cluster. Ch3 and 1sc in each of the last 2dc (last dc is turning ch3 from previous row).
Row 4: Ch1 and turn. 1sc in the first st. 5dc in the next Ch3. *Skip 1sc and 1sc in next (middle) sc. 5dc in next Ch3. Repeat from * to end. 1sc in the last sc.
Row 5: Change color. Ch1 and turn. 1sc in the first sc. Ch1. Skip next dc. 1sc in each of the 3 next dcs. *Ch3. Skip next dc. 1sc in each of the 3 next dcs. Repeat from * to end. Ch1 and 1sc in the last sc.
Row 6: Ch3 and turn. 2dcs in first Ch1. Skip 1sc and 1sc in next (middle) sc. *5dc in next Ch3. Skip 1sc and 1sc in next (middle) sc. Repeat from * to ending Ch1. 2dc in Ch1. 1dc in the last sc.
Row 7: Ch1 and turn. 1sc in the first st. 1sc in the next st. *Ch3. Skip 3sts (stitches skipped are 1dc, 1sc, 1dc). 1sc in each of the next 3dcs. Repeat from * to last 5dc cluster. Ch3 and 1sc in each of the last 2dc (last dc is turning C3 from previous row).
Row 8: Ch1 and turn. 1sc in the first st. 5dc in the next st. *Skip 1sc and 1sc in next (middle) sc. 5dc in next Ch3. Repeat from * to end. 1sc in the last sc.
Row 9-68: Repeat rows 5-8 consecutively. I would recommend weaving in tail ends now.
Row 69: In this step you will be working around the entire perimeter of the finished blanket. Change to border color, begin as you would to repeat row 5. When you reach the first corner; Ch3 and ^1sc in end of the first row ending in sc along the side. Ch3 (should line up with row ending in dc/row beginning with Ch3). *1sc in the end of each of the rows ending in sc. Ch3 along the dc/Ch3 row. Repeat from * around to next corner. When you reach the next corner; 1sc in the last row ending in sc. Ch3^^. 1sc in the first ch along next edge. *Ch3. 3sc in the next Ch3. Repeat from * around, except when you reach the last Ch3; 1sc in last Ch3. Repeat from ^ to ^^. Sl st into the first sc to join. Since the stitch pattern is slightly different on every corner you may have to finagle the corners just a little bit to get them to line up properly. Just be sure there is a Ch3 loop that follow the contour of each corner and you will be fine.
Row 70: Using border color, Ch1 and 1sc in the next sc. *5dc in the next Ch3. Skip 1sc and 1sc in next (middle) sc (or 1sc in next sc for the corners where there is only 1sc). Repeat from * around. Place 7dc in corner Ch3’s. Sl st in the top of the first sc, skipping over Ch1, to join. Fasten off and weave in ends.

You may also like


