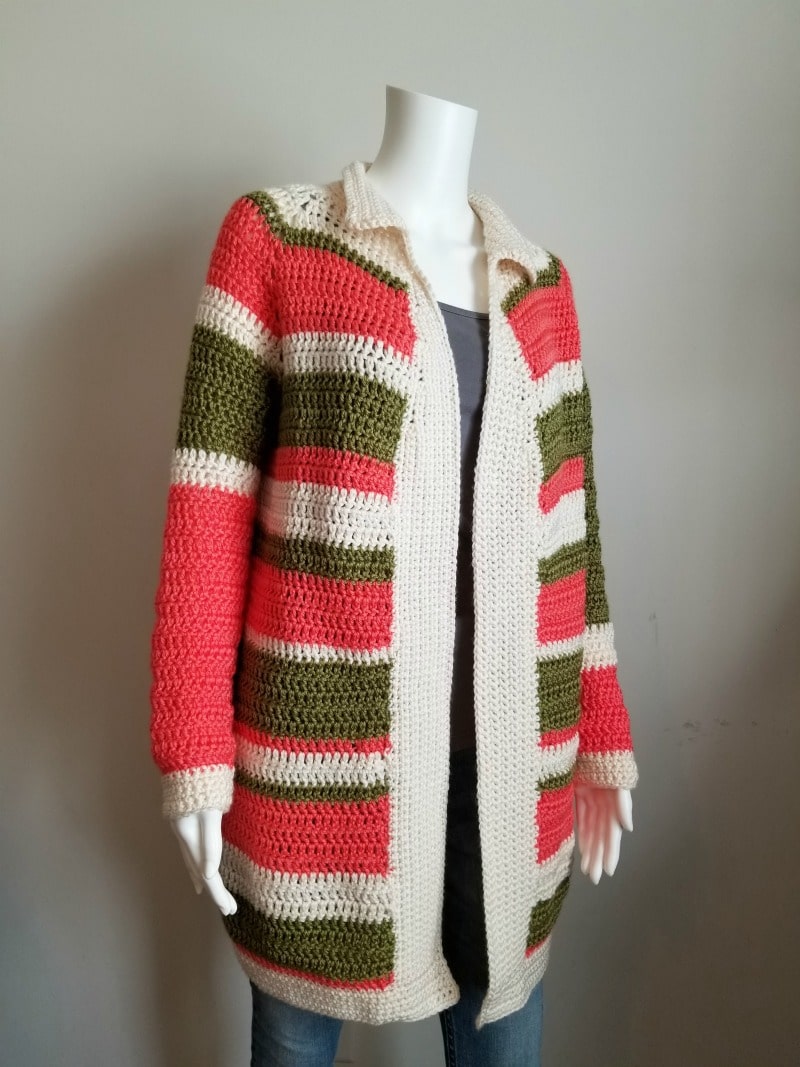
Mary Lou Cardigan
This cardigan was inspired by my mother, who passed away in 2012, it’s a little quirky and completely comfortable. The tapered edging gives this cardigan a classic trapeze shape which allows for the cardigan to fit around the chest and hips perfectly. You can easily customize this design to any length and change the colorwork to suit your personal preferences.
- This pattern contains affiliate links. You can click on any yarn or material highlighted to purchase.
- By using this pattern, you agree to the Pattern Terms of Use set forth by Cre8tion Crochet.
YARN
Red Heart Soft
2 (3, 3, 3, 4, 4, 4, 5) skeins of Color A (Off White)
2 (2, 2, 2, 3, 3, 3, 4) skeins each of Color B (Leaf) and Color C (Coral)
OR
Color A: 510 (575, 645, 725, 815, 915, 1025, 1150) yards
Color B and C: 355 (400, 450, 505, 565, 635, 710, 795) yards
of comparable #4 weight yarn- list here
MATERIALS
I/5.5mm hook or hook needed to obtain gauge- I used my Blackberry Candy Shop Hook
Removable stitch markers
Needle to seam
SKILL LEVEL
Easy to intermediate
TO FIT- follows CYC Standard Sizes- for more information click here.
Pattern has 4-5” of positive ease for comfort.
Small: 32-34” bust
Medium: 36-38” bust
Large: 40-42” bust
1x/Ex Large: 44-46” bust
2x: 48-50” bust
3x: 52-54” bust
4x: 56-58” bust
5x: 60-62” bust
FINISHED MEASUREMENTS
Neck Opening: 18 ¼ (20 ½, 20 ½, 21 ¾, 23, 23, 23, 23)”
Bust: 38 ¼ (42 ½, 47 ¼, 51, 55 ¼, 59 ½, 64, 68 ½)”
Underarm Depth: 7 ¾ (8 ¼, 8 ¾, 9 ¼, 10, 10 ½, 11, 11 ½)”
Hips: 40 ¼ (44 ½, 50 ½, 53, 57 ¼, 61 ½, 66, 68 ½)”
Upper arm: 10 ¼ (11 ¼, 12 ¾, 14 ¼, 15 ¾, 17 ¼, 18 ¾, 19 ½)”
Sleeve (underarm to wrist): 15 ¼ (15 ¼, 16 ¼, 16 ¼, 17 ¼, 17 ¼, 18 ¼, 18 ¼)”
GAUGE
17 sts and 11 rows = 6” in dc
Begin swatch with fdc for continuity
NOTES
- Pattern is in US Terms
- Ch 3 is considered the first dc.
- Ch 3 can be substituted with a CSDS (see OPTIONAL SPECIAL STITCHES).
- Stripe to your heart’s delight! You can do color changes any way that works best for you- the color changes used in the sample are notated in the pattern.
- You may want to mark your raglan corners (ch-1) for ease of stitching.
- Stitch counts appear in <brackets> in rows where a change takes place.
VIDEO RESOURCES
Chainless Starting Double Crochet
Want a new, exclusive pattern, every month? Join A Year in Crochet 2019
SPECIAL STITCHES
Dc2tog – Double Crochet Two Together
Yarn over (YO), insert hook into first st, YO and draw up a loop, (three loops on hook), YO and pull through first two loops (two loops remaining on hook), YO, insert hook in next st, YO and draw up a loop (four loops on hook), YO, pull through first two loops on hook, YO and pull through remaining three loops.
Fdc – Foundation Double Crochet
Chain 4 (counts as the first fdc). Yarn over and insert hook in 4th chain from hook. *Yarn over and pull up loop (3 loops on hook), yarn over and pull through 1 loop creating a chain st, (this is an important step but easy to forget). Yarn over again and pull through first two loops on hook (two loops remaining). Yarn over again and pull through last two loops on hook. This completes the next fdc (remember your ch-4 counted as the first fdc). To stitch the next fdc, yarn over and insert the hook into the chain made in the 2nd fdc and repeat from * to indicated st count.
OPTIONAL SPECIAL STITCHES
CSDC- Chainless Starting Double Crochet
If working in rows, turn work. If working in rounds spin hook completely around, making a twist in the loop. Pull up a loop to the height of a normal dc. YO with the loop so that the hook is behind the loop. Insert the hook into the first st of row. Complete a normal dc (YO and draw through st (3 loops on hook), YO and draw through first two loops on hook. YO and draw through last two loops on hook).
SDC- Standing Double Crochet
Begin with slip knot on hook, YO, insert hook in stitch, and work like a normal dc (YO, draw through first two loops, YO, draw through last two loops).
STITCH GUIDE
blo – back loop only, ch(s) – chain(s), sc – single crochet, dc – double crochet, st(s) – stitch(es), RS – right side
COLOR GUIDE
You can use any color scheme for this pattern, my color changes take place as follows:
3 Rows- Off White
1 Row- Leaf
5 Rows- Coral
2 Rows- Off White
4 Rows- Leaf
2 Rows- Coral
3 Rows- Off White
2 Rows- Leaf
4 Rows- Coral
1 Row- Off White
5 Rows- Leaf
1 Row- Coral
2 Rows- Off White
1 Row- Leaf
5 Rows- Coral
3 Rows- Off White
4 Rows- Leaf
1 Row- Coral
The length is the same for all 8 sizes, if you prefer your garment to be longer or shorter you will need to exclude or add color changes as necessary.
PATTERN
Row 1 (RS): Beginning with Color A; Fdc 56 (62, 62, 66, 72, 72, 72, 72), turn work.
SMALL and MEDIUM ONLY
Row 2: Ch 3 or CSDS (counts as 1 dc here and throughout), dc in each of next 9 (10, xx, xx, xx, xx, xx, xx) sts, (dc, ch 1, dc) in next st (raglan corner made), dc in each of next 5 (6, x, x, x, x, x, x) sts, (dc, ch 1, dc) in the next st (raglan corner made), dc in each of the next 22 (24, xx, xx, xx, xx, xx, xx) sts, (dc, ch 1, dc) in the next st (raglan corner made), dc in each of next 5 (6, x, x, x, x, x, x) sts, (dc, ch 1, dc) in the next st (raglan corner made), dc in each of the last 10 (11, xx, xx, xx, xx, xx, xx) sts, turn work. <60 (66, xx, xx, xx, xx, xx, xx) sts and 4 ch-1 sps>
LARGE thru 5x ONLY
Row 2: Ch 3 or CSDS (counts as 1 dc here and throughout), dc in each of next x (xx, 10, 11, 12, 12, 12, 12) sts, (2 dc, ch 1, 2 dc) in next st (raglan corner made), dc in each of next x (x, 6, 6, 7, 7, 7, 7) sts, (2 dc, ch 1, 2 dc) in the next st (raglan corner made), dc in each of the next xx (xx, 24, 26, 28, 28, 28, 28) sts, (2 dc, ch 1, 2 dc) in the next st (raglan corner made), dc in each of next x (x, 6, 6, 7, 7, 7, 7) sts, (2 dc, ch 1, 2 dc) in the next st (raglan corner made), dc in each of the last xx (xx, 11, 12, 13, 13, 13, 13) sts, turn work. <xx (xx, 74, 78, 84, 84, 84, 84) sts and 4 ch-1 sps>
ALL SIZES
Mark the top of the Fdc row that corresponds with the sts that the raglan corners were placed- these stitches will be used later in the finishing or optional collar
Next 0 (0, 1, 2, 3, 4, 5, 6) Rows: Ch 3 or CSDS, * dc in each st to ch-1 sp, (2 dc, ch 1, 2 dc) in ch-1 sp; rep from * 3 more times, dc in each st to end, turn work. <xx (xx, 90, 110, 132, 148, 164, 180) sts and 4 ch-1 sps>
Next 12 (13, 13, 13, 13, 13, 13, 13) Rows: Ch 3 or CSDS, * dc in each st to ch-1 sp, (dc, ch 1, dc) in ch-1 sp; rep from * 3 more times, dc in each st to end, turn work. <156 (174, 194, 214, 236, 252, 268, 284) sts and 4 ch-1 sps>
SEPARATING for SLEEVES
Next Row: Ch 3 or CSDS, * dc in each st to ch-1 sp, dc in the ch-1 sp, working off the base of the last dc, fdc 1 (1, 3, 3, 3, 5, 7, 7) times, begin an additional fdc as follows; working into the ch of the previous fdc, YO and pull up loop (3 loops on hook), insert hook into the next ch-1 sp (skipping the unworked sts in between) yarn over and pull through the ch-1 sp (four loops on hook), YO and pull through first three loops on hook (two loops remaining), YO again and pull through last two loops on hook; repeat from * one time, dc in each st to end. <100 (112, 128, 136, 148, 160, 172, 180)>
Mark the 4 sts placed in the ch-1 sps. The unworked sts will become the sleeves.
Next 36 (35, 34, 33, 32, 31, 30, 29) Rows: Ch 3 or CSDS, dc in each st across, turn
Fasten off
SLEEVES
Turn work so that you are working into the wrong side of the sleeve opening. You can choose to match the color changes in the body or you can make yours a little quirky like I did and do one sleeve with a large section of Color B, 3 rows of Color A, and a small section of Color C and do the other sleeve with a small section of Color B, 2 rows of Color A and a large section of Color C.
Rnd 1 (RS): Join yarn with a ch 3 or SDC in the center underarm st (this will be the 1st (1st, 2nd, 2nd, 2nd, 3rd, 4th, 4th fdc you made), dc in the next 0 (0, 1, 1, 1, 2, 3, 3) dcs, dc2tog over the marked st and the next st, dc in each st around until one st before the next marked st, dc2tog over the next st and the marked st, sl st in top of ch-3 or SDC to join, turn work. <29 (32, 36, 42, 47, 51, 55, 59)>
Next 0 (0, 0, 1, 1, 1, 1, 2) Rnds: Ch 3 or CSDC, dc2tog, dc in each st until 2 sts remain, dc2tog, sl st in top of ch-3 or CSDC to join, turn work. <29 (32, 36, 40, 45, 49, 53, 55)>
Next 8 Rnds: Ch 3 or CSDC, dc in each st around, sl st in top of ch-3 or CSDC to join, turn work.
Next 2 Rnds: Ch 3 or CSDC, dc2tog, dc in each st to end, sl st in top of ch-3 or CSDC to join, turn work. <27 (30, 34, 38, 43, 47, 51, 53)>
Next 14 (14, 15, 14, 15, 15, 16, 15) Rnds: Ch 3 or CSDC, dc in each st around, sl st in top of ch-3 or SDC to join, turn work.
CHANGE to COLOR A
Next 3 Rnds: Ch 1 and sc in the first st, sc in each st to end, sl st in top of first sc (skipping over ch-1) to join, turn work.
Next Rnd: Ch 1 and sc in the first st, sc2tog, sc in each st to end, sl st in top of first sc (skipping over ch-1) to join, turn work for sizes M, 1x, 3x and 5x ONLY . <26 (29, 33, 37, 42, 46, 50, 52)>
Next Rnd: Ch 1 and sc in the first st, sc in each st to end, sl st in top of first sc (skipping over ch-1) to join, turn work. Fasten off.
Repeat for second sleeve.
FRONT EDGING
Beginning with Color A; Turn work so that the RS is facing out towards you. Join yarn in either top corner so that you will be working along the inner raw edge, working towards the hem.
Row 1: Ch 1 and sc in first st, sc evenly along the inner raw edge towards the hem, turn work. <Exact st count is not mandatory, you just want to make sure that the fabric is neither stretched or pulled. What works well for me is doing 2sc for the edge of each row. St count will vary for the remainder of the edging> Mark the 25th st from the top.
Row 2: Ch 1 and sc in first st, sc in each st to the st before the marked st, move the marked st 5 sts closer to the neck, turn work. This will be a ‘short row’.
Row 3: Ch 1 and sc in first st, sc in each st to end, turn work. This will be a ‘short row’.
Row 4: Ch 1 and sc in first st, sc evenly until one st before the last sc of the short row in Row 3, sc2tog over the last st and the side of the first st from two rows below (this will connect the short row to the rest of the edging), continue to sc to the st before the marked st, move the marked st st 5 sts closer to the neck, turn work.
Repeat Rows 3 and 4 until all sts along Row 1 are worked. Fasten off.
Repeat from Row 1 on the other side of the opening.
NECK
Turn work so that the RS is facing out towards you, join the yarn at the same st that you began (your beginning tail will be your marker).
Row 1: Ch 1 and sc in first st, *sc in each st to the marked st (see Row 1 if your sts are not marked), sc2tog over the marked st and the next st (mark the sc2tog for the four largest sizes only), repeat from * until all four marked sts are worked, sc in each st to end, turn work. <52 (58, 58, 62, 68, 68, 68, 68)>
2x thru 5x ONLY
Repeat previous row one time. <xx (xx, xx, xx, xx, 64, 64, 64, 64)>
OPTIONAL COLLAR
If you do not want a collar skip to FINAL EDGING
Rows 1-4: Ch 1 and sc in first st, 2 sc in next st, sc in each st until 2 sts remain, 2 sc in next st, sc in last st, turn work. <58 (64, 64, 68, 70, 70, 70, 70)>
Next 7 (7, 7, 7, 6, 6, 6, 6) Rows: Ch 1 and sc in first st, sc in each st to end, turn work.
Fasten off.
FINAL EDGING
Turn work so that the RS is facing out towards you; Join yarn in either bottom corner so that you can work towards the hem to the opposite side. You will be working along the bottom/hem edge first and then you will work one complete round along the entire outer edge to finish.
Rows 1-4: Ch 1 and sc in first st, sc in each st to end, turn work. <100 (112, 128, 136, 148, 160, 172, 180)>
Next Row: Ch 1 and sc in first st, sc in each st to end, place 3 sc in the last st (mark the first sc of the corner), turn the entire piece so that you are working up the opening towards the neck, sc evenly around entire opening, (place 3 sc in each corner of the optional collar), place 3 sc in the final corner, sc along the bottom hem and sl st in the marked st. Fasten off and weave in all ends.
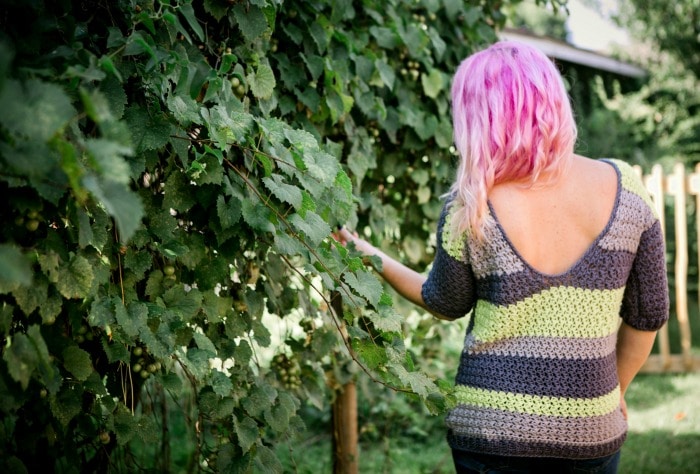
If you like this pattern you’ll probably also love the Laney V Back Cardigan
 |
Subscribe to the Cre8tion Crochet Weekly Newsletter for weekly free patterns, discounts on paid patterns, reviews and giveaways and business tips. You’ll be sent a promo code for one free pattern from my Ravelry shop when you sign up- valid for new subscribers only.
Lorene Eppolite is the designer behind Cre8tion Crochet- Where Beautiful is Easy. She has been designing since October 2012. She loves to create fun and easy crochet accessories and garments. Lorene strives to make her designs to be achievable for any skill level. Just because it is easy, doesn’t mean it can’t be beautiful. Lorene was named one of the Top Ten Designers by The Yarn Box in 2012 and by AllFreeCrochet in 2013-2018. Most recently Lorene has become the Creative Director for Furls Crochet.


