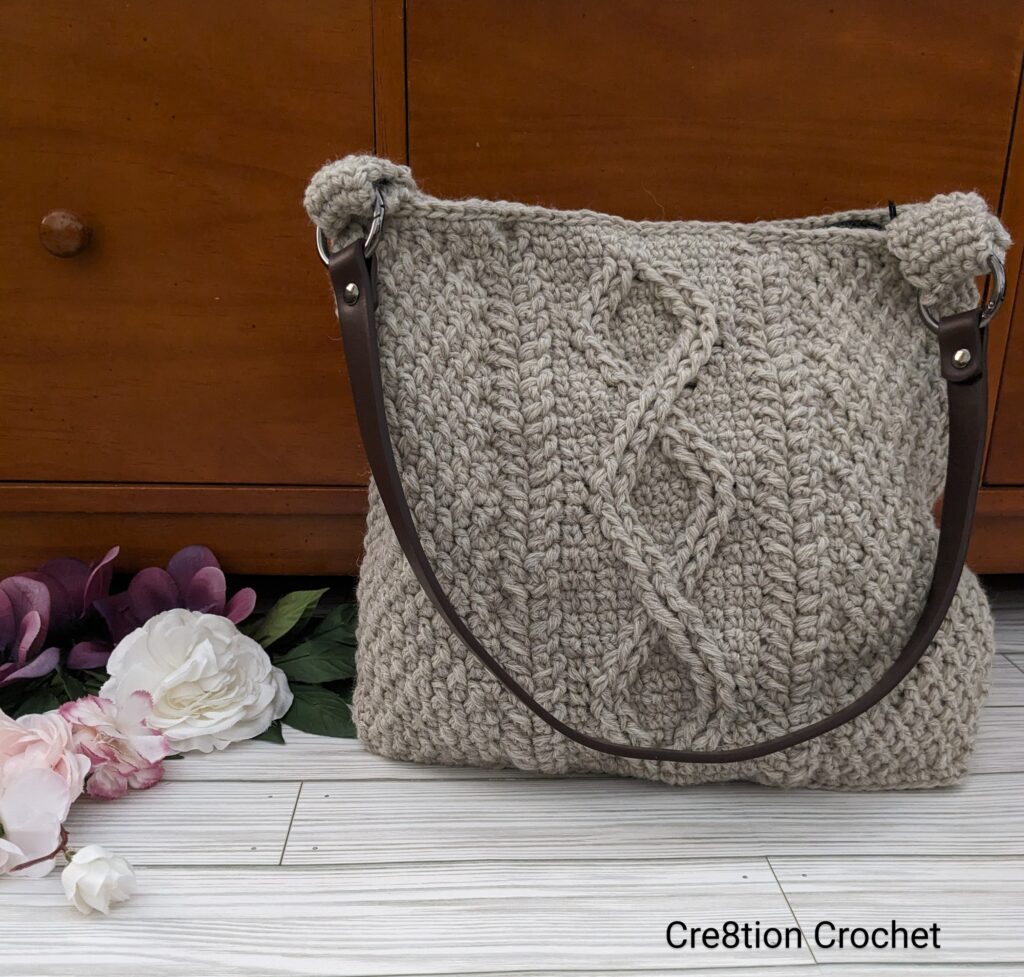
This is a crochet pattern review of the Cateline Cabled Bag designed by Jennifer Pionk for A Crocheted Simplicity Designs. Review done by Kami Jones for Cre8tion Crochet.
This post contains affiliate links for Lion Brand Yarn and Amazon. If you make a purchase by clicking on them, I make a small commission at no extra cost to you. Thanks for your support!
Find the crochet pattern review below, or click here to purchase the pattern from Ravelry!

Hi! This is Kami. Be sure to come join me over on Instagram and say Hi.
I love cables! All my life I have been enamored with beautiful cables in crochet and knitting. Fortunately, crochet cables really aren’t that difficult. As long as you have a good understanding of stitch anatomy and know how to make post stitches you can make cables. A wide variety of cables and faux cables are available in crochet patterns. Crochet cables are great for adding texture and interest to your project. Plus because there are so many different options, you’ll never tire of making them.
A cross-over diamond shape cable is the centerpiece of the Cateline Cabled Bag. “Cable twists” (a type of faux cable) flank the main cable on both sides. I love that Jennifer chose to use the extended single crochet as a background for the cables. Because this stitch lays flatter it allows the cables to truly shine. The stitch variety in this pattern makes it easy to identify the stitches and stay on track without needing to count.
If you’re a seasoned cabler this pattern is simple enough that you can do it while watching TV. However, if you are just starting out you will probably have to give it a little more attention. Either way your Cateline Cabled Bag will come together pretty quickly with an absolutely beautiful result.
What Materials Do You Need to Crochet a Bag:
- 890 yards Lion Brand Fishermen’s Wool in Oatmeal (this pattern is worked with two strands held together)
- H8/5mm Crochet Hook
- Tapestry Needle
- Scissors
- 24″ Leather purse strap with rings (optional)
- Zipper (optional)
- Cateline Cabled Bag, Paid Crochet Pattern from A Crocheted Simplicity Designs on Ravelry
Material Notes:
For this bag I used the recommended yarn, Lion Brand Fishermen’s Wool. This is the first time I have made a bag using wool and I am curious to see how it holds up. A good substitute would be a strong cotton if you prefer not to work with animal fibers. Lion Brand 24/7 Cotton DK would be a good match for thickness. Caution should be used when substituting thicker yarn because it will change the sizing.
This pattern uses two strands of yarn held together to create a chunky fabric. If choosing a substitute you will need to plan accordingly. Fishermen’s Wool comes as a fairly big 8 oz skein, making the bag will use most of two skeins. Alternatively, you could try one strand of a chunky weight #5 yarn, like Lion Brand Hue and Me.
Surprisingly I was able to get the same 24″ purse straps that the designer used. However most leather straps should work for this pattern if you’re not able to find the same one. Because the pattern is designed for one, a ring attachment would be helpful. Additionally, instructions are included for a crochet strap if that is your preference.
How Long Does it Take to Crochet a Bag?
This bag was made over the course of a few days. I only worked on it a few hours at a time and figured that it took me around eight hours to complete. My bag is not lined so if you are adding a liner it will take a little longer. Additionally if you’re a beginner at crochet cables it will most likely take a bit longer, possibly even double the amount of time.
Measurements:
I made the bag size pattern, I didn’t make gauge swatches according to the pattern. My bag’s finished measurements are 11″ length 11.5″ height 4″ wide.
Gauge:
14 stitches x 16 rows = 4″ in single crochet
Pattern Notes:
There are two sizes included in this pattern, a bag and a clutch. Lining and zippers are optional in this pattern. Adding a liner and zipper are included in the video tutorials. A photo tutorial for adding the zipper is provided as well. Plus if you add a zipper there are instructions for a beaded pull.
I stuck to the pattern on this one. Because there are several parameters that are necessary to maintain the integrity of this pattern, changes will take a little planning. First, Twenty-two stitches are required for the cable sections in this pattern. Second, you will calculate the additional stitches to achieve the desired length and width. Finally, eight rounds are required for each pattern repeat to calculate for height.

Be sure to join me over on Instagram for more fun projects and inspiration.
Join one of our awesome Facebook groups to share your creations, and see what others are up to!
– Yarn Crafts & Coffee Community
– DIY Home On Rockwood Lane
– Alexandra Lane Lifestyle
Linked Up To…


Leave a Reply