Free Spring Crochet Flower Pattern
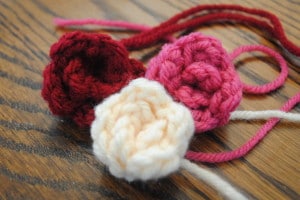
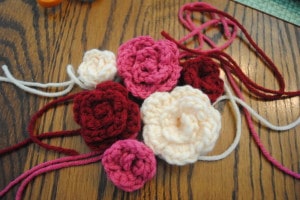
Rosettes
I created this sweet rosettes as embellishments for my Red Heart Spring Cloche. I wanted something that had the same look but in different sizes. They were the perfect addition to my Spring Blossom flower pattern.
Little Rosette
Abbreviations and Stitches used:
st– stitch
sp– space
sl st– slip stitch
insert hook, yarn over, pull through, (two loops on hook), pull loop closest to hook through other loop
ch– chain
sc– single crochet
insert hook, yarn over, pull through (two loops on hook), yarn over, pull through both loops
hdc– half double crochet
yarn over, insert hook, yarn over, pull through (three loops on hook), yarn over, pull through all three loops
Materials:
Red Heart yarn in your choice of colors
5.0 mm hook (you can use any size hook, as different sizes will produce different results)
embroidery needle
Notes:
Keep in mind that different colors are slightly different in thickness and will produce different results, if you want a really tiny flower use a light color (which tends to be thinner) and as small hook, 4.0mm works well.
The final look will also be determined by how tightly or loosely you wind up the flower and secure
Pattern:
- Leave long tail (18-24”) and chain 17 Figure A
- Skip first space and sc into second space from hook, * ch1 (skipping a space) and sc into next space. Repeat from* till end. This will give you 8 holes or spaces Figure B and Figure C
- Turn, into the first three spaces crochet 3sc and 1sl st giving you 3 petals
- Into the next 4 spaces crochet 3hdc and 1sl st giving you 4 more petals
- Into the last space (the very tip) crochet 1hdc, 2sc and 1sl st. Fasten off leaving short tail (approx. 4-6”) Figure D
- Insert long tail into embroidery needle and begin to wind up petals to create the rosette. Stitch together at the bottom as you go along. I recommend stitching after your first three petals are rounded and then for every additional petal placement so that you can control exactly what your flower will look like. Figure E1 & E2
- Secure with knot when done and leave tails to secure to finished piece. I use both tails to secure and tie them together and then use the long tail to tack the rosette into place. Weave in ends and cut short when done. Figure F

Figure A
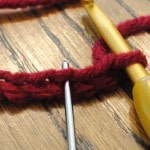
Figure B
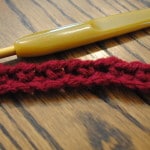
Figure C
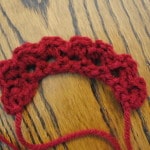
Figure D

Figure E-1

Figure E-2
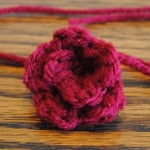
Figure F
Medium Rosette
Abbreviations and Stitches used:
st– stitch
sp– space
ch– chain
sl st– slip stitch
insert hook, yarn over, pull through, (two loops on hook), pull loop closest to hook through other loop
sc– single crochet
insert hook, yarn over, pull through (two loops on hook), yarn over, pull through both loops
hdc– half double crochet
yarn over, insert hook, yarn over, pull through (three loops on hook), yarn over, pull through all three loops
dc– double crochet
yarn over, insert hook, yarn over, pull through (three loops on hook), yarn over, pull through first two loops on hook, yarn over and pull through last two loops
Materials:
Red Heart yarn in your choice of colors
5.0 mm hook (you can use any size hook, as different sizes will produce different results)
embroidery needle
Notes:
Keep in mind that different colors are slightly different in thickness and will produce different results, if you want a really tiny flower use a light color (which tends to be thinner) and as small hook, 4.0mm works well.
The final look will also be determined by how tightly or loosely you wind up the flower and secure
Pattern:
- Leave long tail (18-24”) and chain 25
- Skip first space and sc into second space from hook, * ch1 (skipping a space) and sc into next space. Repeat from* till end. This will give you 12 holes or spaces Figure A
- Turn, into the first three spaces crochet 3sc and 1sl st giving you 3 petals
- Into the next 4 spaces crochet 4hdc and 1sl st giving you 4 more petals
- Into the next 4 spaces crochet 5dc and 1sl st giving you 4 more petals
- Into the last space (the very tip) crochet 1dc, 1hdc, 2sc and 1sl st. Fasten off leaving short tail (approx. 4-6”) Figure B
- Insert long tail into embroidery needle and begin to wind up petals to create the rosette. Stitch together at the bottom as you go along. I recommend stitching after your first three petals are rounded and then for every additional petal placement so that you can control exactly what your flower will look like.
- Secure with knot when done and leave tails to secure to finished piece. I use both tails to secure and tie them together and then use the long tail to tack the rosette into place. Weave in ends and cut short when done.
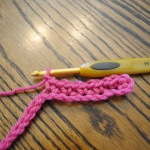
Figure A
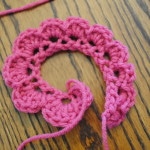
Figure B
I hope you enjoyed this FREE Spring Crochet Flower Pattern – Rosettes. If you like what you see please share it and….
Happy Hookin’
You may also enjoy
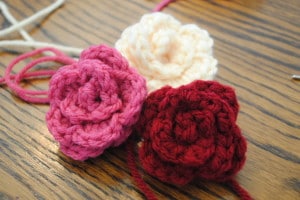
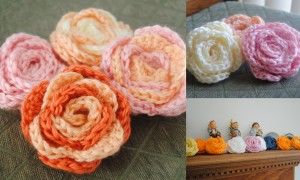
my large rose pattern, available in two colors or one
or my Spring Blossom Flower Pattern
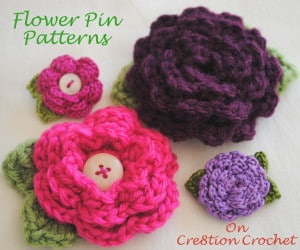
and check out these adorable pins and hair accessory options
Also be sure to check out The Flower Repository for lots of free flower patterns


