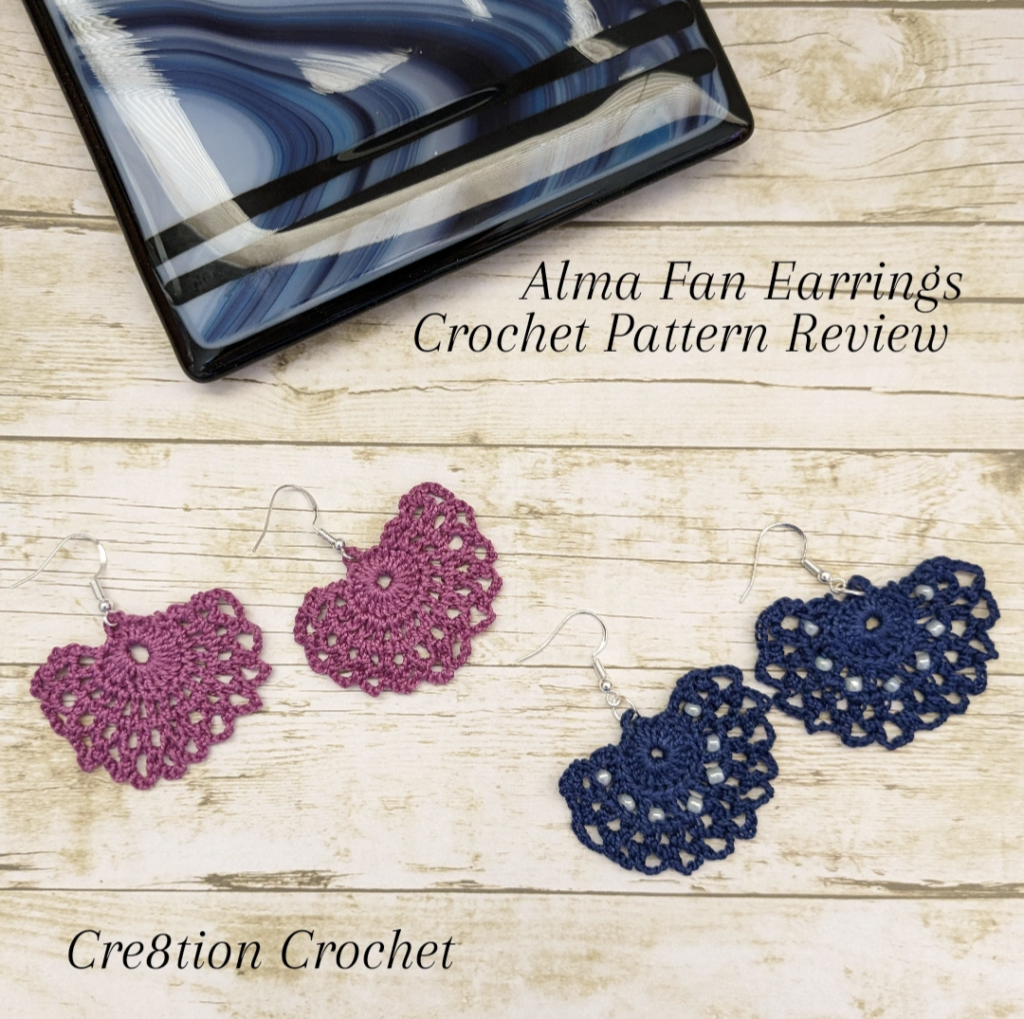
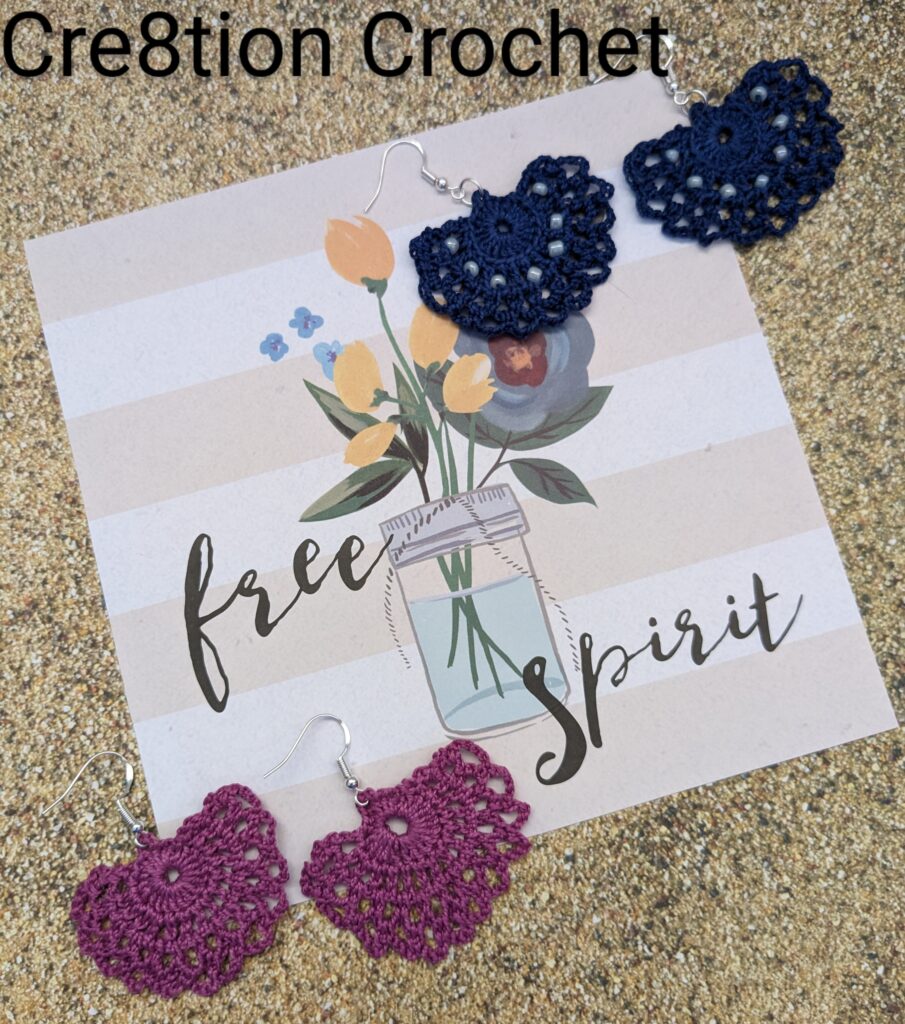
This is a crochet pattern review of the Alma Fan Earrings designed by Amber Bliss for Bliss This. Review done by Kami Jones for Cre8tion Crochet.
This post contains affiliate links for Amazon, Etsy and WeCrochet. If you make a purchase by clicking on them, I make a small commission at no extra cost to you. Thanks for your support!
Find the crochet pattern review below, or click here to purchase the pattern from Ravelry.
In a hurry? Pin this for later when you have more time.
Hi! This is Kami. Be sure to come join me over on Instagram and say Hi. While your there check out the other earring designs I have made.
When the weather starts getting warm the last thing you want to crochet is a big blanket; hats and scarves are out of season. Earrings are a great item to make in the warmer months because they are small, and you can work up a pair in no time at all. They are a perfect make for spring markets or as a Mother’s Day gift. Nothing says springtime like a new pair of earrings!
I chose the Alma Fan Earrings by Amber of Bliss This to review and share today, these are a very simple classic looking pair. They are a beginner friendly pattern for those who haven’t tried making earrings yet and want to give it a shot. This is also a great pattern for those who have made earrings and want to try adding beads; this pattern doesn’t actually have instructions for adding beads, but you can see how I did it in the material notes section below. You can also make matching pendants or even key chains from most earring patterns. I started making crochet earrings a little over a year ago and I am addicted, I have made over 50 pairs so far!!
If you are new to earring making check out the pattern notes below for helpful information on blocking/stiffening and adding ear wires.
What Materials Do You Need to Crochet a Pair of Earrings?
- Cotton thread: I used Curio #10 thread in Heliotrope and Blue
- 7 / 1.65 mm hook
- 14 small beads (if you want to add beads like I did; mine are 2-3mm beads that I purchased at Dollar Tree)
- Small needle
- Scissors
- 2 Earring Wires (1 for each earring)
- 6 mm Jump Rings (these are not a necessity, I use them as a personal preference)
- Jewelry Pliers
- Optional: Stiffening Spray – I used Aleene’s Stiffen Quik & talk about it more in the Pattern Notes section – and blocking materials, ie Rust Proof Pins & Blocking Mat
- Alma Fan Earrings, Paid Crochet Pattern from Amber Bliss Calderon on Ravelry
Material Notes:
Cotton thread is usually numbered 30,20,10,8,5 and 3; with 30 being the smallest and 3 the largest. I used smaller cotton thread (10) than what is recommended in the pattern (5), this just makes the earrings a little smaller. If you are new to working with thread I recommend using a larger thread or even a lace or fingering weight yarn. Some people even prefer to work the pattern in a worsted weight yarn to familiarize themselves with the stitches before working them with the smaller thread. Some earring patterns make great coasters or ornaments when worked up this way.
I added beads to one pair, this is pretty easy to do and there are several methods that you can use. I added mine by using a smaller hook (.75 mm) to pull my working loop through the bead. You can also use a needle and add the beads to your thread before starting the earrings, the method that you use depends a lot on the hole size of your bead and what works best for you. There are several areas in this pattern that would be great for adding the beads, I chose to put mine in row 2 but you could also add them in row 4 on the fan tips. The important thing is to make sure that your beads have some space since they are bigger than the stitches that you are adding them to, I did mine on every other stitch. Because these earrings are turned when working I added a row of slip stitches before I worked round 2 to make it so that my beads ended up on the right side of my work.
How Long Does it Take to Crochet A Pair of Earrings?
I spent about 45 minutes on the pair without beads and close to an hour on the ones with. This doesn’t include the time that it takes for drying after stiffening and blocking.
Measurements:
My Earrings measure 1.25 inches long and 1.75 inches wide. Your size will vary depending on the size of thread and hook that you use.
Gauge:
Although it’s very difficult to measure gauge on a project this small. If you are trying to get your earrings the same measurements as mine your first round will measure approximately 0.5″ in diameter.
Pattern Notes:
Stiffening or blocking your earrings in my opinion is an important step. It opens up any lacy stitches and makes them lay better. I prefer to use stiffening spray on mine, I will quickly go over the method that I use. First, you will need a glove and a blocking mat covered with plastic wrap. I use Aleene’s Stiffen Quik and spray the earring while holding it in my gloved hand and work the solution into the fibers by squishing it with my fingers. Then, I turn the earring over and do the opposite side. Once it is thoroughly saturated, I position it on my covered blocking mat making sure that all the stitches are open and positioned as desired. You can use a needle or a pin to stretch out stitches as needed. I usually use only one pin to make sure that the spot that I am adding the ear wires is open, but you can pin as desired. Leave your pieces to dry, it takes an hour or two. When they are dry they will stay in the position that they were set.
You can also just use water and just block them, this doesn’t keep the shape quite as well but it will still open up any lace and make sure that they lay flat. Another method is dipping them in a bowl of starch, shaping them and letting them dry.
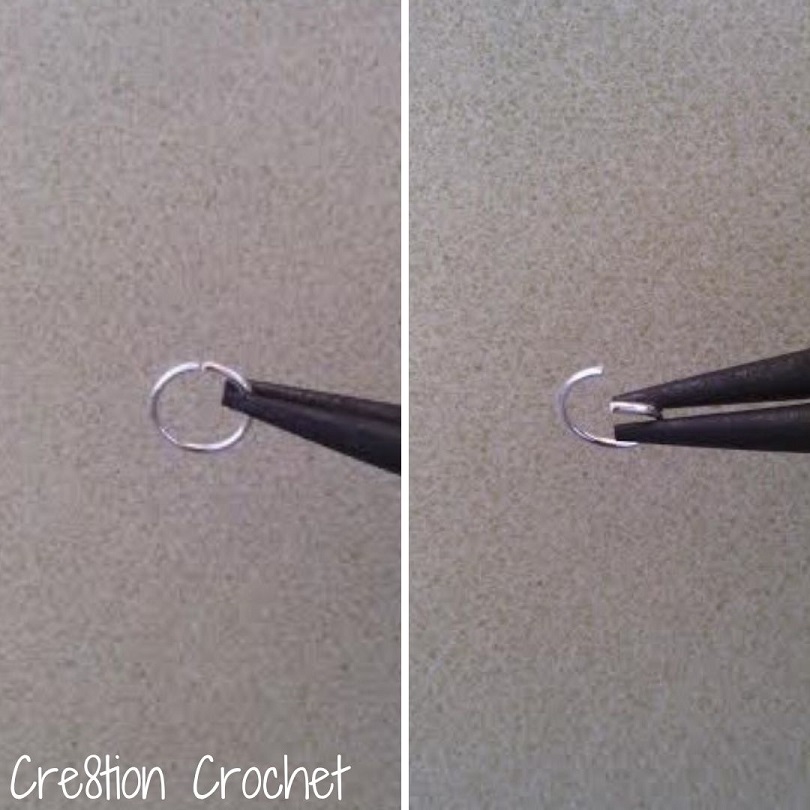
If using jump rings, use jewelry pliers to attach them to the top center loop of the crocheted fabric. I use jump rings because it allows the fabric to turn better and sit straighter – the blue ones are shown with a jump ring. Some people prefer not to use them because it is easier to lose an ear wire if they aren’t closed properly. When opening and closing them, twist them apart instead of pulling straight out side to side. When pulling them straight out it is harder to close them properly and it weakens the metal.
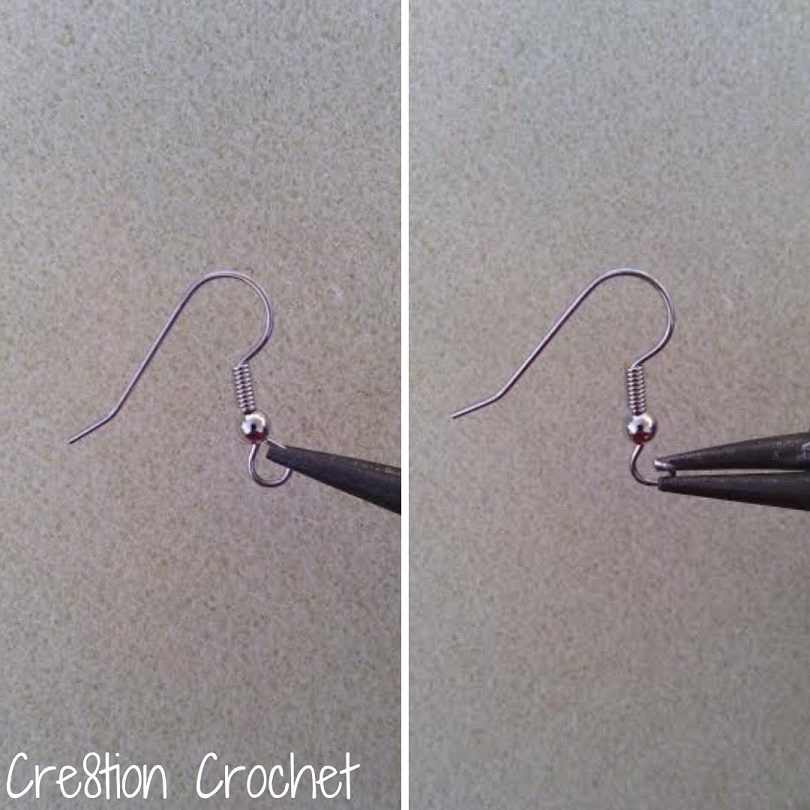
Use jewelry pliers to open the loops on the earring wires, and attach those either to the top center loop of the crocheted fabric if not using jump rings – the purple ones are shown attached in this manner, or to the jump ring. You may need to turn the loop on the earring wires 90 degrees to allow it to sit properly.
Be sure to join me over on Instagram for more fun projects and inspiration.
Join one of our awesome Facebook groups to share your creations, and see what others are up to!
– Yarn Crafts & Coffee Community
– DIY Home On Rockwood Lane
– Alexandra Lane Lifestyle
Linked Up To…


These are so pretty! I love how they turned out!
Thank you Laura!
Your insights on adding beads provide a wonderful touch of personalization to these earrings. Also, your advice on stiffening and blocking is crucial for achieving a polished look. It’s evident that your experience shines through, and I appreciate the attention to detail you’ve shared. Happy crafting!
Thank you! I love adding beads to my projects. Stiffening is definitely a must for me when it comes to earrings!