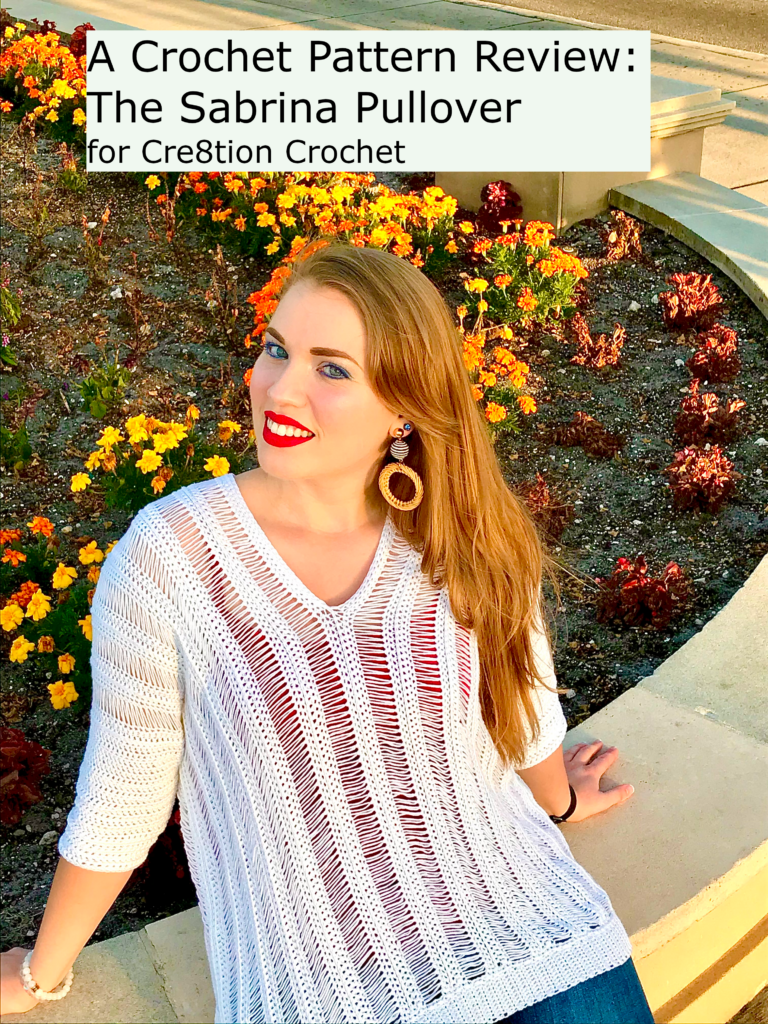
This is a crochet pattern review of the Sabrina Pullover designed by Anastasia of Journey Chanel Designs. Review done by Emily of Crochet Aweigh for Cre8tion Crochet.
This post contains affiliate links for Lion Brand. If you make a purchase by clicking on them, I make a small commission at no extra cost to you. Thanks for your support!
Find the crochet pattern review below, or click here to purchase the pattern from Journey Chanel Designs on Ravelry!
In a hurry? Pin this for later when you have more time.
It’s me, Emily with Crochet Aweigh.
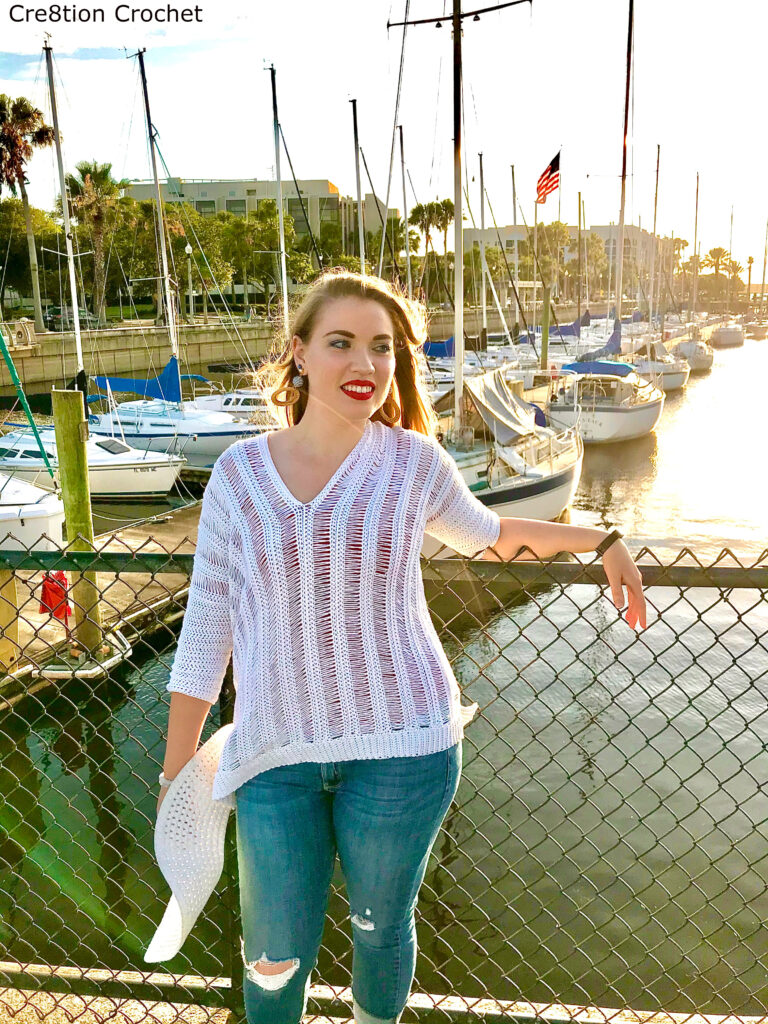
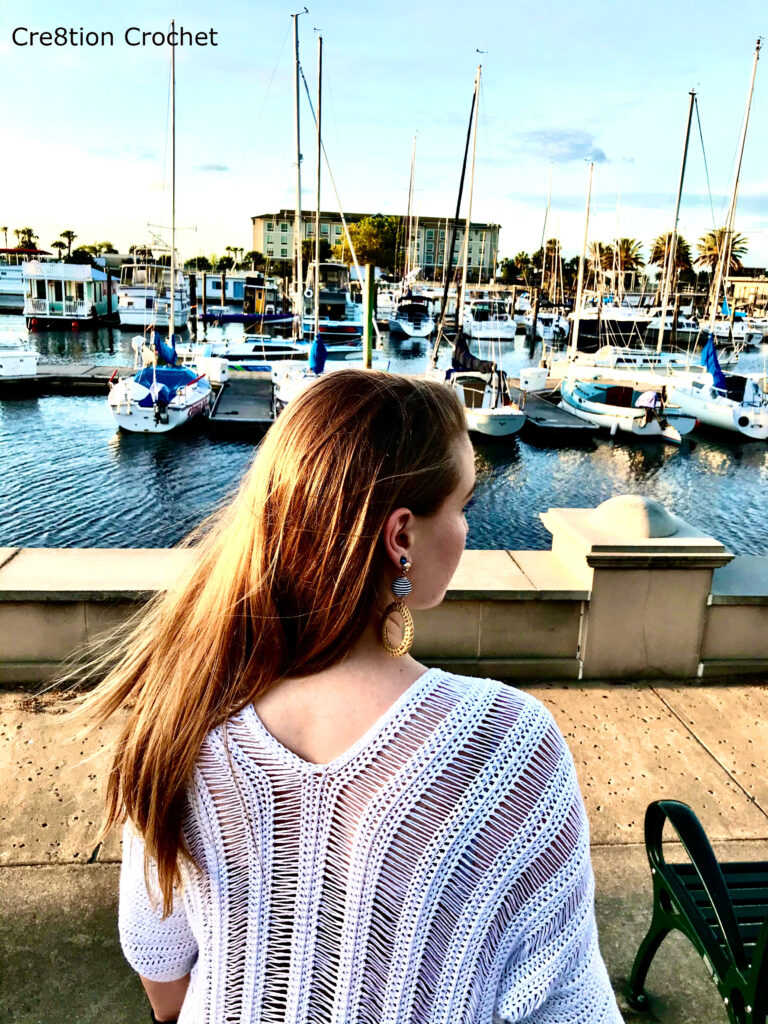
I’m so excited to share the Sabrina Pullover with you! This has got to be one of my favorite makes of all time. Broomstick lace is the superstar of this pattern, and if you have never tried it before, worry not! I had never done broomstick before either. The Sabrina Pullover is the perfect pattern to get yourself acquainted with the technique. It is rather addicting once you get used to it! This pattern has been a huge hit among my friends and at the local yarn store. All of my friends requested one for their birthday, and we hosted a crochet-a-long at our local yarn store She Sells Yarn in Ormond Beach, FL.
Anastasia of Journey Chanel Designs is such a first-class garment designer. Her designs are always excellent, tested thoroughly by 20+ testers, usually offer different design elements to choose from, and are size inclusive. For example the Sabrina Pullover is written for 9 different sizes. She goes above and beyond for her crocheters. She is definitely someone you should be following.
Visit with me on Instagram @Crochet.Aweigh for all kinds of awesome crochet makes and inspiration.
What Materials Do You Need to Crochet a Pullover?
- Approximately 850 – 1,900 yards (depending on which size you are making and which sleeve length you choose) of DK weight yarn – I used 1,085 yards for the Medium size
- F5/3.75mm Crochet Hook or size needed to obtain gauge
- Scissors and yarn needle for weaving ends
- Ruler between 1” – 1.5” wide
- The Sabrina Pullover, Paid Crochet Pattern from Journey Chanel Designs
Material Notes:
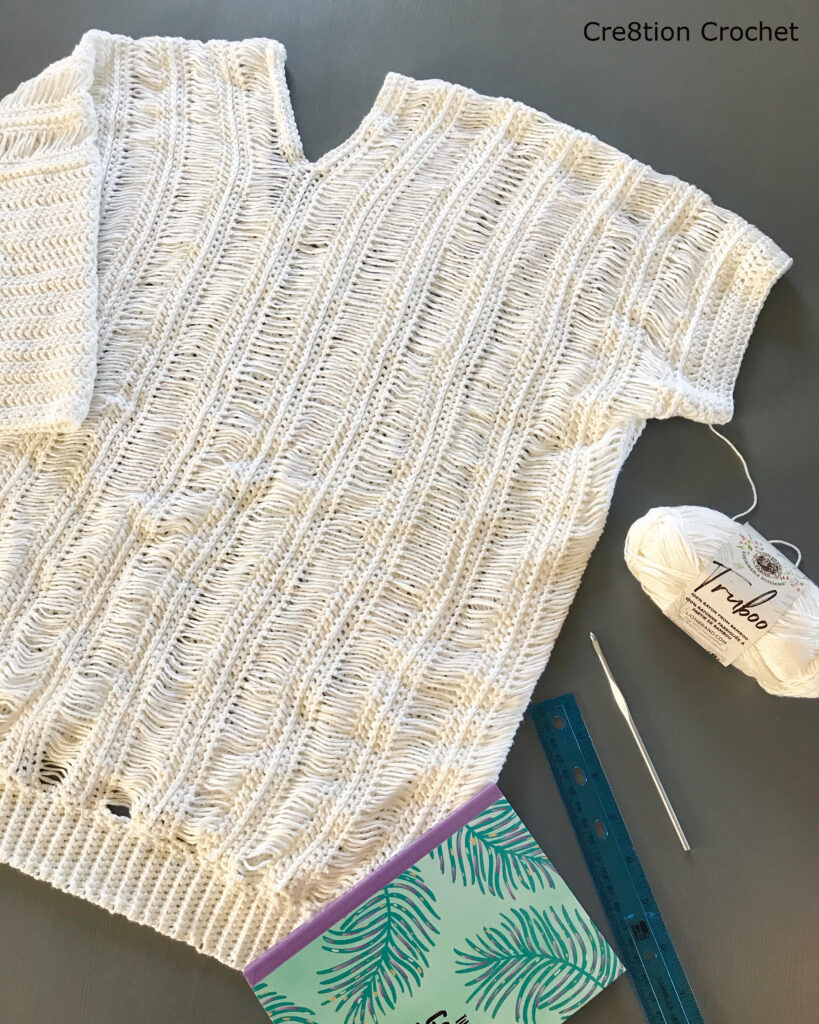
I have made this pattern a total of four times with 2 different yarns so I can share my thoughts on both. The first 2 times I used Lion Brand Truboo, which is 100% rayon. Rayon is a fiber derived from bamboo and is extremely soft with wonderful drape. The only downside to Truboo, or any 100% rayon for that matter, is that it tends to pill and be kind of fibrous after a few wears. I tend to find little “fuzzies” coming off the garment when I’m wearing it. My pullovers still look good and have worn well, but they are a little on the fuzzy side.
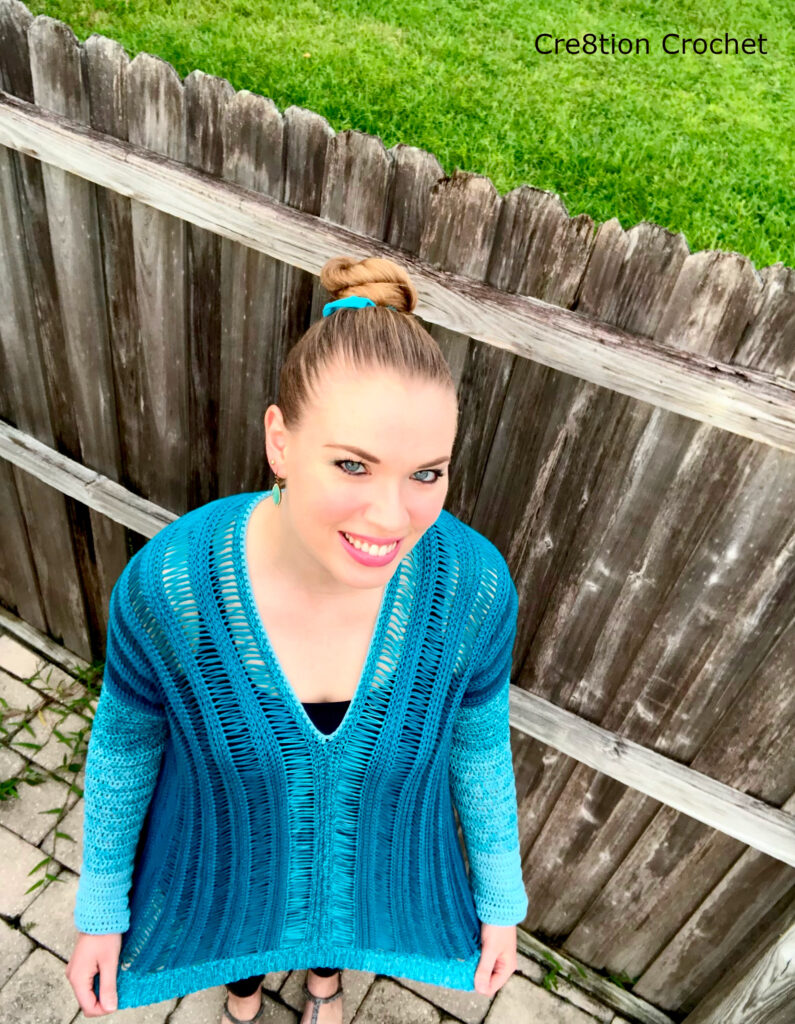
The 3rd and 4th pullover I made with Concentric Cotton by HiKoo and these have definitely held up better. This Ombre cake yarn is 100% cotton and it does not pill. It is important to note that this is a fingering weight yarn, not a DK. You can either go up hook sizes until gauge is met, or do what I did and make a larger size than you normally would. The turquoise top in my photos was made using 2 skeins so the color gradients to be equal on both sides and sleeves. I go into further details on how I matched up the colors later on in this post. You could definitely get by with only 1 skein if you opted for the sleeveless style.
How Long Does it Take to Crochet a Pullover?
I spent about 2 weeks on my sleeveless ones and about 3 weeks total on the ones with sleeves. Probably between 12 – 20 hours on average.
Gauge:
The gauge is 16 stitches by 14 rows. She gives instructions to chain 21 and follow rows 1-13 of the pattern to check the swatch. I started with the recommended G6/4.25mm, but ended up going down a hook size to F/3.75mm.
Pattern Notes:
I made a medium in the white since it was DK yarn. I used about four and a half skeins or 1,085 yards. For the turquoise top I used almost 2 whole skeins of the Concentric Cotton since I was making the large size to accommodate the fingering weight.
For the turquoise top I really wanted the color changes to be even and symmetrical. Normally this top is made in one continuous panel, but I made it in 2 separate panels rather than in one. I pulled from the center of each skein for the beginning of each panel. When seeing the panels together I kept the darkest color towards the outside and stitched up the middle until where the neck opening was supposed to be. I repeated that step for the back side. Next came the bottom ribbing. I used one skein for the front and switched to using the other skein for the back of the shirt to keep the color changes the same. Next I did the sleeves in the same way, I used one skein for the first sleeve and switched to the other skein for the second sleeve. Last I did the neck edging using one skein, I did not do the neck by switching back and forth since this was the last step.
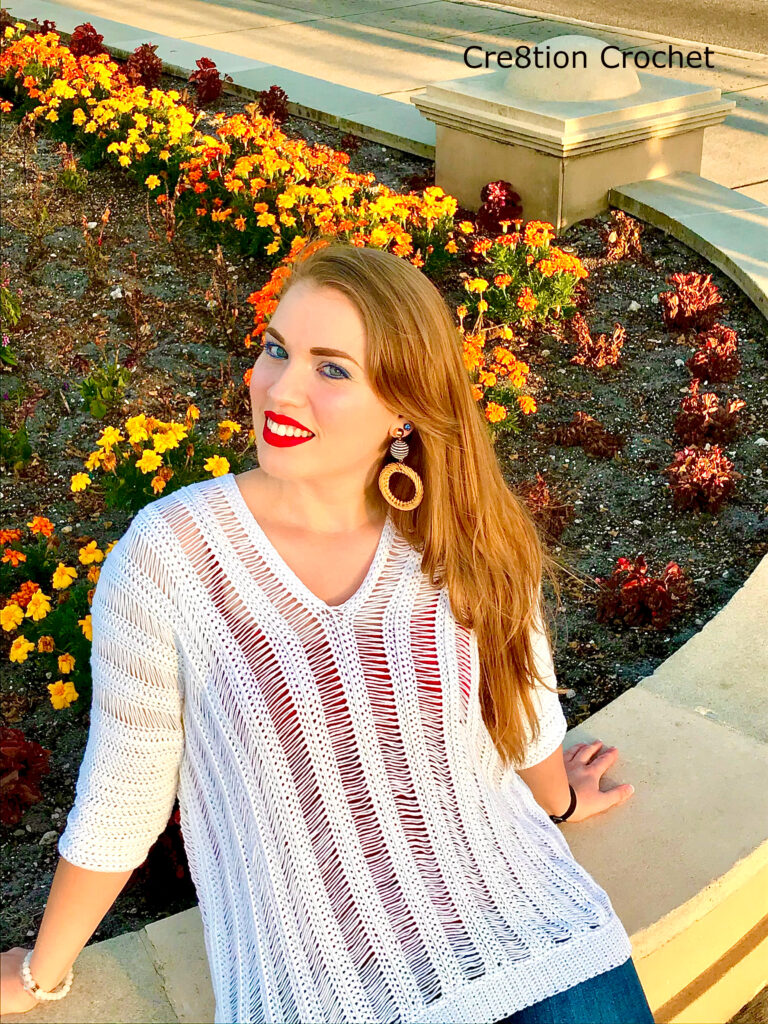
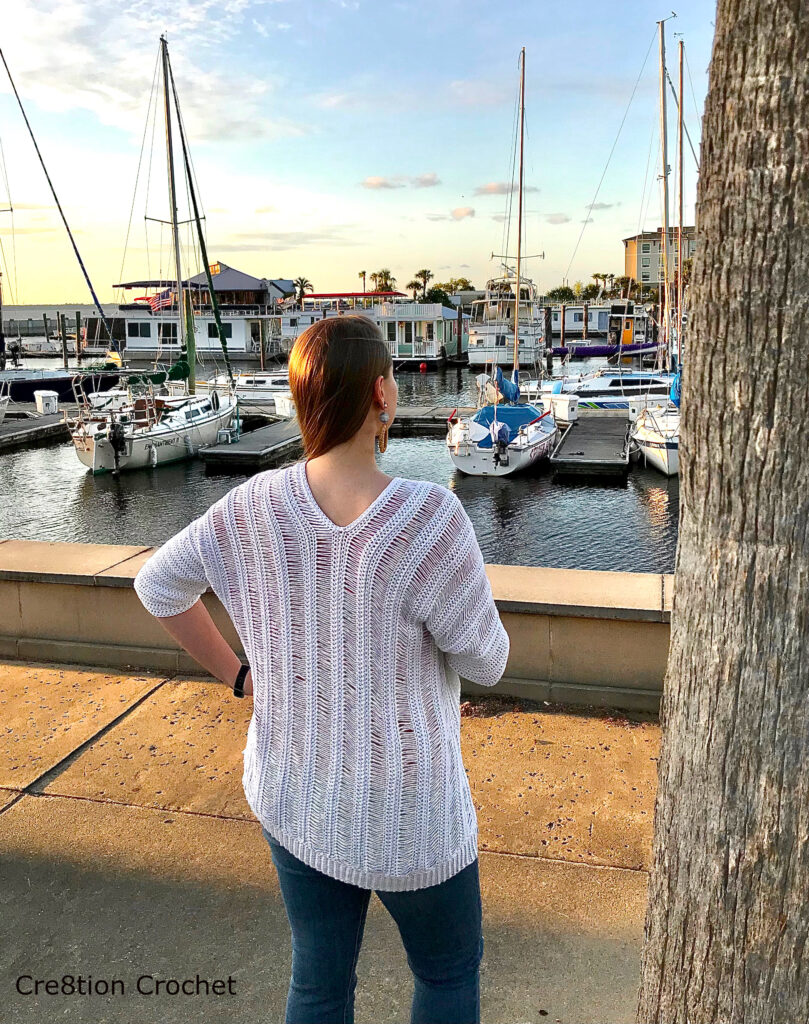
This pattern is a fantastic choice for an advanced beginner looking to learn something new. However, do be prepared when all of your friends and family want one of their own! I highly recommend getting to know Anastasia of Journey Chanel Designs. You will be pleasantly surprised by the sheer number of patterns she offers and the extraordinary detail that went into each of them. This particular design of hers can be styled in so many different ways. I have worn this tucked in with a skirt, loose over jeans, and over a slim dress. Be sure to drop a comment below to tell me how you are going to style your Sabrina Pullover!
Don’t forget to visit with me on Instagram @Crochet.Aweigh or all kinds of awesome crochet makes and inspiration.
Join one of our awesome Facebook groups to share your creations, and see what others are up to!
– Yarn Crafts & Coffee Community
– DIY Home On Rockwood Lane
– Alexandra Lane Lifestyle
Linked Up To…
Style with a Smile Link Up – Style Splash
Turning Heads Tuesday – Elegantly Dressed and Stylish
Confident Twosday Linkup – I do deClaire
Loop Scoop #64 – Moogly Blog
Wow on Wednesday – Is This Mutton?
Chic and Stylish Link Up – Mummabstylish
Fancy Friday – Nancy’s Fashion Style
Craftastic Monday Link Party – Sew Can Do
Wednesday Link Party 508 – Oombawka Design Crochet
Team Creative Crafts Link Party #151 – Artsy-Fartsy Mama
Creatively Crafty Link Party #385 – Try It – Like It – Create It
Grace at Home No. 510 – Imparting Grace
Spread The Kindness Link Up On the Edge #657 – Shelbee on the Edge
Saturday Sparks Link Party 570 – Pieced Pastimes
Handmade Monday #332 – Sum of their Stories
The Really Crafty Link Party #370 – Keeping it Real
Happiness is Homemade – Decor Craft Design
You’re the Star Blog Hop – Decor Craft Design
Anything Goes Linky 381 – My Random Musings
686th Inspire Me Tuesday – A Stroll Thru Life
Fabulous Party 480 – Lou Lou Girls
The Happy Now Blog Link- Up #378 – JENerally Informed
Vintage Charm Party 394 – My Thrift Store Addiction
Wonderful Wednesday Blog Hop – My Life Abundant
Wednesday Link Party #353 – To Grandma’s House We Go
Thursday Favorite Things #614 – An Artful Mom
Encouraging Hearts and Home Blog Hop – Slices of Life
Crafty Creators Link Party #71 – Life as a LEO Wife
Create, Bake, Grow & Gather Party #577 – Shabby Art Boutique
Funtastic Friday Link Party #442 – Simply Beautiful by Angela
A Morning Cup of Joe – The Cottage Market
Pink Saturday – How Sweet the Sound
Craft Schooling Sunday – Creative Jewish Mom
Sundays on Silverado #151 – The House on Silverado
August Sunday Showcase – Chez Mireille


That is beautiful, perfect as a summer cover up. Thank you for sharing with us at Handmade Monday.
Yes it would be perfect as a cover up as well! Just make it a little longer!
Love seeing a crochet pattern for tops! The video didn’t work, but the pictures are great. Enjoy your week.
I love doing tops too!
That is beautiful!
Thanks so much!
These tops are fabulous! They look very airy and perfect for summer. I love the broomstick pattern. Thanks for linking up!
Emma xxx
http://www.style-splash.com
Thank you! The broomstick is a lot of fun!