This is a crochet pattern review of the Driving Me Daisy Steering Wheel Cover designed by Tangles in Thyme. Review done by Emily of Crochet Aweigh for Cre8tion Crochet.
This post contains affiliate links for Amazon, WeCrochet, and Yarn Crafts and Coffee. If you make a purchase by clicking on them, I make a small commission at no extra cost to you. Thanks for your support!
Find the crochet pattern review below, Download the FREE pattern from Tangles in Thyme on Ravelry.
In a hurry? Pin this for later when you have more time.
It’s me, Emily with Crochet Aweigh.
I had a Honda Accord that I absolutely LOVED! It drove so well, had some “git-up” to it, no blind spots, was paid off, and was going strong with over 200,000 miles on it. But all good things must come to an end, and one day it decided to require a new transmission and so it was time to move on…with another Honda accord just one year newer. I loved my last accord so much I wasn’t willing to look at other vehicles. Now I’m driving “Betty”, almost the same exact car, but I wanted to spruce her up a bit and give her some crocheted accessories. Below is not only a pattern review of the Driving me Daisy Steering Wheel Cover by Tangles in Thyme, but also a brief summary of the adjustments I made to the pattern, and the other accessories that were made to match!
Now I know what some of you might be thinking. Crocheted steering wheel covers aren’t safe, they are too slippery and could cause an accident. Well don’t you think I thought of that! I’m not about to crash my new (to me) car! I made a few adjustments that I will include below to make this the safest crocheted steering wheel cover ever!
Visit with me on Instagram @Crochet.Aweigh for all kinds of awesome crochet makes and inspiration.

What Materials Do You Need to Crochet a Steering Wheel Cover?
- Approximately 575 yards of a DK (3) or worsted (4) weight yarn – I used Lion Brand 24/7 Cotton
- G6/4.00mm Crochet Hook – We love Clover Amour Ergonomic hooks!
- Soft tape measure as taking measurements is important
- Scissors and yarn needle for weaving ends
- Elastic Thread
- Drawer Liner – waffle or “grippy” style like this one
- Driving Me Daisy Steering Wheel Cover, free crochet pattern by Tangles in Thyme via Ravelry

Material Notes:
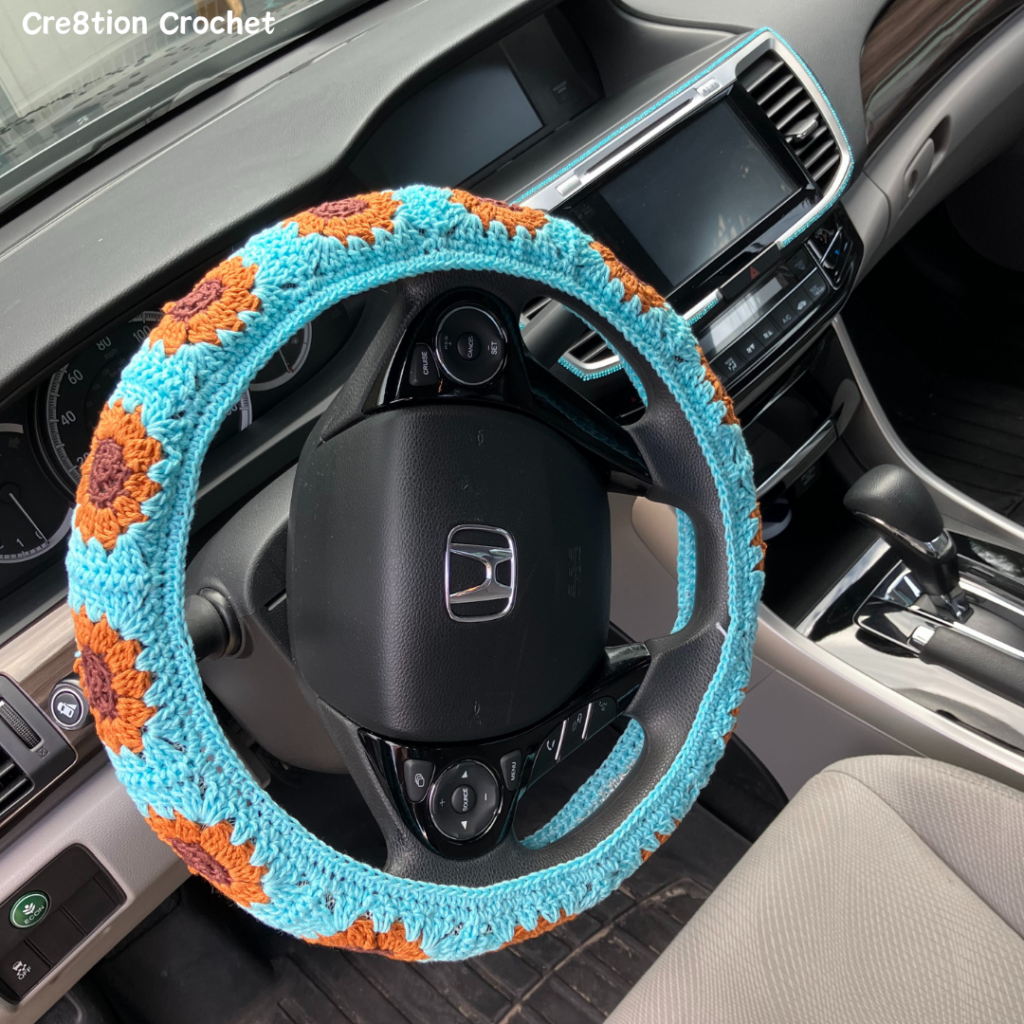
Tangles in Thyme chose Baby Bee Sweet Delight, a DK weight acrylic/nylon blend for her steering wheel cover. This would be a really nice and soft option. Personally I had my heart set on cotton so I chose Lion Brand 24/7 Cotton for mine. This is my favorite cotton for utilitarian things like scrubbies, pot holders, etc., anything that I want to be able to toss in the washing machine. I used the colors: coffee bean, amber, and aqua because I love sunflowers.
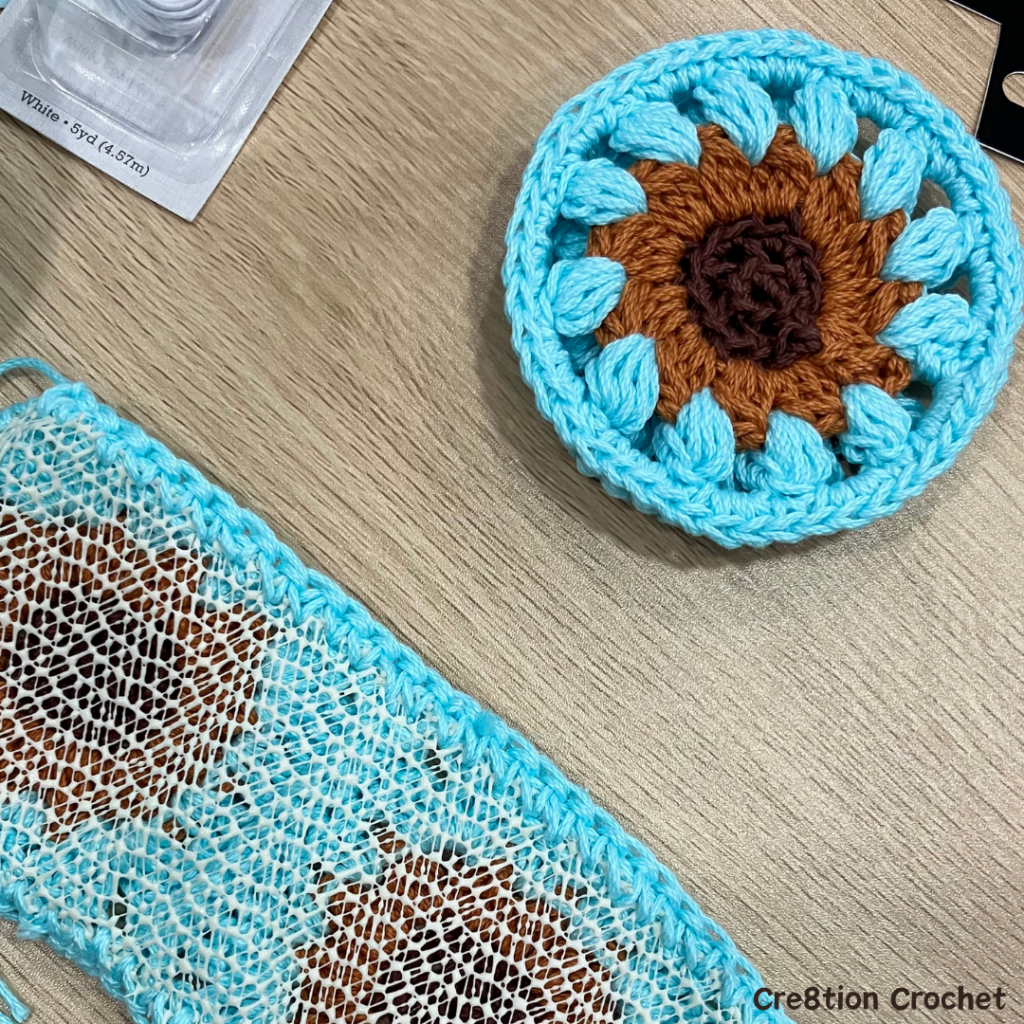
Back to the safety issue – I knew I wanted to adapt the pattern to include a way to prevent the cover from slipping around while driving. I went to the dollar store and picked up a small roll of “grippy” drawer liner. I wish I had known that Amazon has aqua colored liner like the one I linked above! Definitely would have used that instead. You can see the drawer liner in the photo below before I cut it to fit. More notes about the liner and working it in are listed below.

How Long Does it Take to Crochet a Steering Wheel Cover?
Each square took me about 10 minutes and it took 13 squares to make the right size. Including the time it took for seaming and adding the borders, it took approximately 3 or 4 hours. Every one will be different though depending on the size of your steering wheel.
Gauge:
Gauge is 2.25″ per granny square. Mine came out slightly larger and they were totally fine.

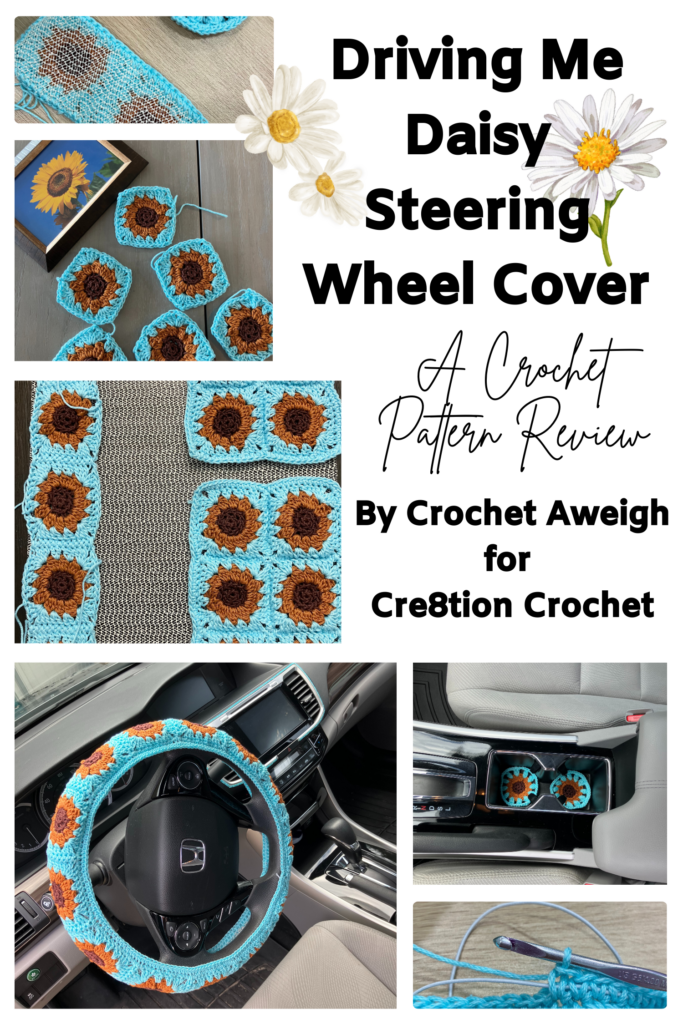
All About the Driving Me Daisy Steering Wheel Cover:
This was such a fun project and I highly recommend making one of these for your car! The flower granny squares start with a magic circle and only have 4 rounds each. Once your squares are done, seam them together using the back loops only in one long strip.
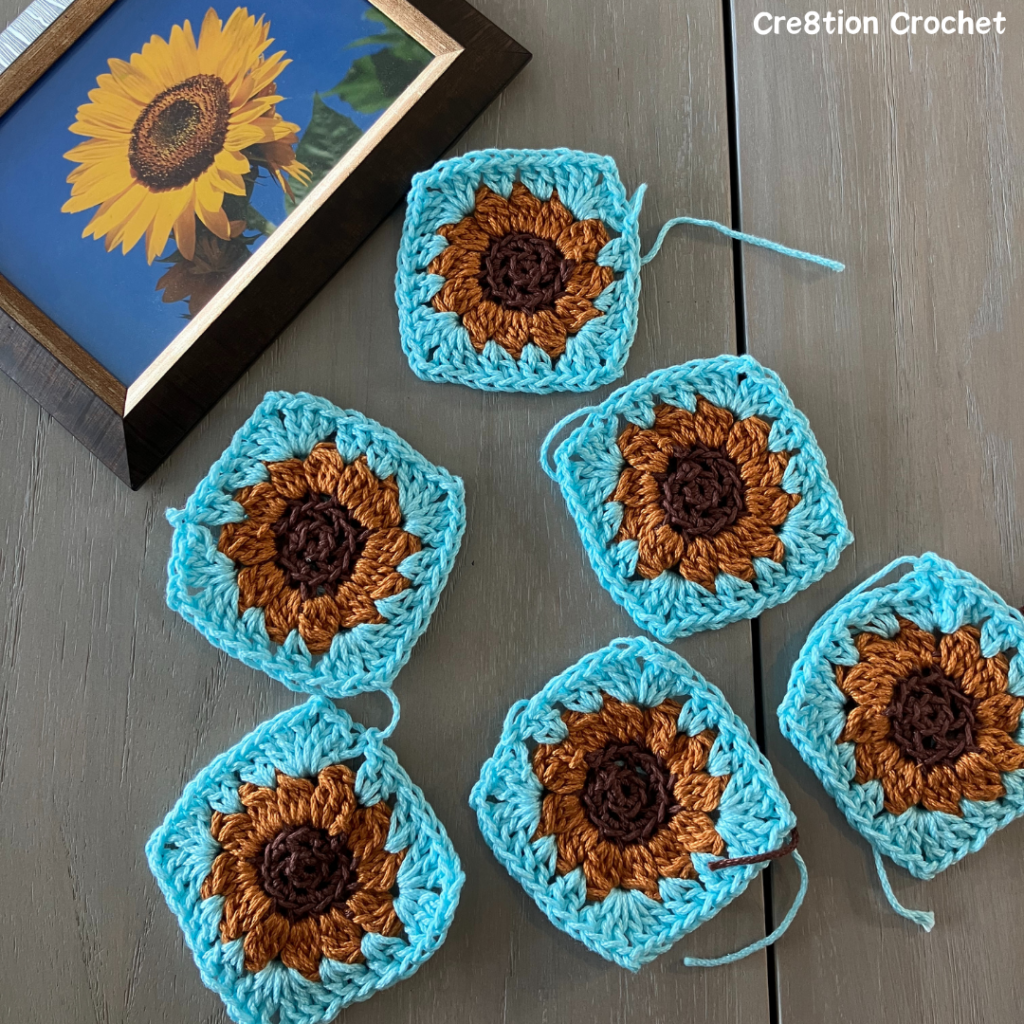
The only hang up with using the drawer liner is that crochet is stretchy and this liner stuff is not. I made what I thought was enough squares to go around my wheel, and cut the liner to match those, but when I tried to get the wheel cover on it didn’t stretch at all to fit. I ended up trying again by cutting the liner to the exact measurement of the wheel and making another square or 2 to match that measurement.
I wanted to use my sewing machine to sew the drawer liner to the back of my squares before connecting them into a circle, but the machine had other plans. So I lined the squares and liner up, pinned it in a few places, and crocheted the liner in using single crochet. In the photo above you can see how it is attached. I worked my crochet hook through the outer edge of the liner and the coordinating stitch on the granny square. This was pretty tedious and if you and your sewing machine are friends, definitely do that instead.

Once the drawer liner was secured all the way around with single crochets, it was time to sew the last seam to turn the cover into a circle/wheel shape. Once that was done it was time for elastic! The photo above shows the single crochets to secure the elastic. I cut the elastic a little bit smaller than my overall size so that it would pull in nice and tight around the steering wheel. The elastic and the drawer liner made for a VERY secure wheel cover. This baby isn’t sliding around anywhere! I’ve been driving with it for a few weeks now and it is awesome! No slipping whatsoever.
Extra Car Accessories:
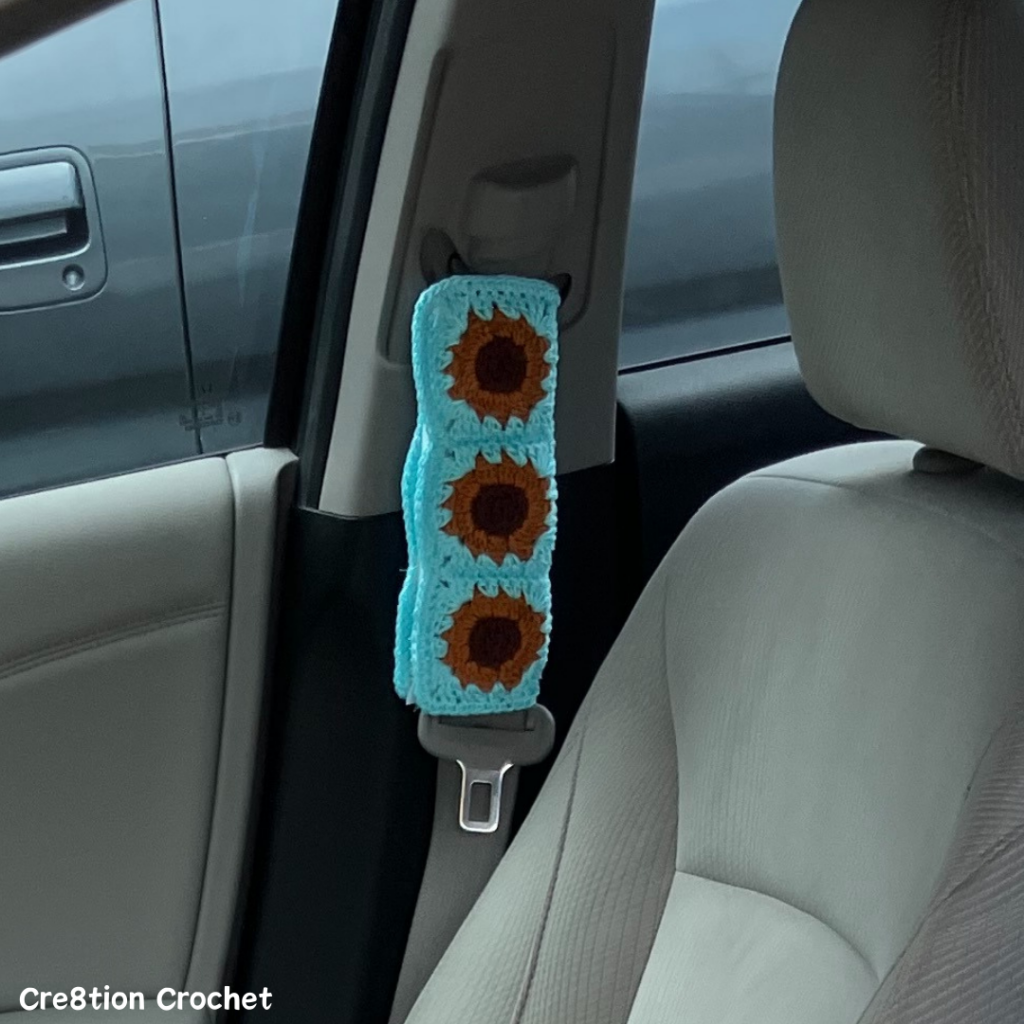
I couldn’t stop after just the wheel cover! I also did seat belt covers for the front seats and coasters to match! For the seat belt covers I made 6 of the same squares, sewed them into a rectangle, did 1 row of single crochet border, added the drawer liner, and velcro so that it I can remove them to wash them. I do regret using the drawer liner here. It made them hard to slide up and down on the seat belt as you are putting it on or taking it off, so if you do this, skip that step! Velcro is good though because you will want to wash them once in a while. I managed to get the sewing machine to cooperate to sew on the velcro, but if you don’t have one, permanent fabric glue would work fine too.

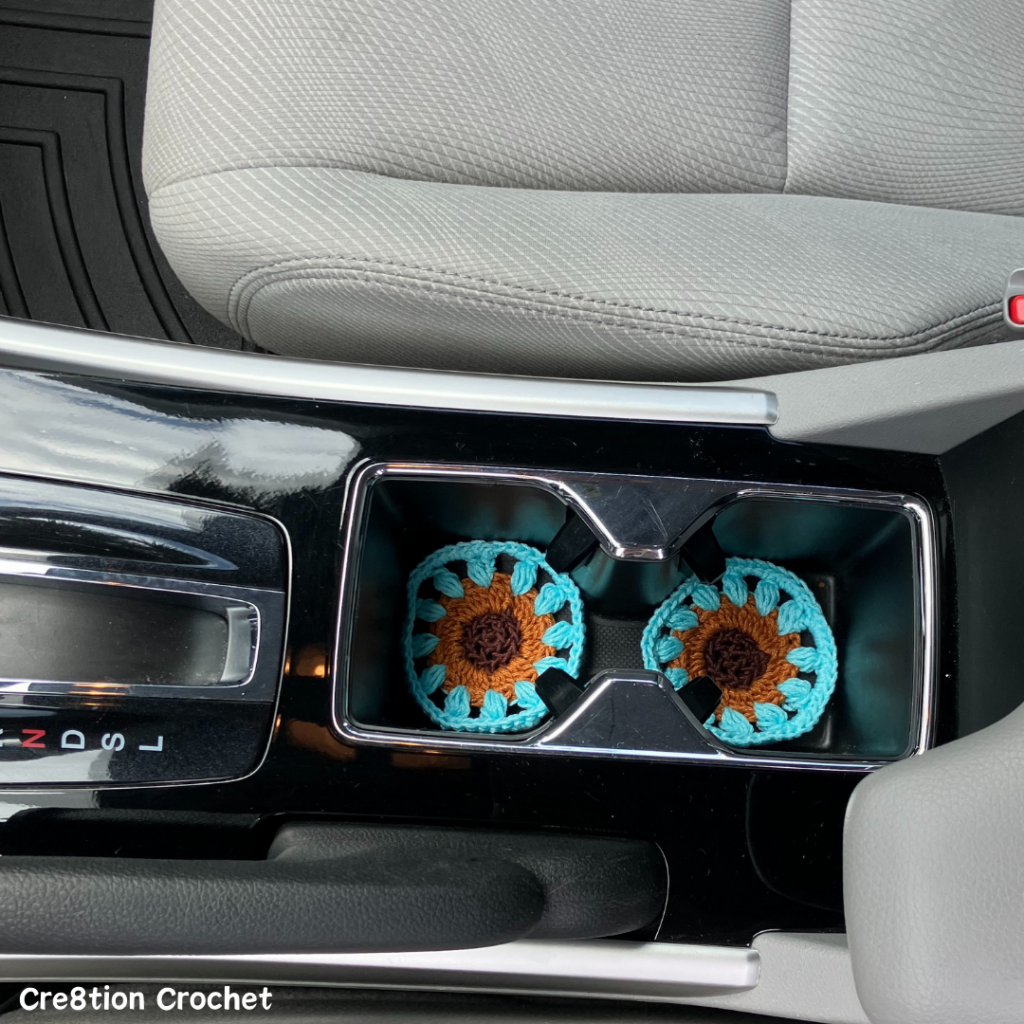
The coasters needed to be round, so I changed the final round of the square to puff stitches with a chain 2 space in between, then added 1 row of single crochet as the border. They were perfect!
That was everything I crocheted so far for my new car! I think it might need a crocheted plant hanging from the rear-view mirror though…
Now she needed some extra embellishments! Check these out:

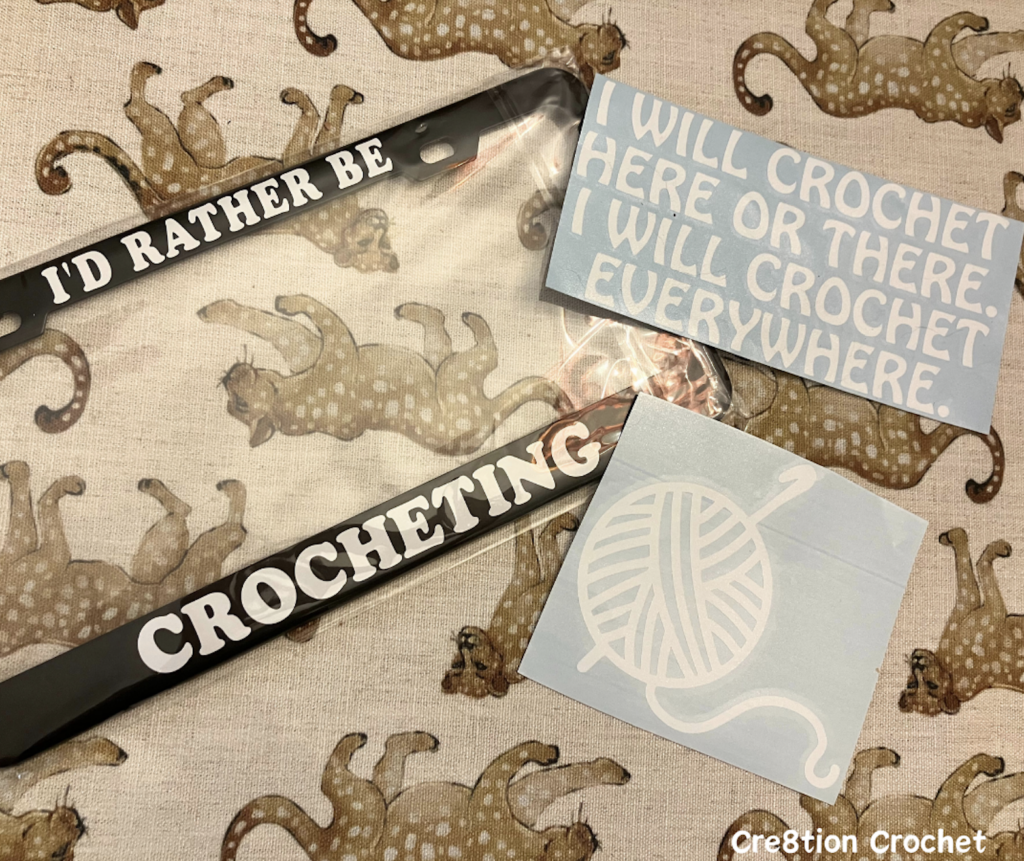
Added Bling to the start button
Added bling tape around the stereo screen [might add more later ;)]
Found a fun license plate cover on Amazon
Added a “I will crochet here or there. I will crochet everywhere” sticker to the back window
Added a yarn skein and hook sticker to the other side of the back window
I hope that you enjoyed this pattern review and it has inspired you to make your own Driving Me Daisy Steering Wheel Cover! If you do make one be sure to share with me in the comments below which flower and colors you chose!
Don’t forget to visit with me on Instagram @Crochet.Aweigh or all kinds of awesome crochet makes and inspiration.
Join one of our awesome Facebook groups to share your creations, and see what others are up to!
– Yarn Crafts & Coffee Community
– DIY Home On Rockwood Lane
– Alexandra Lane Lifestyle
Linked Up To…


Leave a Reply