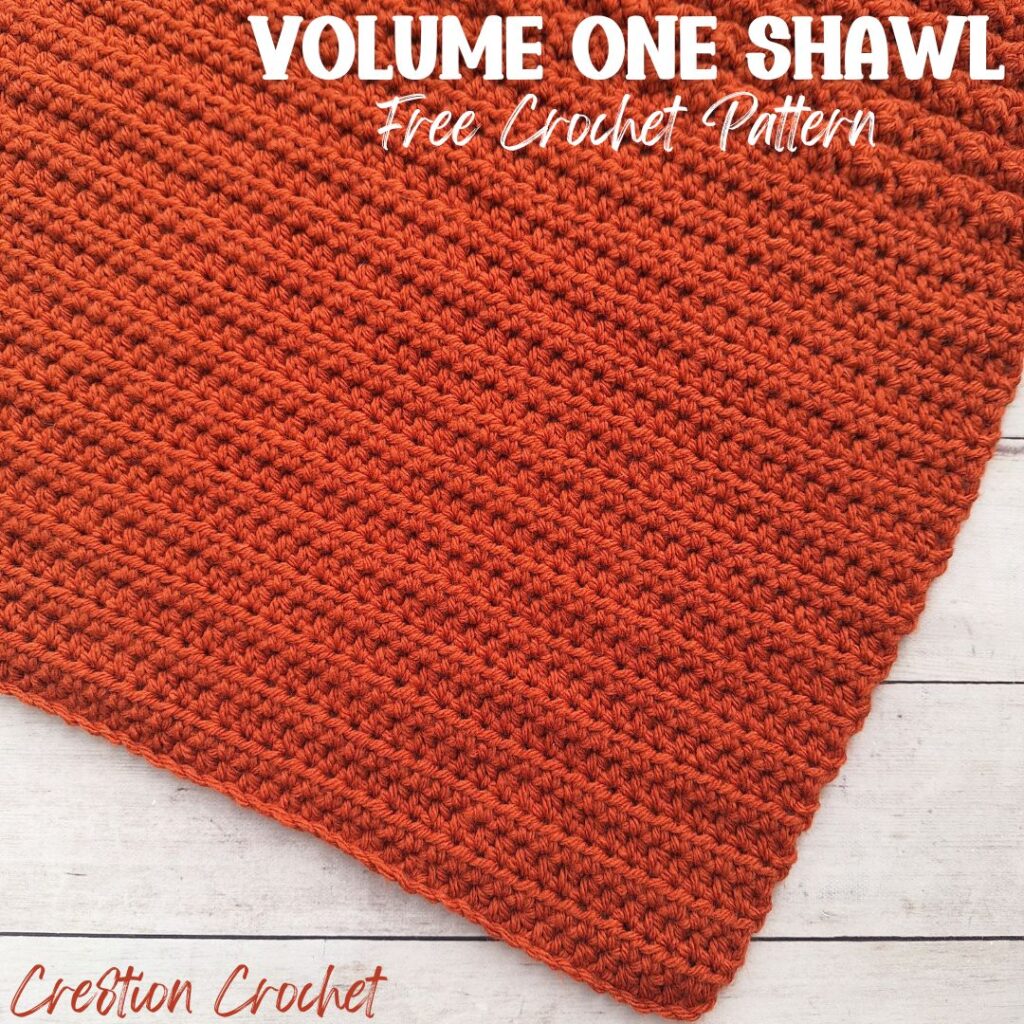
Learn how to combine 6 different crochet stitch patterns in one cozy, crochet shawl with this free crochet pattern and video tutorial. With the different stitch sections, you’ll love this sample style crochet shawl, and want to just keep going to make it to the next section.
This post contains affiliate links for Etsy. If you make a purchase by clicking on them, I make a small commission at no extra cost to you. Thanks for your support!
Find the free crochet pattern instructions below, or purchase a printer-friendly, ad-free PDF on Ravelry by clicking here.
In a hurry? Pin this for later when you have more time.
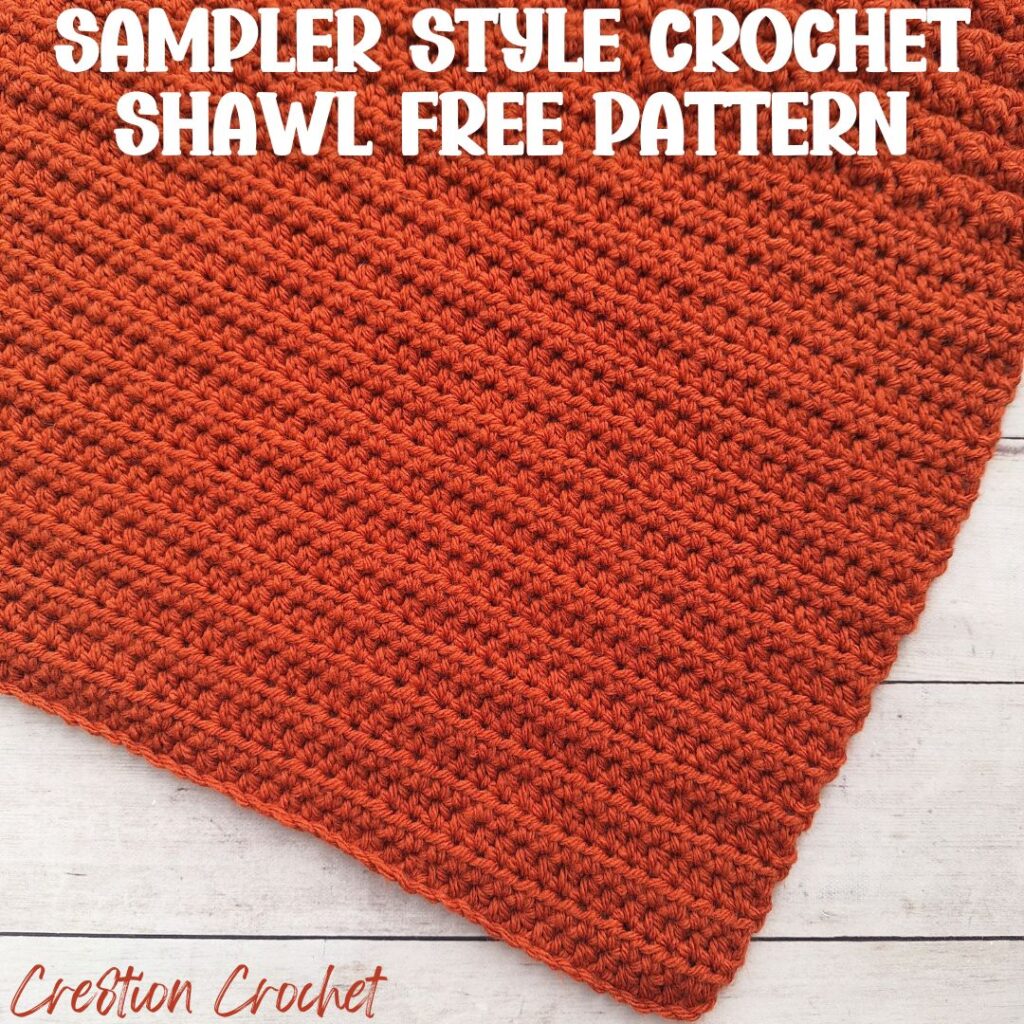
This sampler style rectangle shawl was inspired by a crocheted blanket I have been working on for a while.
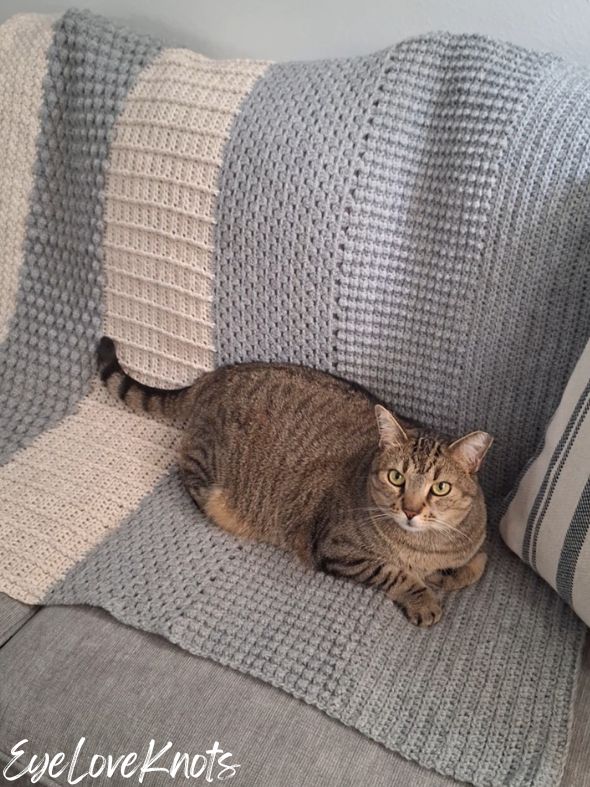
I worked on the Volume One Afghan while at Stitch Night at Crochet Aweigh in Tavares, Florida, which is held every Tuesday night, as well as at Stitch Day in my yarn shop, the Yarn Crafts & Coffee shop, in Melbourne, Florida, which is held on the 1st and 3rd Sundays of the month, and I received so many compliments and so much interest in learning how to make it, but I also received feedback from a few makers that they loved the stitch pattern, but didn’t want to make a whole blanket, so I decided to have a rectangle shawl as an alternative, and hold a Crochet a Long for both simultaneously.
Crochet-a-Long Schedule:
In both shops, we’re going to be working on this sample style crocheted blanket or shawl together. If you are local, we’d love for you to join us starting Sunday, August 3rd in Melbourne or Tuesday, August 5th in Tavares. You can find the exact schedule over on my Yarn Crafts & Coffee shop Events page.
To go hand and hand with the in person crochet a long, I’ll be updating this post with the new sections and video tutorials as they become available so I highly recommend joining my newsletter list so you’ll find out as soon as the updates are ready or grabbing the PDF on Ravelry where I’ll also be sending updates, but this is my tentative schedule: 1st Section (posted) | 2nd Section (posted) | 3rd Section, (posted) | 4th Section, (posted) | 5th Section, (posted) | 6th Section, October 14th | 7th Section, October 28th.
What stitch patterns will be included in each section?
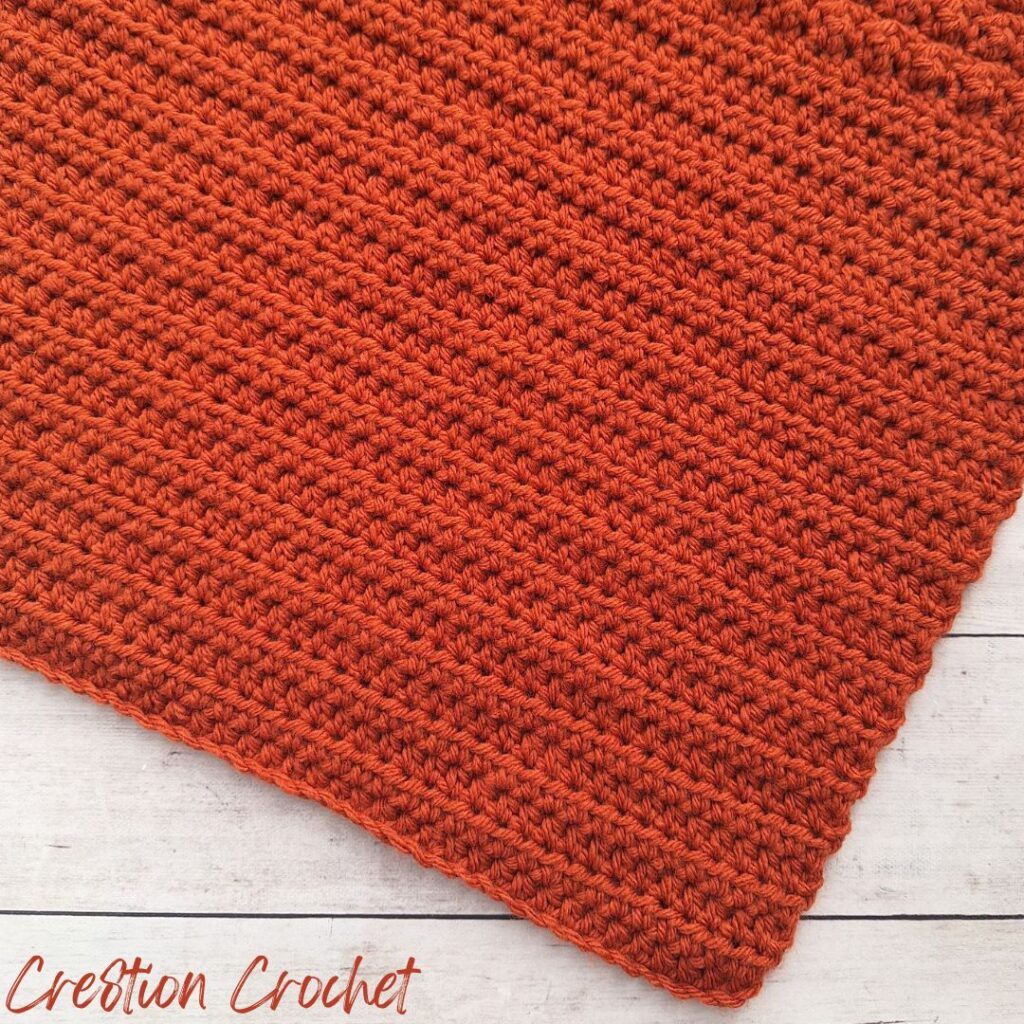
Part 1 features half double crochet stitches.
Part 2 features a really fun textured stitch pattern created by alternating single crochets and treble crochets.
Part 3 features the classic granny stitch pattern.
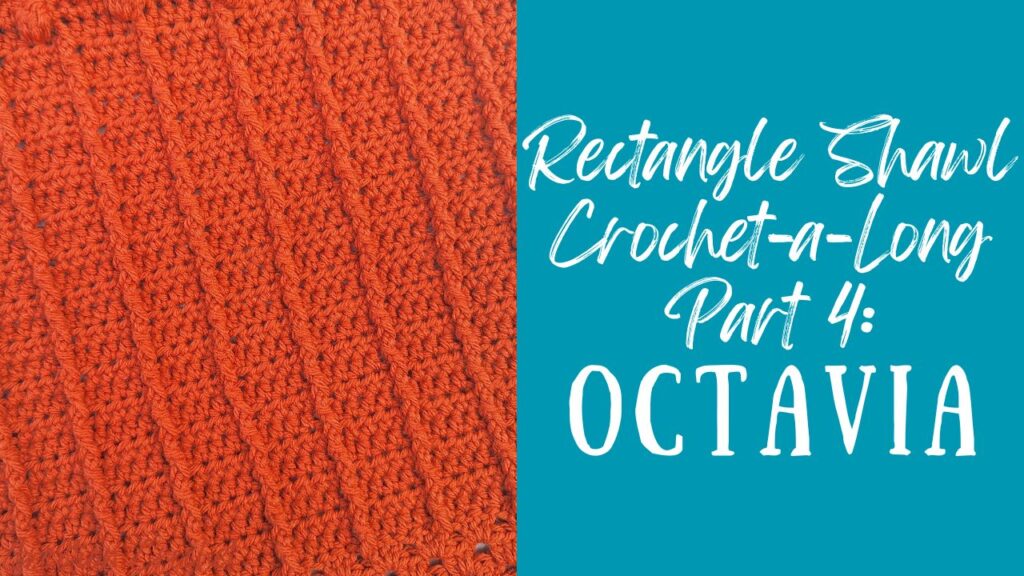
Part 4 features post stitches in combination with half double crochets.
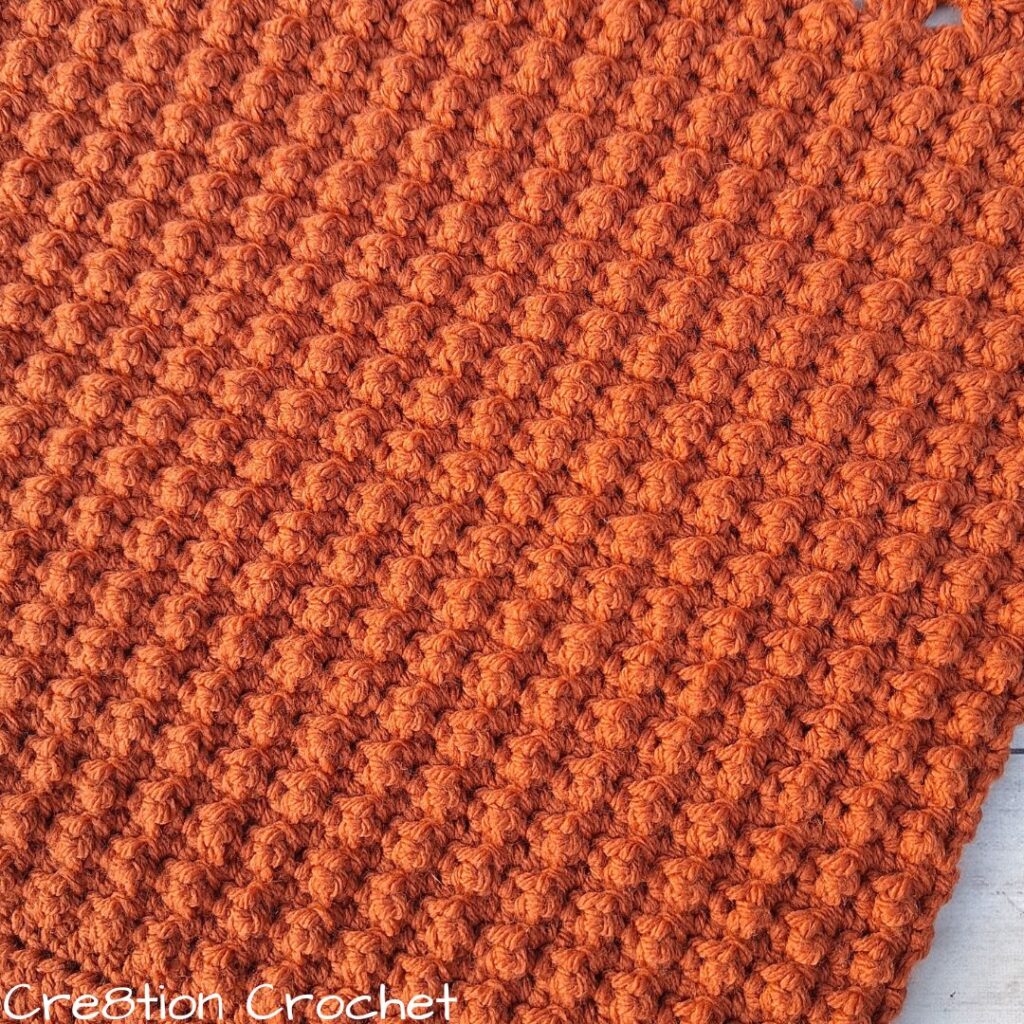
Part 5 features really fun bobble stitches that stagger each other. You’ll love running your hand across this section!
Part 6 features the suzette stitch, which is a combination of single crochets and double crochets to create just the sweetest textured fabric of slanted clusters.
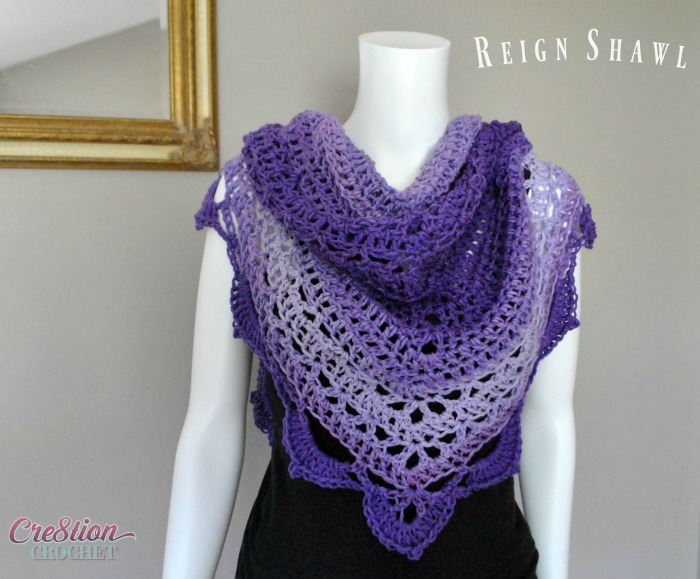
What is the different between a Shawl, a Stole and a Wrap?
A Shawl, Stole and Wrap all describe a rectangular, square or triangular accessory that is draped over the shoulders or wrapped around the body.
A shawl is more casual, and is either worn to accent an outfit, to provide warmth or for religious purposes.
A stole is a more formal shawl used to accent an outfit, and is usually more narrow than a shawl, and made of more expensive materials like silk and cashmere.
A wrap encompasses both a shawl and stole. It’s a more casual, modern term that simply describes any accessory that can be draped over the shoulders or wrapped around the body.
Are Shawls and Scarves the same?
Shawls and Scarves both describe an accessory that can be draped over the shoulders, or wrapped around the neck and body, depending on the size.
Typically, a scarf is often more narrow than a shawl by at least half or more, and solely wrapped around the neck, rather than the body, either to accent an outfit or to provide warmth, but there are several different types of scarves, like super scarves and blanket scarves, that are much wider and can definitely be used to cover the shoulders or wrapped around the body.
I’ll get into a little more detail when I get into the sizing, but one thing I love about making my own shawls and scarves is being able to customize the width and length to fit the exact way I like to wear them.
What is the best yarn to use to crochet a shawl?
I picked Lion Brand Pound of Love Yarn because I wanted to use yarn that I had in my stash already. Some of my other favorite worsted weight yarns for shawls, especially against the wind, are Lion Brand Wool Ease (wool and acrylic blend) and Berroco Vintage (wool and acrylic blend). They’re soft, squishy, warm and hold up so well to wear and tear and machine washing and drying.
If you want to make the shawl with yarns better for warmer weather, living in Florida, one of my favorites is Berroco Modern Cotton. Jody Long Coastline and Lion Brand The Cottony One are great alternatives.
You can use any worsted weight yarn from your stash – pick your favorite! If the finished size is essential to you, then check your gauge, but if not, then just start crocheting – you can even go up to a #5 chunky weight yarn, like Lion Brand Hue & Me, for a cozier, oversized shawl, or down to a #3 weight yarn, like Lion Brand Coboo, for something a bit more lightweight.
What size should a rectangle shawl be?
The average sizes of rectangle shawls are 15″ wide by 60″ long, 18″ wide by 72″-75″ long, and 20″ wide by 80″-100″ long. It really all depends on your preferences, like if you like to wear it more like a scarf or wrap around your shoulders and arms, and how much overhang you like on your shawl.
Personally, I try to keep the overhang to a minimum as the shawl can get heavy with worsted weight yarns, so I opt for 15″ by 60″ for a shawl I will wrap around my shoulders and pin. For reference, I have a 42″ bust and wear a ladies size L / juniors size XL top – the fit is a little different based on bust and arm circumference measurements, which may affect your choice of length.
When you think of the circumference of your bust and arms together, it’s roughly 10″ larger than your bust. In my case, that would be 52″ in circumference. With a 60″ length, that leaves 8″ to overlap and drape. If you were a size Extra Small with a 28″ in bust, plus the 10″ extra for the arms, that would bring you to 38″. Perhaps you’d want to adjust to say a 45″ shawl to wrap around your shoulders.
For a shawl that I will wear more like a scarf, I opt for 15″ by 70″. For reference, I like to make my regular scarves 60″ in length, and I always feel like (I think due to the extra fabric/bulkiness) rectangle shawls worn the same way need just a little extra length to wrap around the neck once, and have a nice amount of fabric hanging on either side. I am 5’6″. If you’re shorter, you may want a shorter shawl length, and if you’re taller, you may want a longer shawl length.
Do I need to work a border around my shawl?
Because the shawl is worked in 6 different stitch pattern with various stitch multiples for each, the sides where they meet may not be as straight as usual. For a more finished edge, I definitely recommend adding a border, or at least blocking the finished shawl. Keep in mind, a simple single crochet border will add about 1/2″ to width and 5/8″ to the length, and any other stitch patterns or additional rounds will add more.
Sampler Style Crochet Patterns | Volume One:
Volume One is a fun crochet line full of texture that features 6 different crochet stitch patterns. Sometimes big projects can seem to take forever and get boring, but just when you start to get bored, it’s time to switch to the next crochet stitch pattern, which makes this the kind of project you won’t really want to put down.
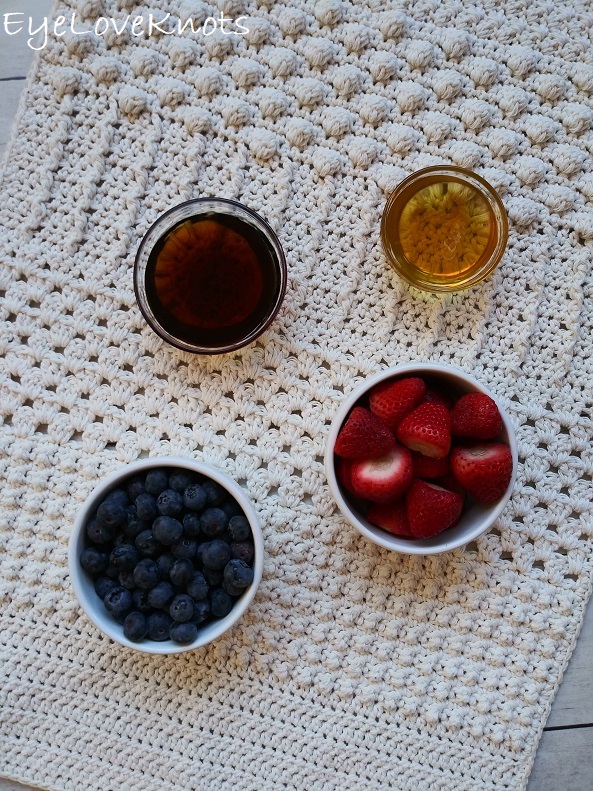
You’ll love these matching sampler style crochet pieces!
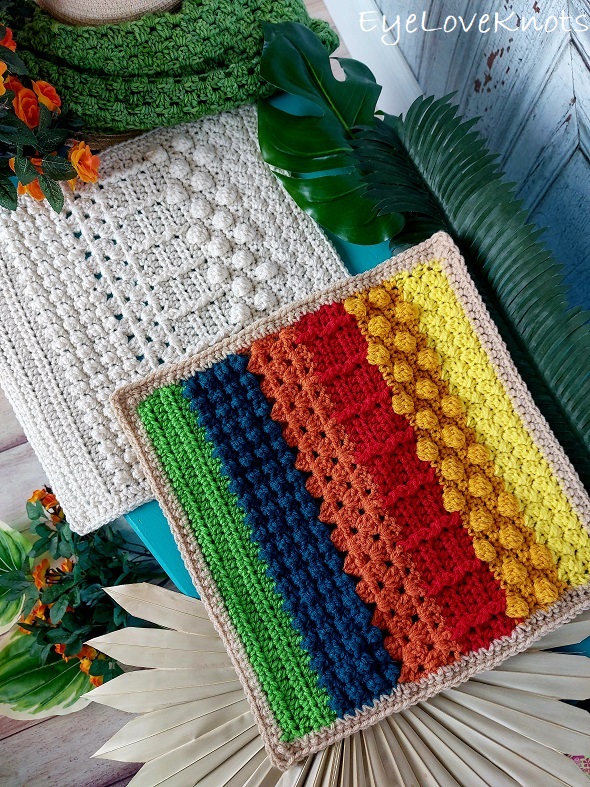
Find more Volume One accessory and home decor crochet patterns on EyeLoveKnots, and Volume One accessory and wearables crochet patterns here on Cre8tion Crochet.
If you like making shawls as much as I do, you’ll love these:


Ad-Free Printer Friendly PDF:

Cre8tion Crochet newsletter subscribers get access to Exclusive Subscriber Content, like the free PDF of this pattern via the Free File Library – you’ll find the tab on the top menu. The library is password protected so sign up for my newsletter and you’ll receive a Welcome email containing this month’s password, or if you are already a blog subscriber, reference your latest newsletter for this month’s password. From the library, you’ll be able to access the PDFs via Google Drive – you do not need to have a Google Drive account to view and download the PDF.
For a limited time…
Through 08/16/25 at 11:59pm EST, you can grab a free copy of the PDF for the Volume One Rectangle Shawl on Ravelry using code FREECROCHET202509. I earn my income from the number of pageviews my blog sees, so please do not share the code, but instead share the link to this post so others can find it. Thank you!
After 08/16/25 or for non-subscribers, if you would like a PDF version of this post, you may get one through either my Etsy Shop (will be published there once the crochet-a-long is over) or Ravelry Shop for a small fee. This fee is to compensate for the views lost when you no longer need to return to the blog to for the information, as you will have your own copy. In a hurry? Pin this for later when you have more time.


Save this to Your Favorites on any of these awesome directories: AllFreeCrochet, FaveCrafts, Cheap Thrifty Living, DIYideaCenter, Crochet Pattern Bonanza, AllFreeHolidayCrafts, Free Crochet Tutorials, The Free Crochet Family
What Materials Do I Need to Crochet a Rectangle Shawl?
- 1166 (1628, 2371) Yards of Worsted Weight Yarn – I used Lion Brand Pound of Love Yarn in Denim for my video tutorial and the Pumpkin Spice colorway for my finished shawl
- H8/5mm Crochet Hook
- Tapestry Needle
Material Notes:
My sample is the 16″ by 60″ size. The rest of the size yardages are estimated based on my sample.
Feel free to substitute the Pound of Love for your favorite worsted weight yarn. If the finished size is essential to you, then check your gauge, but if not, then just start crocheting.
I love my ergonomic clay hooks from SiennasBowtique and BronzeShepherdStudio! They both have so many fun designs – I have several from each shop because they’re so darn cute and nice to hold onto! We also have lots of beautiful, handcrafted crochet hooks in our Yarn Crafts and Coffee Yarn Shop as well!
If you don’t mind if the finished size of your crocheted shawl is a little smaller or a little larger, gauge is not essential for this project, so if you are more comfortable working with an I9/5.5mm crochet hook with your worsted weight yarn, feel free to size up. Please note, this will require more yardage than that listed.
If you experience ruffling when working the border, this is caused from a change, especially seen on the sides. My quick fix is to simply go down a hook size to a G6/4.25mm. You can also continue with the same hook you’ve been working with, and just block the finished shawl. Usually, I run into this issue, but I did not in this shawl, so I kept the same hook throughout.
How Long Does it Take to Crochet a Rectangle Shawl?
Working the 16″ by 60″ size, I completed it in about 12 hours.
Broken down that’s: the half double crochet section in just over an hour and a half, the little pebbles section in just over 2 hours, the granny stitch section in just over an hour, the post stitch section in about an hour and a half, the bobble stitch section in about two and a half hours and the Suzette stitch section in just over two hours.
Finished Measurements with Border, Width by Height:
- 16 1/2″ by 60 1/8″
- 18 1/8″ by 75 1/8″
- 19 7/8″ by 100 1/4″
These sizes are average adult sizes. It really all depends on your preferences, like if you like to wear it more like a scarf or wrap around your shoulders and arms, and how much overhang you like on your shawl.
Gauge (Not Essential):
Measured in the Half Double Crochet Pattern from Section 1: 14 HDC by 12 Rows = 4″ Wide by 4 1/8″ Tall
Note: If you are measuring a swatch that is only 14 HDC wide by 12 rows tall, it will measure slightly larger. If working a swatch, I recommend working at least 20 stitches by 18-20 rows, but a swatch is not necessary for this project unless the finished size is essential to you.
When working the pattern, the border will add about 1/2″ to the width and 5/8″ to the height.
Abbreviations (US Terms):
- HDC – Half Double Crochet (Photo Tutorial)
- SC – Single Crochet (Photo Tutorial)
- TR – Treble Crochet (Explained in it’s Notes section below)
- DC – Double Crochet (Photo Tutorial)
- FPDC – Front Post Double Crochet (Explained in it’s Notes section below)
- BPDC – Back Post Double Crochet (Explained in it’s Notes section below)
General Pattern Notes:
None of the names given to the stitch patterns are official, except for Suzette – they are the names I’ve given my designs.
Because this shawl is built with 6 different stitch patterns, the stitch multiple for each section is different, therefore there is no set multiple for adjusting the width of the project. If you want to change the width, you can go up crochet hook sizes for a bigger size, or down for a smaller size, or you can try working with a lighter or chunkier weight yarn.
Anytime we have a beginning chain of 1, this does not count as a stitch.
Section 1, Haylee Section Notes:
Skipped chains from the foundation chain count as a half double crochet.
If you want to alter the height of the shawl, simply add or subtract rows ending after completing a row worked from the front side so the next section can start from the back side.
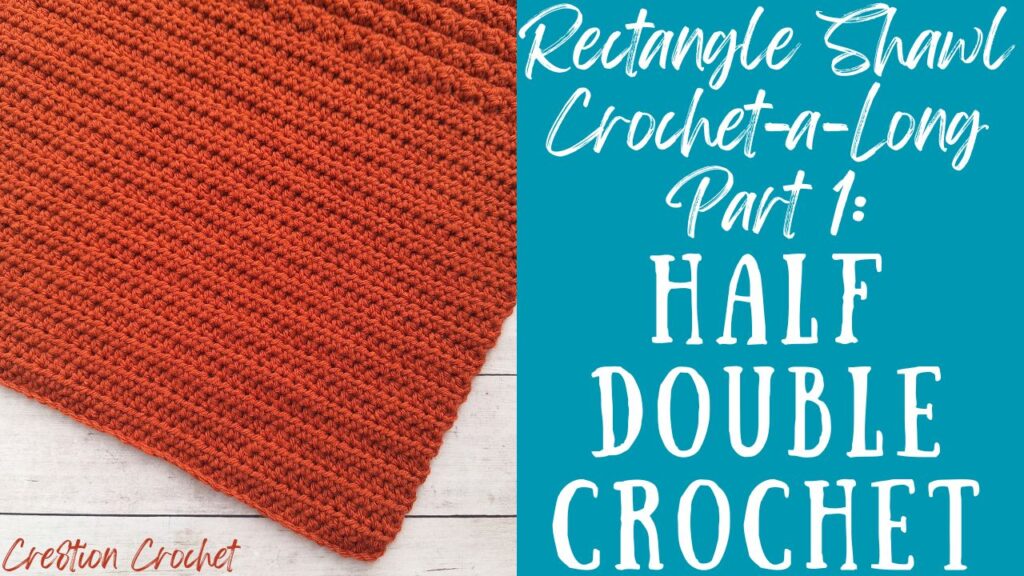
Section 1, Half Double Crochet Video Tutorial:
Section 2, Little Pebbles Section Notes:
We will alternate between a textured row that combines single crochets and treble crochets, followed by a row of just single crochet. Each time you are looking at the flat back side, you will work a textured row so the treble crochets will pop out on the front, and each time you are looking at the textured front side, you will work a simple row of single crochet all the way across.
To Treble Crochet: yarn over 2 times so there are 3 loops on your hook, insert your hook into the stitch, yarn over and pull through (4 loops on hook), then (yarn over and pull through 2 loops) 3x.
When working the single crochet row, you will notice the top of the treble crochet stitches will have fallen to the back of the fabric. If you have a tough time seeing your stitch, you may need to rotate your fabric forward to see better.
If you want to alter the height, simply add or subtract rows ending after completing a textured row, which is worked from the back side, so the granny stitch row can begin from the front of the fabric.
Section 2, Textured Crochet Video Tutorial:
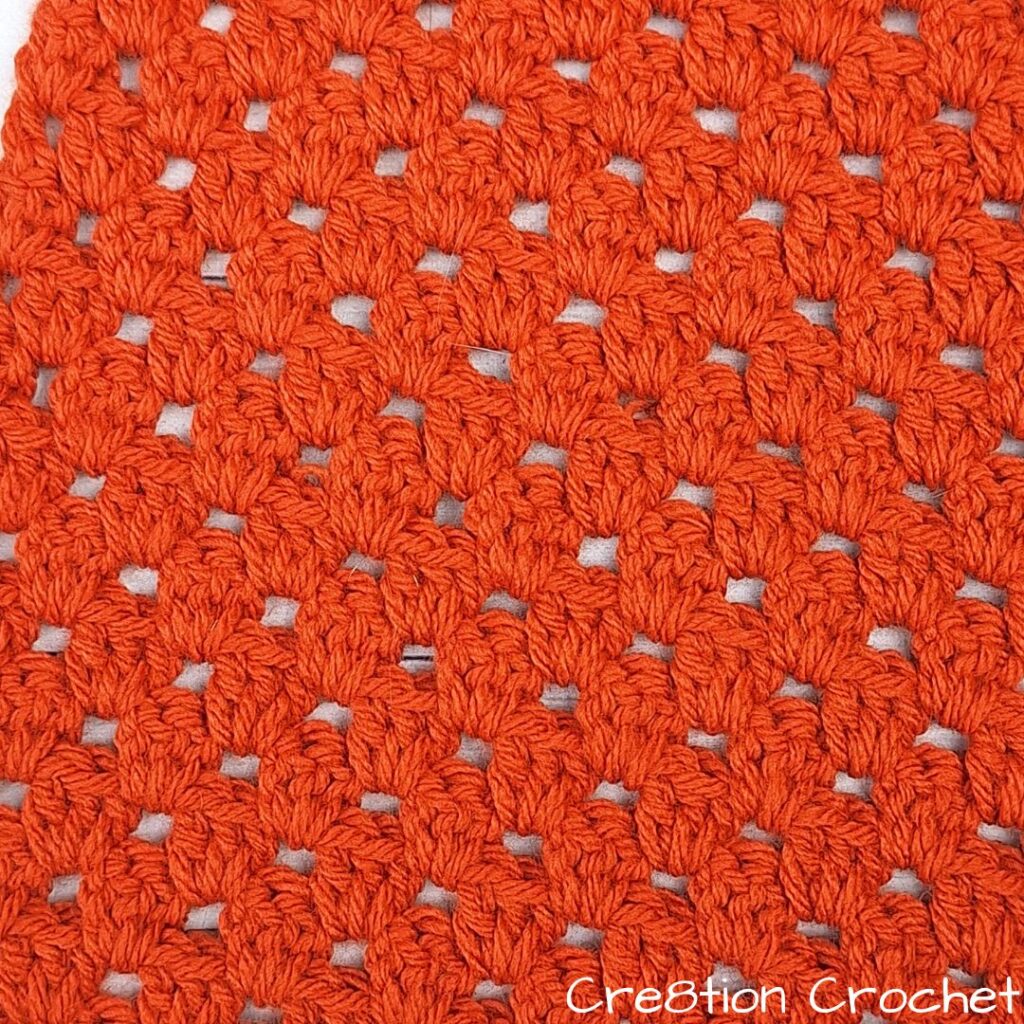
Section 3, Grace Tinley Section Notes:
The beginning chain 2 counts as a double crochet from the first granny stitch cluster.
If you want to alter the height, simply add or subtract rows by any number. It does not matter if you end on the front side or back side of the fabric.
Section 3, Granny Stitch Section Video Tutorial:
Section 4, Octavia Section Notes:
We will alternate between a row worked with front post stitches followed by a row worked with back post stitches. Each time you are looking at the flat back side of the fabric, you will work a back post stitch row so the texture will show on the front, and each time you are looking at the textured front side of the fabric, you will work a front post stitch row.
Post stitches are worked around the post of the previous rows stitch rather than into the top of the stitch. The post is found directly underneath the top of the stitch.
It’s very easy to add stitches in post stitch rows because sometimes it’s hard to determine where to work the next stitch after your post stitch. Reference the top of each stitch as you work across. When it comes time to work a post stitch, look to the top of the next stitch, then follow it down to the post. For the next stitch, look back to the top of the stitches. The top of the post stitch you just finished will appear unworked – make sure you do not work into this stitch, but rather, into the following stitch.
To Front Post Double Crochet (worked from the front of the fabric): Yarn over, then swoop your hook downward and towards the front so your hook stays on the front side of the fabric. From the front to the back, insert your hook into the space in between the stitches so that your hook comes out just to the right of the desired stitch. Wrap the crochet hook around the back of the desired stitch. From the back to the front, insert your hook into the space in between the stitches so that your hook comes out just to the left of the desired stitch. At this point, the desired stitch will appear raised on the front of the fabric. Yarn over and pull directly through (3 loops on your hook). (Yarn over and pull through 2 loops) 2x.
To Back Post Double Crochet (worked from the back of the fabric: Yarn over, then swoop your hook downward and backward so your hook goes to the back of the fabric. From the back to the front, insert your hook into the space in between the stitches so that your hook comes out just to the right of the desired stitch. Wrap the crochet hook around the front of the desired stitch. From the front to the back, insert your hook into the space in between the stitches so that your hook comes out just to the left of the desired stitch. At this point, the desired stitch will appear raised on the back of the fabric. Yarn over and pull directly through (3 loops on your hook). (Yarn over and pull through 2 loops) 2x.
Section 4, Post Stitch Section Video Tutorial:
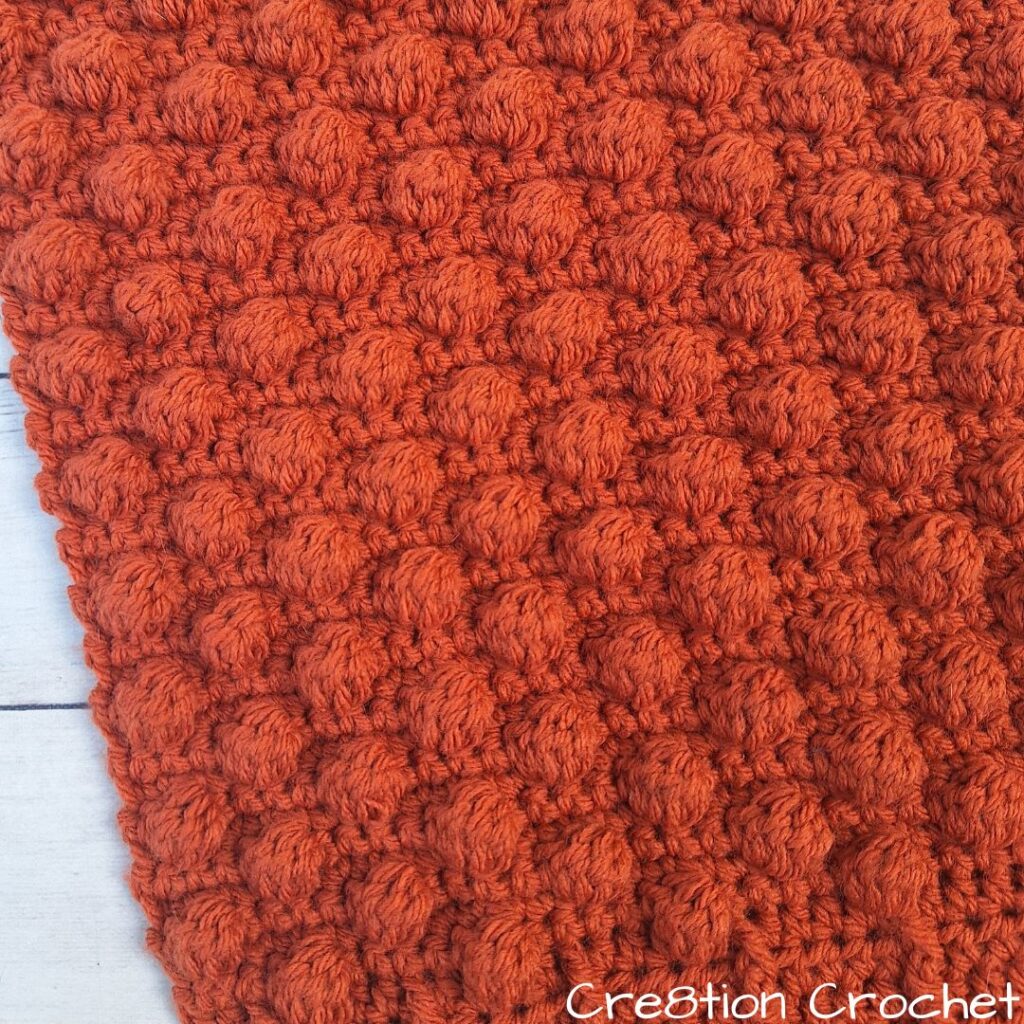
Section 5, Bobblish Section Notes:
We will alternate between a textured row that combines bobble stitches and single crochets, followed by a row of just single crochet. Each time you are looking at the flat back side, you will work a bobble stitch row so the bobbles will pop out on the front, and each time you are looking at the textured front side, you will work a simple row of single crochet all the way across.
How to Crochet a Bobble: All in the same stitch, (yarn over, insert hook into stitch, yarn over, pull through 2 loops) 4x, yarn over, pull through all 5 loops.
If you want to alter the height, simply add or subtract rows ending after completing a bobble stitch row, which is worked from the back side of the fabric, so the Suzette stitch row can begin from the front of the fabric.
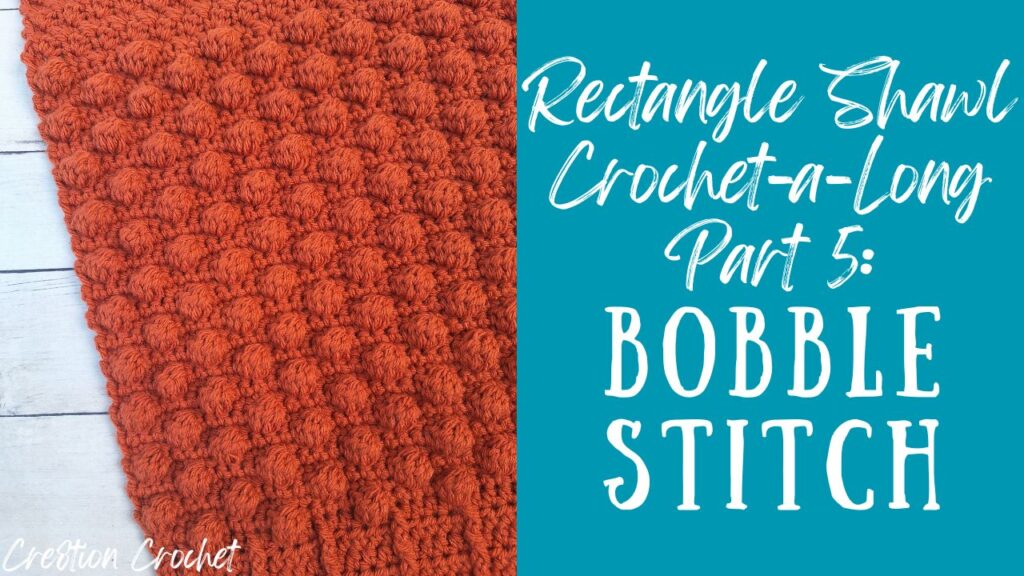
Section 5, Bobble Stitch Section Video Tutorial:
Section 6, Suzette Section Notes:
This section is a simple 1 row repeat where you work a single crochet and double crochet into the same stitch and skip the next stitch. By skipping the stitch in between, it makes the cluster slant to the side, and by turning at the end of each row, it creates a fabric with beautiful texture from the clusters slanting opposite directions.
If you want to alter the height, simply add or subtract rows by any number desired. Personally, I like to end after completing a row worked from the front side of the fabric, so the border row can begin from the back side of the fabric, which is opposite the last Suzette stitch row and Row 1 of the half double crochet pattern, but the change in the appearance of the fabric is subtle so completely up to you.
Section 6, Suzette Stitch Section Video Tutorial:
COMING SOON
Section 7, Border Section Notes:
Because of the different stitch multiples for each section, the edges of your project will appear uneven. Adding the border helps even up the edges and provide a nice polished finish. You may opt not to work a border, and just block your finished piece. Completely up to you. The design has been worked with a border in mind so the finished size may be a little smaller without a border, but can be blocked to size.
I am working a simple single crochet round, but you can change that stitch up to any that you like, or add additional rounds to the border.
Work the border stitches as close to the side edge as you can, not in between the last 2 stitches of the row- this includes working right into the center of the last stitch where applicable – otherwise you will end up with a lacy edging.
Working evenly means: 3 stitches per 2 rows of the Haylee, Octavia and Suzette sections, 2 stitches per 1 row of the Grace Tinley section and 1 stitch per 1 row of the Little Pebbles and Bobblish sections.
I am working my corners as (SC, chain 2, SC), which will give me a more square corner. Another way you can do this is (SC, HDC, SC) into the same stitch. If you like a more round corner, you can work a (SC, chain 1, SC) or 3 SC into the same stitch.
If you experience ruffling when working the border, this is caused from a change, especially seen on the sides. My quick fix is to simply go down a hook size to a G6/4.25mm. You can also continue with the same hook you’ve been working with, and just block the finished project.
I finished my border with a slip stitch join, but you could also finish your border with an invisible join, which creates a clean, consistent look. Either way, this stitch will count as the final stitch for the border.
Section 7, Single Crochet Border Video Tutorial:
COMING SOON
Crochet Rectangle Shawl Pattern:
16″ by 60″ Size:
Section 1: Half Double Crochet – 16″ wide by 10 1/8″ tall
Chain 58. Work 1 HDC into the 3rd chain from the hook, and into each chain all the way across the chain. (57 HDC)
R2 – 29: Chain 1, and turn. Work 1 HDC into the first HDC, and into each HDC across the row. (57 HDC)
Section 2: Little Pebbles – 20 1/8″ tall
R1 (from back side): Chain 1, and turn. SC into the first stitch, then the repeat for the row begins here: (TR into the next stitch, SC into the next stitch) across. (57 stitches)
R2 (from front side): Chain 1, and turn. Work 1 SC into the first stitch, and into each stitch across the row. (57 stitches)
R3 – 37: Continue repeating a Row 1 followed by a Row 2, ending after finishing a Row 1.
Section 3: Grace Tinley – 29 3/4″ tall
R1 (from front side): Chain 2 (counts as a DC), and turn. 2 DC into the first stitch, skip each of the next 2 stitches, 1 DC into the next stitch, then we’ll begin our first decrease over this same stitch as the DC and the next stitch.
In the same stitch: yarn over, insert your hook into the stitch, yarn over and pull through (3 loops on the hook). Yarn over and pull through 2 loops only, leaving 2 loops on your hook. Yarn over, insert your hook into the next stitch, yarn over and pull through (4 loops on your hook). Yarn over and pull through all 4 loops.
Skip each of the next 2 stitches. Now the repeat for the row begins here: (3 DC into the next stitch, skip each of the next 2 stitches) across to the 5th stitch from the end. In that 5th stitch we’ll begin our decrease: yarn over, insert your hook into the stitch, yarn over and pull through (3 loops on the hook). Yarn over and pull through 2 loops only, leaving 2 loops on your hook. Yarn over, insert your hook into the next stitch, yarn over and pull through (4 loops on your hook). Yarn over and pull through all 4 loops.
Then, work 1 more DC into the same stitch that the second half of the decrease was worked into. Skip each of the next 2 stitches, work 1 DC into the last stitch. (55 stitches)
R2 – 21: Chain 2, and turn. Work 2 DC into the first stitch, skip each of the next 2 stitches, then the repeat for the row begins here: (3 DC into the next stitch, skip each of the next 2 stitches) across, 1 DC into the last stitch. (55 stitches)
Section 4: Octavia with Front & Back Post Stitches – 39 1/8″ tall
R1 (from back side): Chain 1, and turn. HDC into each of the 1st 2 stitches, BPDC around the post of the next stitch, then the repeat for the row begins here: (HDC into the top of each of the next 4 stitches, BPDC around the post of the next stitch) across. HDC into each of the last 2 stitches. (55 stitches)
R2 (from front side): Chain 1, and turn. HDC into each of the 1st 2 stitches, FPDC around the post of the next stitch, then the repeat for the row begins here: (HDC into the top of each of the next 4 stitches, FPDC around the post of the next stitch) across. HDC into each of the last 2 stitches. (55 stitches)
R3 – 27: Continue repeating a Row 1 followed by a Row 2, ending after working a back post stitch row.
R28: Chain 1, and turn. HDC into each of the 1st 2 stitches, FPDC around the post of the next stitch, HDC into the same stitch as the post stitch just worked, then the repeat for the row begins here: (HDC into the top of each of the next 4 stitches, FPDC around the post of the next stitch) across to the last 7 stitches. Add a HDC into the same stitch as the last post stitch, then HDC into each of the next 4 stitches, FPDC around the post of the next stitch, HDC into each of the last 2 stitches. (57 stitches)
Section 5: Bobblish with Staggered Bobble Stitches – 49″ tall
R1 (from back side): Chain 1, and turn. SC into each of the 1st 4 stitches, Bobble in the next stitch, (SC into each of the next 5 stitches, Bobble in the next stitch) across to the last 4 stitches, then work 1 SC into each of the last 4 stitches. (57 stitches)
R2 (from front side): Chain 1, and turn. SC into the 1st stitch, and each stitch across. (57 SC)
R3: Chain 1, and turn. SC into the 1st SC, Bobble in the next SC, (SC into each of the next 5 SC, Bobble in the next SC) across to the last SC, then SC into the last SC. (57 stitches)
R4: Chain 1, and turn. SC into the 1st stitch, and each stitch across. (57 SC)
R5 – 41: Repeat Rows 1 – 4, ending after finishing a bobble stitch row.
Now you’re ready for Part 6.
18″ by 75″ Size:
Section 1: Half Double Crochet – 16″ wide by 12 1/8″ tall
Chain 64. Work 1 HDC into the 3rd chain from the hook, and into each chain all the way across the chain. (63 HDC)
R2 – 35: Chain 1, and turn. Work 1 HDC into the first HDC, and into each HDC across the row. (63 HDC)
Section 2: Little Pebbles – 25″ tall
R1 (from back side): Chain 1, and turn. SC into the first stitch, then the repeat for the row begins here: (TR into the next stitch, SC into the next stitch) across. (63 stitches)
R2 (from front side): Chain 1, and turn. Work 1 SC into the first stitch, and into each stitch across the row. (63 stitches)
R3 – 46: Continue repeating a Row 1 followed by a Row 2, ending after finishing a Row 1.
R47: Chain 1, and turn. SC into the first stitch, then the repeat for the row begins here: (TR into the next stitch, SC into the next stitch) across to the last 6 stitches. In the next stitch (which is the 5th from the end), work 2 SC into the same stitch, then (TR into the next stitch, SC into the next stitch) 2x. (64 stitches)
Section 3: Grace Tinley – 37 1/4″ tall
R1 (from front side): Chain 2, and turn. 2 DC into the first stitch, skip each of the next 2 stitches, then the repeat for the row begins here: (3 DC into the next stitch, skip each of the next 2 stitches) across, 1 DC into the last stitch. (64 stitches)
R2 – 27: Chain 2, and turn. Work 2 DC into the first stitch, skip each of the next 2 stitches, then the repeat for the row begins here: (3 DC into the next stitch, skip each of the next 2 stitches) across, 1 DC into the last stitch. (64 stitches)
Section 4: Octavia with Front & Back Post Stitches – 49 1/4″ tall
R1 (from back side): Chain 1, and turn. HDC into each of the 1st 2 stitches, BPDC around the post of the next stitch, HDC into the top of the same stitch as the BPDC to increase, HDC into each of the next 3 stitches, BPDC around the post of the next stitch, then the repeat for the row begins here: (HDC into the top of each of the next 4 stitches, BPDC around the post of the next stitch) across. HDC into each of the last 2 stitches. (65 stitches)
R2 (from front side): Chain 1, and turn. HDC into each of the 1st 2 stitches, FPDC around the post of the next stitch, then the repeat for the row begins here: (HDC into the top of each of the next 4 stitches, FPDC around the post of the next stitch) across. HDC into each of the last 2 stitches. (65 stitches)
R3: Chain 1, and turn. HDC into each of the 1st 2 stitches, BPDC around the post of the next stitch, then the repeat for the row begins here: (HDC into the top of each of the next 4 stitches, BPDC around the post of the next stitch) across. HDC into each of the last 2 stitches. (65 stitches)
R4 – 35: Continue repeating a Row 1 followed by a Row 2, ending after working a back post stitch row.
R36: Chain 1, and turn. HDC into each of the 1st 2 stitches, FPDC around the post of the next stitch, HDC into each of the next 2 stitches, then we’ll decrease over the next 2 stitches.
In the next stitch: yarn over, insert your hook into the stitch, yarn over and pull through (3 loops on the hook). Yarn over, insert your hook into the next stitch, yarn over and pull through (4 loops on your hook). Yarn over and pull through all 4 loops.
FPDC around the post of the next stitch, then the repeat for the row begins here: (HDC into the top of each of the next 4 stitches, FPDC around the post of the next stitch) across to the last 7 stitches. Starting in that 7th stitch from the end, we’re going to begin our next decrease.
In the next stitch: yarn over, insert your hook into the stitch, yarn over and pull through (3 loops on the hook). Yarn over, insert your hook into the next stitch, yarn over and pull through (4 loops on your hook). Yarn over and pull through all 4 loops.
HDC into each of the next 2 stitches, FPDC around the post of the next stitch, HDC into each of the last 2 stitches. (63 stitches)
Section 5: Bobblish with Staggered Bobble Stitches – 61 5/8″ tall
R1 (from back side): Chain 1, and turn. SC into each of the 1st 4 stitches, Bobble in the next stitch, (SC into each of the next 5 stitches, Bobble in the next stitch) across to the last 4 stitches, then work 1 SC into each of the last 4 stitches. (63 stitches)
R2 (from front side): Chain 1, and turn. SC into the 1st stitch, and each stitch across. (63 SC)
R3: Chain 1, and turn. SC into the 1st SC, Bobble in the next SC, (SC into each of the next 5 SC, Bobble in the next SC) across to the last SC, then SC into the last SC. (63 stitches)
R4: Chain 1, and turn. SC into the 1st stitch, and each stitch across. (63 SC)
R5 – 50: Repeat Rows 1 – 4, ending after finishing a single crochet row.
R51: Chain 1, and turn. SC into the 1st SC, Bobble in the next SC, (SC into each of the next 5 SC, Bobble in the next SC) across to the last SC, then work 2 SC into the last SC. (64 stitches)
Now you’re ready for Part 6.
20″ by 100″ Size:
Section 1: Half Double Crochet – 19 3/8″ wide by 16 3/8″ tall
Chain 70. Work 1 HDC into the 3rd chain from the hook, and into each chain all the way across the chain. (69 HDC)
R2 – 47: Chain 1, and turn. Work 1 HDC into the first HDC, and into each HDC across the row. (69 HDC)
Section 2: Little Pebbles – 32 7/8″ tall
R1 (from back side): Chain 1, and turn. SC into the first stitch, then the repeat for the row begins here: (TR into the next stitch, SC into the next stitch) across. (69 stitches)
R2 (from front side): Chain 1, and turn. Work 1 SC into the first stitch, and into each stitch across the row. (69 stitches)
R3 – 60: Continue repeating a Row 1 followed by a Row 2, ending after finishing a Row 1.
R61: Chain 1, and turn. SC into the first stitch, then the repeat for the row begins here: (TR into the next stitch, SC into the next stitch) across to the last 6 stitches. In the next stitch (which is the 5th from the end), work 2 SC into the same stitch, then (TR into the next stitch, SC into the next stitch) 2x. (70 stitches)
Section 3: Grace Tinley – 49 3/4″ tall
R1 (from front side): Chain 2, and turn. 2 DC into the first stitch, skip each of the next 2 stitches, then the repeat for the row begins here: (3 DC into the next stitch, skip each of the next 2 stitches) across, 1 DC into the last stitch. (70 stitches)
R2 – 37: Chain 2, and turn. Work 2 DC into the first stitch, skip each of the next 2 stitches, then the repeat for the row begins here: (3 DC into the next stitch, skip each of the next 2 stitches) across, 1 DC into the last stitch. (70 stitches)
Section 4: Octavia with Front & Back Post Stitches – 65 3/4″ tall
R1 (from back side): Chain 1, and turn. HDC into each of the 1st 2 stitches, BPDC around the post of the next stitch, then the repeat for the row begins here: (HDC into the top of each of the next 4 stitches, BPDC around the post of the next stitch) across. HDC into each of the last 2 stitches. (70 stitches)
R2 (from front side): Chain 1, and turn. HDC into each of the 1st 2 stitches, FPDC around the post of the next stitch, then the repeat for the row begins here: (HDC into the top of each of the next 4 stitches, FPDC around the post of the next stitch) across. HDC into each of the last 2 stitches. (70 stitches)
R3 – 47: Continue repeating a Row 1 followed by a Row 2, ending after working a back post stitch row.
R48: Chain 1, and turn. HDC into each of the 1st 2 stitches, FPDC around the post of the next stitch, then the repeat for the row begins here: (HDC into the top of each of the next 4 stitches, FPDC around the post of the next stitch) across to the last 7 stitches. Starting in that 7th stitch from the end, we’re going to begin our decrease.
In the next stitch: yarn over, insert your hook into the stitch, yarn over and pull through (3 loops on the hook). Yarn over, insert your hook into the next stitch, yarn over and pull through (4 loops on your hook). Yarn over and pull through all 4 loops.
HDC into each of the next 2 stitches, FPDC around the post of the next stitch, HDC into each of the last 2 stitches. (69 stitches)
Section 5: Bobblish with Staggered Bobble Stitches – 82 3/8″ tall
R1 (from back side): Chain 1, and turn. SC into each of the 1st 4 stitches, Bobble in the next stitch, (SC into each of the next 5 stitches, Bobble in the next stitch) across to the last 4 stitches, then work 1 SC into each of the last 4 stitches. (69 stitches)
R2 (from front side): Chain 1, and turn. SC into the 1st stitch, and each stitch across. (69 SC)
R3: Chain 1, and turn. SC into the 1st SC, Bobble in the next SC, (SC into each of the next 5 SC, Bobble in the next SC) across to the last SC, then SC into the last SC. (69 stitches)
R4: Chain 1, and turn. SC into the 1st stitch, and each stitch across. (69 SC)
R5 – 68: Repeat Rows 1 – 4, ending after finishing a single crochet row.
R69: Chain 1, and turn. SC into each of the 1st 4 SC, Bobble in the next SC, (SC into each of the next 5 SC, Bobble in the next SC) across to the last 4 SC. Work 1 SC into each of the next 3 SC, 2 SC into the last SC. (70 stitches)
Now you’re ready for Part 6.
Feel free to use this information to make and sell your own items. When sharing, designer credit is appreciated, but not required. All Cre8tion Crochet Patterns, Photos and PDF’s are protected under copyright. They are not to be copied, distributed or sold – doing so is copyright infringement and stealing! DO NOT copy and paste my pattern anywhere, and DO NOT share the written pattern with others, share the link to the pattern instead so others can find it themselves.
Join one of our awesome Facebook groups to share your creations, and see what others are up to!
– Yarn Crafts & Coffee Community
– DIY Home On Rockwood Lane
– Alexandra Lane Lifestyle


Leave a Reply