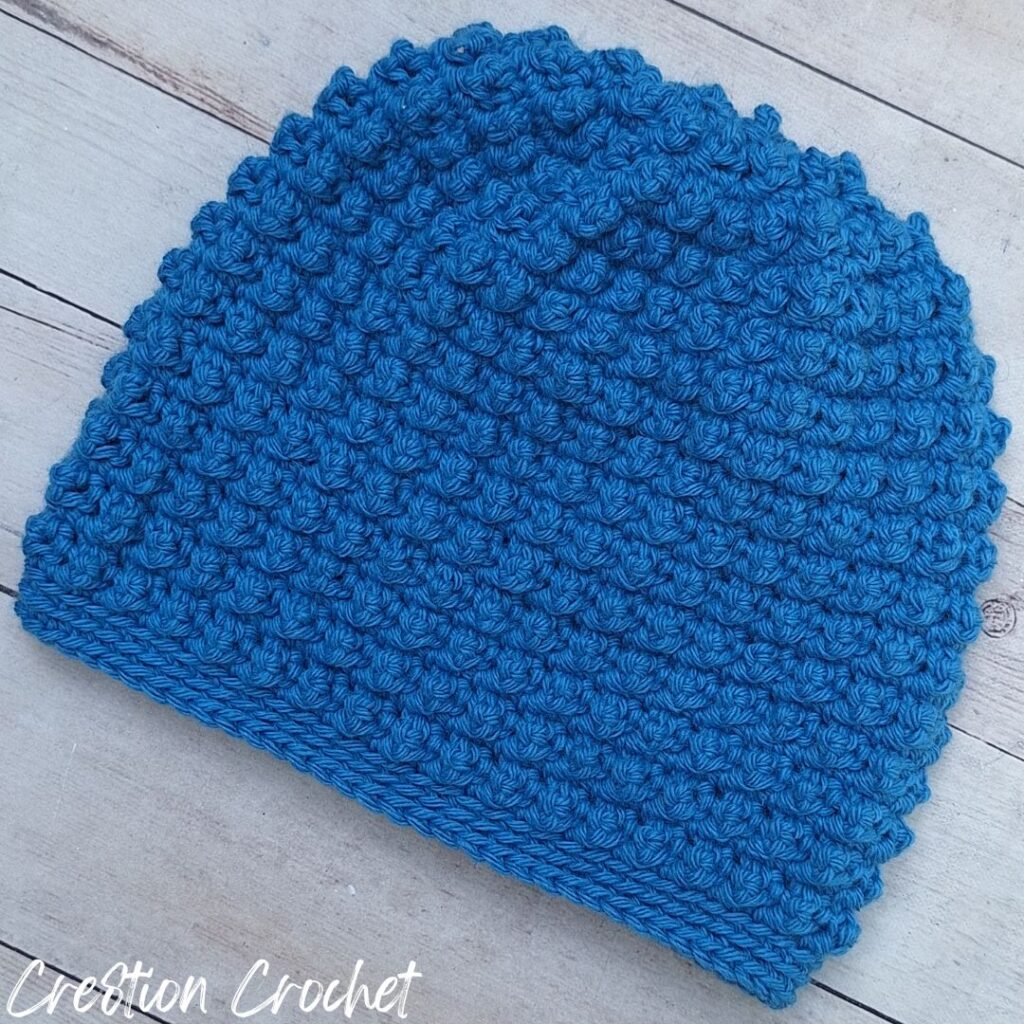
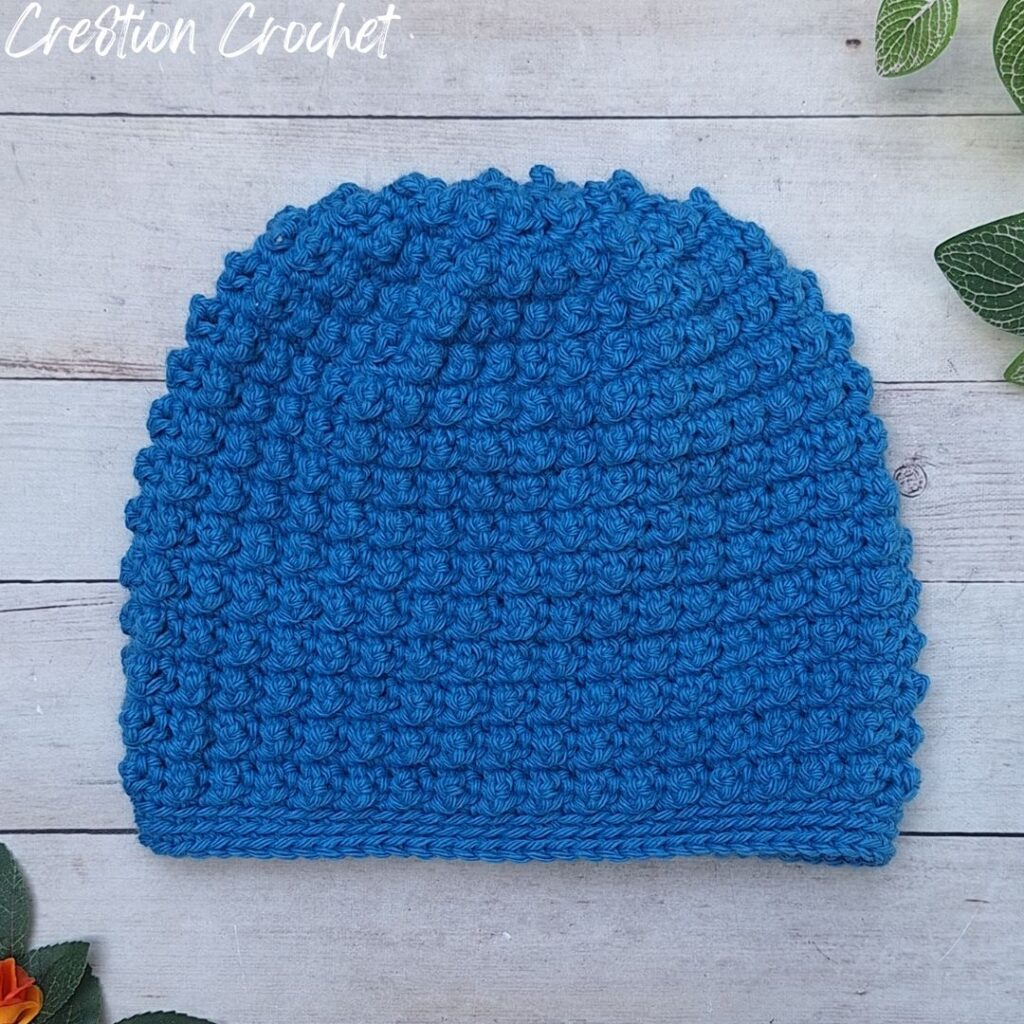
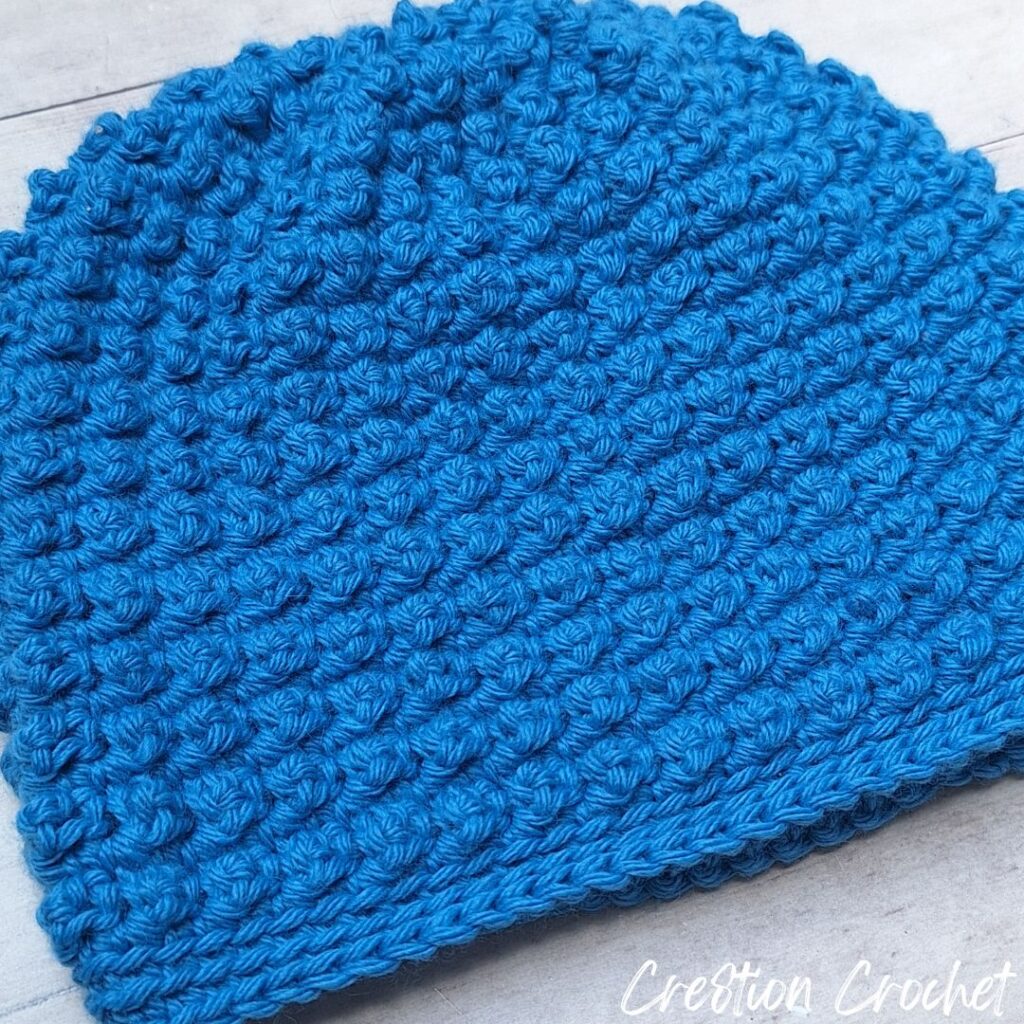
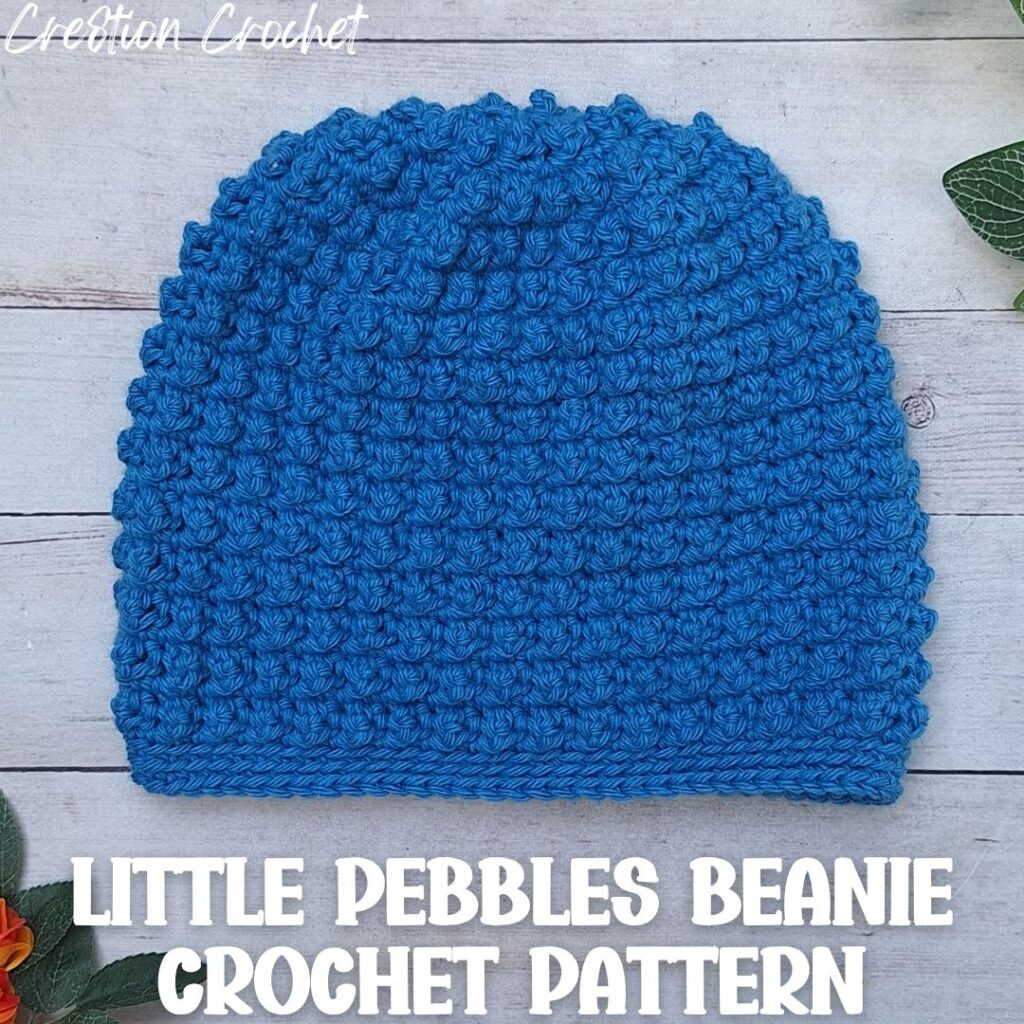
This is a free crochet pattern showing how to crochet the Little Pebbles Beanie, which is a fun crocheted beanie worked in a combination of single crochets and treble crochets to create a cozy, textured crochet pattern and your favorite worsted weight yarn.
This post contains affiliate links for WeCrochet, Amazon and Etsy. If you make a purchase by clicking on them, I make a small commission at no extra cost to you. Thanks for your support!
Find the free crochet pattern instructions below, or purchase a printer-friendly, ad-free PDF on Ravelry by clicking here.
Short on time? Pin it for later when you have more time.
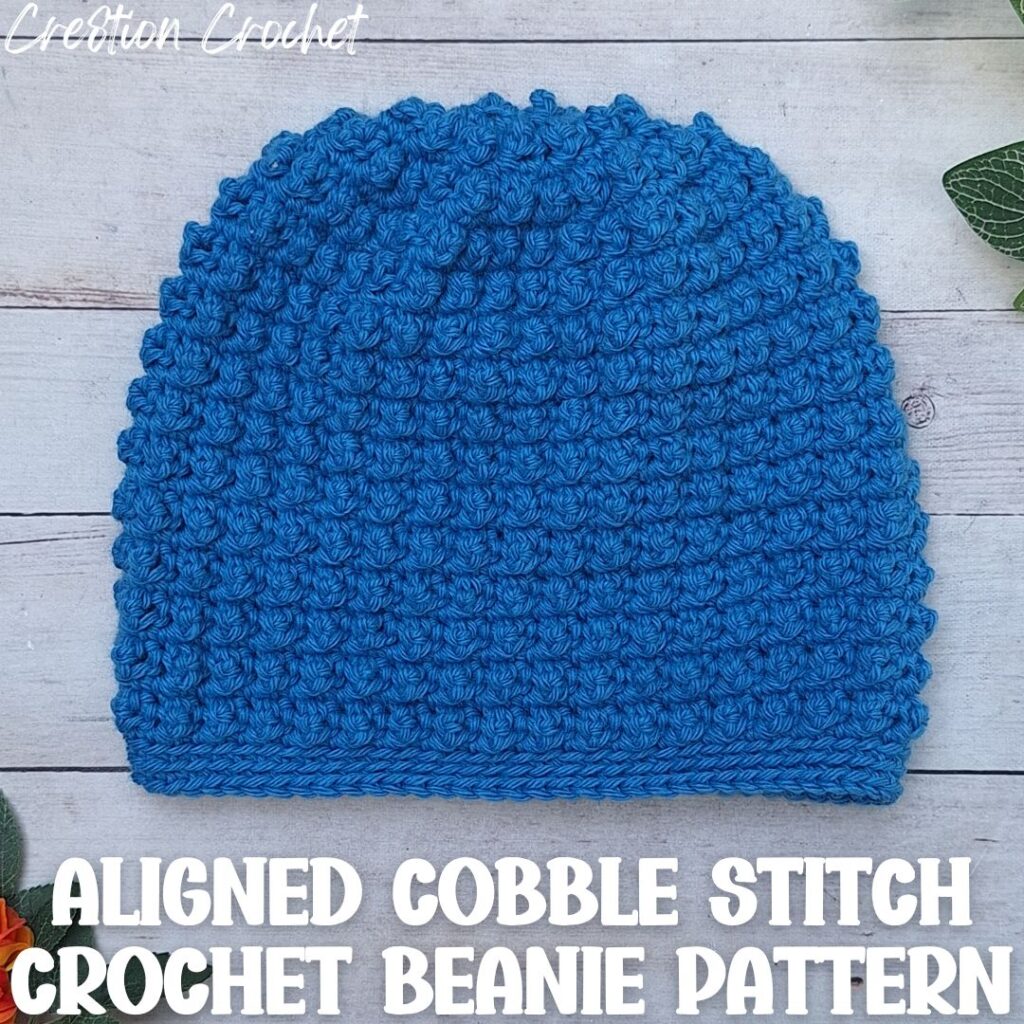
I am honored to be returning to participate in this year’s Crochet Cancer Challenge hosted by Christine from Sweet Potato 3 with a cozy, textured beanie worked in the aligned cobble stitch. I’ve chosen the color light blue for Prostate Cancer in honor of two special gentlemen in my life – in their respect, I’ll leave it at that.

The Crochet Cancer Challenge is a beautiful charity event where each day in the month of October, you can download a different free crochet pattern, and each download = 1 pledge for making and donating a hat using that pattern. Many of the beanies/hats are available for the entire month of October so I’ve you’ve missed any, you still have time on many of them to download the PDF – all the details found on the Sweet Potato 3 blog.
In Previous Crochet Cancer Challenges, I shared these Free Crochet Beanie Patterns:

Octavia Beanie in honor of Leiomyosarcoma, or LMS.

Lightweight Grace Tinley Beanie in honor of Pancreatic Cancer.

Striped Dylan Claire Beanie (over on my sister blog, EyeLoveKnots) in honor of Retinoblastoma and Childhood Cancer.

Please visit with Christine at Sweet Potato 3 to get all the details for this Crochet Cancer Challenge, download free printable tags for your beanies, and get the schedule for each free pattern including her beautiful Brave Spirit Beanie.
Aligned Cobble Stitch Crochet Patterns:
Little Pebbles is a fun texture line that features a combination of single crochets and treble crochets to create an amazing texture that keeps it’s shape well and is not too bulky. These projects have a simple two row repeat making them great projects to pair with watching your favorite TV show or movie.
Find more Little Pebbles accessory and home decor crochet patterns on EyeLoveKnots, and Little Pebbles accessory and wearables crochet patterns here on Cre8tion Crochet.
You May Also Like:
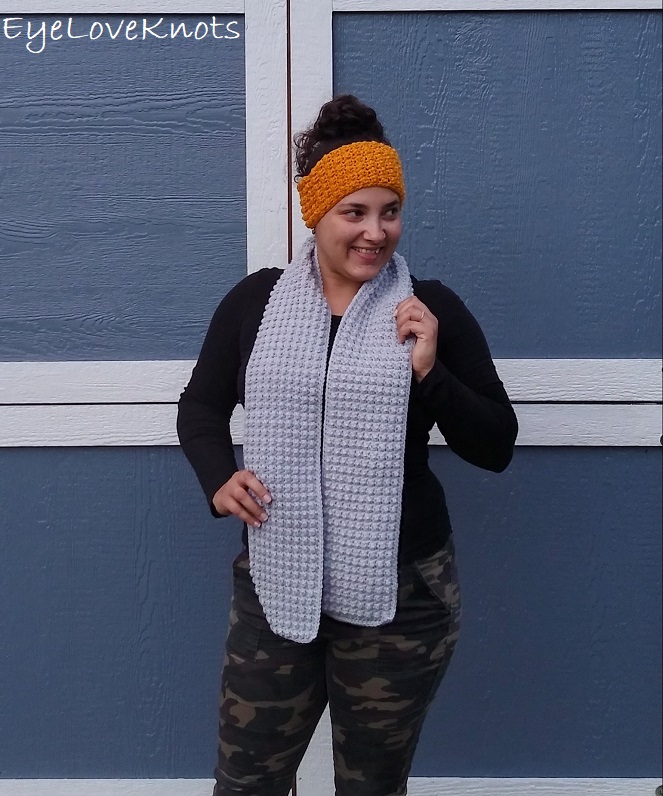
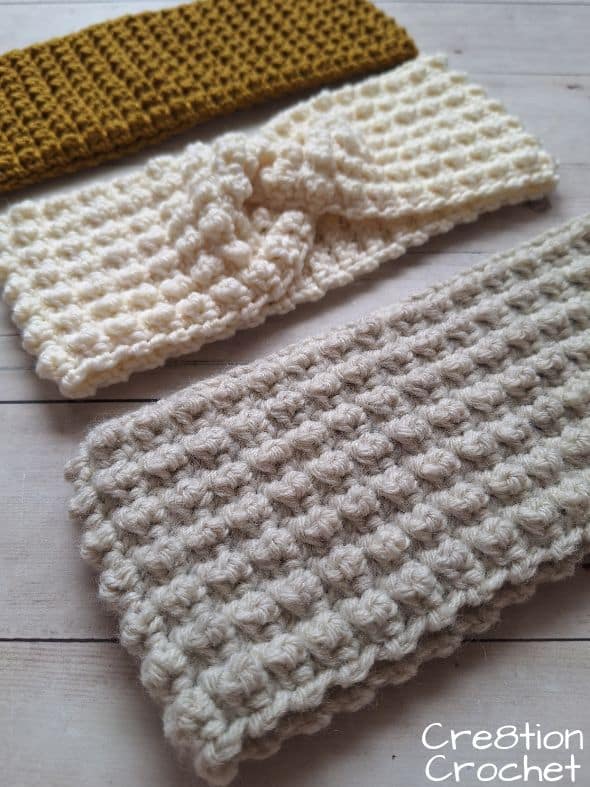
Lightweight Yarn Little Pebbles Earwarmer (Top)
Twisted Little Pebbles Earwarmer (Middle)
Worsted Weight Little Pebbles Earwarmer 2 Ways (Bottom)
Ad-Free Printer Friendly PDF:

Cre8tion Crochet newsletter subscribers get access to Exclusive Subscriber Content, like the free PDF of this pattern via the Free File Library – you’ll find the tab on the top menu. The library is password protected so sign up for my newsletter and you’ll receive a Welcome email containing this month’s password, or if you are already a blog subscriber, reference your latest newsletter for this month’s password. From the library, you’ll be able to access the PDFs via Google Drive – you do not need to have a Google Drive account to view and download the PDF.
For a Limited Time…
Through 10/31/25 at 11:59pm EST, you can grab a free copy of the PDF for the Little Pebbles Beanie on Ravelry using the code found inside Sweet Potato 3’s 2025 Crochet Cancer Challenge post. We both earn our income from the number of pageviews our blogs see, so please do not share the code, but instead share the link to this post or the Crochet Cancer Challenge post so others can find it. Thank you!
After 10/31/25 or for non-subscribers, if you would like a PDF version of this post, you may get one through either my Etsy Shop or Ravelry Shop for a small fee. This fee is to compensate for the views lost when you no longer need to return to the blog to for the information, as you will have your own copy.
In a hurry? Pin this for later when you have more time!


Save this to Your Favorites on: AllFreeCrochet, FaveCrafts, Cheap Thrifty Living, DIYideaCenter, Crochet Pattern Bonanza, AllFreeHolidayCrafts, Free Crochet Tutorials
What Supplies Do I Need to Crochet Beanie?
- 63 – 305 Yards of Worsted Weight #4 Weight Yarn – I used Berroco Vintage in Horizon Blue colorway
- H8/5mm Crochet Hook
- Tapestry Needle
- Soft Tape Measure – Gauge is Essential
Berroco Vintage is comprised of 52% Acrylic, 40% Wool, and 8% Nylon and comes in a hank that is 218 yards, or 100 grams.
Yardage By Size:
- Newborn: 63 Yards (or 29 Grams)
- 3 – 6 Months: 81 Yards (or 37 Grams)
- 6 – 12 Months: 120 Yards (or 55 Grams)
- Toddler: 134 Yards (or 61 Grams)
- Child: 206 Yards (or 95 grams)
- Teen/Adult Small: 234 Yards (or 107 Grams)
- Adult Large: 305 Yards (or 140 Grams)
Material Notes:
Recently, I’ve learned from my friend Krissy of Krissy’s Over the Mountain Crochet that as a beanie for cancer patients, the best yarn for a sensitive head is going to be a bamboo blend, like Berroco Modern Cotton or Lion Brand Coboo. Some can tolerate 100% acrylic or wool, but not all can. With this said, if you’ll be donating your beanie, I recommend looking up the requirements from the organization. Some say not to use wool yarns. Some say not to use Red Heart Super Saver (though I think this is a great yarn that really softens nicely after washing, and wears and washes so well). Some request the beanies to be washed prior to donating. Each has it’s own set of guidelines so you’ll want to check with the organization first.
As a cold weather beanie, animal fibers are better for keeping warm against the wind, and while alpaca works great, my go-to is always a 100% superwash merino wool, like WeCrochet Swish Yarn, or a wool and acrylic blend, like Lion Brand Wool Ease and Berroco Vintage. All of these that I’ve mentioned hold up well to wear and tear and machine washing and drying.
If you’re looking for an acrylic yarn, and can’t use Red Heart Super Saver, or want to try something different, I have heard some great things about Lion Brand Heartland yarn for wearables, though I haven’t tried it yet myself.
I love my ergonomic clay hooks from SiennasBowtique and BronzeShepherdStudio! They both have so many fun designs – I have several from each shop because they’re so darn cute and nice to hold onto! We also have lots of beautiful, handcrafted crochet hooks in our Yarn Crafts and Coffee Yarn Shop as well!
Measurements:
If you haven’t worked a top down beanie in single crochets before, they are different than half double crochet beanies, which are worked 3″ smaller than the head circumference, and double crochet beanies, which are worked 2″ smaller than the head circumference, and that is that they are worked 4″ smaller than the head circumference.
The Newborn Size fits up to 3 months a head circumference of 13″ – 14″. The crown diameter will be 3 1/8″ and the finished length will be 5 1/8″.
The 3 – 6 Size head circumference is 14″ – 16″. The crown diameter will be 3 7/8″ and the finished length will be 5 3/8″.
The 6 – 12 Size head circumference is 17″ – 19″. The crown diameter will be 4 5/8″ and the finished length will be 5 3/4″.
The Toddler Size head circumference is 18″ – 20″. The crown diameter will be 5 1/8″ and the finished length will be 6 1/2″.
The Child Size head circumference is 20″ – 22″. The crown diameter will be 5 5/8″ and the finished length will be 7 1/8″.
The Teen/Adult Small Size fits the average teen/woman’s size head circumference of about 22″. The crown diameter will be 5 5/8″ and the finished length will be 8 3/8″.
The Adult Large Size head circumference is 22″ – 23″. The crown diameter will be 6″ and the finished length will either be 8 1/2″ or 9 1/2″.
*If you are concerned with the size (or want to make a different size), take your tape measure out and measure around your head just above your eyebrows. The distance around is the circumference. You will need to use this equation to figure out what size diameter you will need: Your Circumference – 4” / 3.14 (pi) = crown diameter. 4” is the amount of stretch for acrylic, wool, and similar
Gauge – Measured in Pattern at the end of Round 4:
- 10 stitches = 3 1/8″
- 12 stitches = 3 3/8″
Gauge it very important for beanies. If you do not meet gauge, and continue making your beanie, the finished size will either be too small or too big so make sure to check it at the end of Round 4.
If you’re measuring smaller than the given measurements, go up a crochet hook size and rework the sample. If you’re measuring larger than the given measurements, go down a crochet hook size and rework the sample. Take gauge again, and see where you are.
Abbreviations (US Terms):
- SC – Single Crochet (Photo Tutorial)
- TR – Treble Crochet
- BLO – Back Loop Only (Photo Tutorial)
Pattern Notes:

I work my crown and body differently than most to help keep my seam straight, and that is that the first stitch from the first set of increases is done in the first stitch of the round, which will appear just to left of the beginning chain, then the round will be worked as normal, and the final stitch of the round will be the second stitch of the first set of increases, and it will be worked into the same stitch as the first, and appear just to the right of the beginning chain. The photo above shows where the first and last stitch are worked, and I have a photo tutorial of this technique in my How to Keep a Straight Seam post. You can work in your preferred increase method as long as we end up with the same stitches at the end of the round.
Slip stitch join to the first stitch of each round.
Aligned Cobble Stitch Beanie Hat Written Pattern:
Newborn Size:
Chain 5. Slip stitch join to form a ring. Chain 1. Hold the tail end to what is currently the front side that you are looking at – this is not like you are used to working and that is because we are currently looking at the wrong side and the texture will pop out on the back side as we work. The tail end will begin by laying on top of the left side chains and move counter clockwise as you work around. (SC into the ring, TR into the ring) 5x. Join. (10 stitches)
R2: Chain 1, and turn. SC into the 1st stitch, 2 SC into each of the next 9 stitches, SC into the last stitch. Join. (20 SC)
R3: Chain 1, and turn. SC into the 1st stitch, TR into the next stitch, SC into the next stitch, TR into the same stitch, SC into the next stitch, [TR into the next stitch, SC into the same stitch, TR into the next stitch, then SC into the next stitch, TR into the same stitch, SC into the next stitch] around, TR into the last stitch. (30 stitches)
R4: Chain 1, and turn. SC into the 1st 3 stitches, (2 SC into the next stitch, SC into each of the next 2 stitches) 9x, SC into the last stitch. Join. (40 SC)
Checkpoint: Stop here, and measure the diameter to ensure the finished beanie will fit correctly. You’ll want your diameter to measure 3 1/8″.
R5: Chain 1, and turn. SC into the 1st stitch, (TR into the next stitch, SC into the next stitch) 19x, TR into the last stitch. Join. (40 stitches)
R6: Chain 1, and turn. SC into the 1st stitch, and each stitch around. Join. (40 SC)
R7 – 16: Repeat Rounds 5 and 6.
The current height of your beanie, laying flat, should be about 4 1/2″ – 4 5/8″ tall. Now, you can choose to finish in the back loop only (Option #1), as shown on the original blue beanie, or continue in the same pattern as the body (Option #2) to finish. The finished height will be about 5″ – 5 1/8″ tall. Add or take away rounds as needed to reach this (or your desired) height.
Option #1, R17 – 18 (as shown in photos): Chain 1, but don’t turn. In the BLO: 1 SC into the 1st stitch, and each stitch around. Join only after the very last stitch. (40 SC)
Option #2, R17 – 18: Repeat Rounds 5 and 6.
Fasten off, and weave in ends.
3-6 Month Size:
Chain 5. Slip stitch join to form a ring. Chain 1. Hold the tail end to what is currently the front side that you are looking at – this is not like you are used to working and that is because we are currently looking at the wrong side and the texture will pop out on the back side as we work. The tail end will begin by laying on top of the left side chains and move counter clockwise as you work around. (SC into the ring, TR into the ring) 5x. Join. (10 stitches)
R2: Chain 1, and turn. SC into the 1st stitch, 2 SC into each of the next 9 stitches, SC into the last stitch. Join. (20 SC)
R3: Chain 1, and turn. SC into the 1st stitch, TR into the next stitch, SC into the next stitch, TR into the same stitch, SC into the next stitch, [TR into the next stitch, SC into the same stitch, TR into the next stitch, then SC into the next stitch, TR into the same stitch, SC into the next stitch] around, TR into the last stitch. (30 stitches)
R4: Chain 1, and turn. SC into the 1st 3 stitches, (2 SC into the next stitch, SC into each of the next 2 stitches) 9x, SC into the last stitch. Join. (40 SC)
R5: Chain 1, and turn. SC into the 1st stitch, TR into the next stitch, SC into the next stitch, TR into the next stitch, (SC into the next stitch, TR into the same stitch, SC into the next stitch, TR into the next stitch, SC into the next stitch), and now the repeat: [(TR into the next stitch, SC into the same stitch, TR into the next stitch, SC into the next stitch, TR into the next stitch) then (SC into the next stitch, TR into the same stitch, SC into the next stitch, TR into the next stitch, SC into the next stitch)] around, TR into the last stitch. (50 stitches)
Checkpoint: Stop here, and measure the diameter to ensure the finished beanie will fit correctly. You’ll want your diameter to measure 3 7/8″.
R6: Chain 1, and turn. SC into the 1st stitch, (TR into the next stitch, SC into the next stitch) 24x, TR into the last stitch. Join. (50 stitches)
R7: Chain 1, and turn. SC into the 1st stitch, and each stitch around. Join. (50 SC)
R8 – 16: Repeat Rounds 6 and 7.
The current height of your beanie, laying flat, should be about 4 5/8″ tall. Now, you can choose to finish in the back loop only (Option #1), as shown on the original blue beanie, or continue in the same pattern as the body (Option #2) to finish. The finished height will be about 5 3/8″ – 5 1/2″ tall. Add or take away rounds as needed to reach this (or your desired) height.
Option #1, R17 (as shown in photos): Chain 1, and turn so the front side is facing. In the BLO: 1 SC into the 1st stitch, and each stitch around. Don’t join. (50 SC)
Option #1, R18 – 19 (as shown in photos): Chain 1, but don’t turn. In the BLO: 1 SC into the 1st stitch, and each stitch around. Join only after the very last stitch. (50 SC)
Option #2, R17 – 19: Repeat Rounds 7 and 8.
Fasten off, and weave in ends.
6-12 Month Size:
Chain 6. Slip stitch join to form a ring. Chain 1. Hold the tail end to what is currently the front side that you are looking at – this is not like you are used to working and that is because we are currently looking at the wrong side and the texture will pop out on the back side as we work. The tail end will begin by laying on top of the left side chains and move counter clockwise as you work around. (SC into the ring, TR into the ring) 6x. Join. (12 stitches)
R2: Chain 1, and turn. SC into the 1st stitch, 2 SC into each of the next 11 stitches, SC into the last stitch. Join. (24 SC)
R3: Chain 1, and turn. SC into the 1st stitch, TR into the next stitch, SC into the next stitch, TR into the same stitch, SC into the next stitch, [TR into the next stitch, SC into the same stitch, TR into the next stitch, then SC into the next stitch, TR into the same stitch, SC into the next stitch] around, TR into the last stitch. (36 stitches)
R4: Chain 1, and turn. SC into the 1st 3 stitches, (2 SC into the next stitch, SC into each of the next 2 stitches) 11x, SC into the last stitch. Join. (48 SC)
Checkpoint #1: Stop here, and measure the diameter to check gauge. You’ll want your diameter to measure 3 3/8″.
R5: Chain 1, and turn. SC into the 1st stitch, TR into the next stitch, SC into the next stitch, TR into the next stitch, (SC into the next stitch, TR into the same stitch, SC into the next stitch, TR into the next stitch, SC into the next stitch), and now the repeat: [(TR into the next stitch, SC into the same stitch, TR into the next stitch, SC into the next stitch, TR into the next stitch) then (SC into the next stitch, TR into the same stitch, SC into the next stitch, TR into the next stitch, SC into the next stitch)] around, TR into the last stitch. (60 stitches)
R6: Chain 1, and turn. SC into the 1st 5 stitches, (2 SC into the next stitch, SC into each of the next 4 stitches) 11x, SC into the last stitch. Join. (72 stitches)
Checkpoint #2: Stop here, and measure the diameter to ensure the finished beanie will fit correctly. You’ll want your diameter to measure 4 5/8″.
R7: Chain 1, and turn. SC into the 1st stitch, (TR into the next stitch, SC into the next stitch) 35x, TR into the last stitch. Join. (72 stitches)
R8: Chain 1, and turn. SC into the 1st stitch, and each stitch around. Join. (72 SC)
R9 – 18: Repeat Rounds 7 and 8.
The current height of your beanie, laying flat, should be about 5 3/8″ tall. Now, you can choose to finish in the back loop only (Option #1), as shown on the original blue beanie, or continue in the same pattern as the body (Option #2) to finish. The finished height will be about 5 3/4″ – 5 7/8″ tall. Add or take away rounds as needed to reach this (or your desired) height.
Option #1, R19 – 20 (as shown in photos): Chain 1, but don’t turn. In the BLO: 1 SC into the 1st stitch, and each stitch around. Join only after the very last stitch. (72 SC)
Option #2, R19 – 20: Repeat Rounds 7 and 8.
Fasten off, and weave in ends.
Toddler Size:
Chain 5. Slip stitch join to form a ring. Chain 1. Hold the tail end to what is currently the front side that you are looking at – this is not like you are used to working and that is because we are currently looking at the wrong side and the texture will pop out on the back side as we work. The tail end will begin by laying on top of the left side chains and move counter clockwise as you work around. (SC into the ring, TR into the ring) 5x. Join. (10 stitches)
R2: Chain 1, and turn. SC into the 1st stitch, 2 SC into each of the next 9 stitches, SC into the last stitch. Join. (20 SC)
R3: Chain 1, and turn. SC into the 1st stitch, TR into the next stitch, SC into the next stitch, TR into the same stitch, SC into the next stitch, [TR into the next stitch, SC into the same stitch, TR into the next stitch, then SC into the next stitch, TR into the same stitch, SC into the next stitch] around, TR into the last stitch. (30 stitches)
R4: Chain 1, and turn. SC into the 1st 3 stitches, (2 SC into the next stitch, SC into each of the next 2 stitches) 9x, SC into the last stitch. Join. (40 SC)
Checkpoint #1: Stop here, and measure the diameter to check gauge. You’ll want your diameter to measure 3 1/8″.
R5: Chain 1, and turn. SC into the 1st stitch, TR into the next stitch, SC into the next stitch, TR into the next stitch, (SC into the next stitch, TR into the same stitch, SC into the next stitch, TR into the next stitch, SC into the next stitch), and now the repeat: [(TR into the next stitch, SC into the same stitch, TR into the next stitch, SC into the next stitch, TR into the next stitch) then (SC into the next stitch, TR into the same stitch, SC into the next stitch, TR into the next stitch, SC into the next stitch)] around, TR into the last stitch. (50 stitches)
R6: Chain 1, and turn. SC into the 1st 5 stitches, (2 SC into the next stitch, SC into each of the next 4 stitches) 9x, SC into the last stitch. Join. (60 stitches)
R7: Chain 1, and turn. SC into the 1st stitch, TR into the next stitch, SC into the next stitch, TR into the next stitch, SC into the next stitch, TR into the next stitch, (SC into the next stitch, TR into the same stitch, SC into the next stitch, TR into the next stitch, SC into the next stitch, TR into the next stitch, SC into the next stitch), and now the repeat: (TR into the next stitch, SC into the same stitch, TR into the next stitch, SC into the next stitch, TR into the next stitch, SC into the next stitch, TR into the next stitch) then (SC into the next stitch, TR into the same stitch, SC into the next stitch, TR into the next stitch, SC into the next stitch, TR into the next stitch, SC into the next stitch)] around, TR into the last stitch. (70 stitches)
Checkpoint #2: Stop here, and measure the diameter to ensure the finished beanie will fit correctly. You’ll want your diameter to measure 5 1/8″.
R9: Chain 1, and turn. SC into the 1st stitch, (TR into the next stitch, SC into the next stitch) 34x, TR into the last stitch. Join. (70 stitches)
R10: Chain 1, and turn. SC into the 1st stitch, and each stitch around. Join. (70 SC)
R11 – 20: Repeat Rounds 9 and 10.
The current height of your beanie, laying flat, should be about 5 7/8″ tall. Now, you can choose to finish in the back loop only (Option #1), as shown on the original blue beanie, or continue in the same pattern as the body (Option #2) to finish. The finished height will be about 6 1/2″ – 6 5/8″ tall. Add or take away rounds as needed to reach this (or your desired) height.
Option #1, R21 – 23 (as shown in photos): Chain 1, but don’t turn. In the BLO: 1 SC into the 1st stitch, and each stitch around. Join only after the very last stitch. (70 SC)
Option #2, R21 – 22: Repeat Rounds 9 and 10.
Option #2, R23: Repeat Round 10.
Fasten off, and weave in ends.
Child Size:
Chain 5. Slip stitch join to form a ring. Chain 1. Hold the tail end to what is currently the front side that you are looking at – this is not like you are used to working and that is because we are currently looking at the wrong side and the texture will pop out on the back side as we work. The tail end will begin by laying on top of the left side chains and move counter clockwise as you work around. (SC into the ring, TR into the ring) 5x. Join. (10 stitches)
R2: Chain 1, and turn. SC into the 1st stitch, 2 SC into each of the next 9 stitches, SC into the last stitch. Join. (20 SC)
R3: Chain 1, and turn. SC into the 1st stitch, TR into the next stitch, SC into the next stitch, TR into the same stitch, SC into the next stitch, [TR into the next stitch, SC into the same stitch, TR into the next stitch, then SC into the next stitch, TR into the same stitch, SC into the next stitch] around, TR into the last stitch. (30 stitches)
R4: Chain 1, and turn. SC into the 1st 3 stitches, (2 SC into the next stitch, SC into each of the next 2 stitches) 9x, SC into the last stitch. Join. (40 SC)
Checkpoint #1: Stop here, and measure the diameter to check gauge. You’ll want your diameter to measure 3 1/8″.
R5: Chain 1, and turn. SC into the 1st stitch, TR into the next stitch, SC into the next stitch, TR into the next stitch, (SC into the next stitch, TR into the same stitch, SC into the next stitch, TR into the next stitch, SC into the next stitch), and now the repeat: [(TR into the next stitch, SC into the same stitch, TR into the next stitch, SC into the next stitch, TR into the next stitch) then (SC into the next stitch, TR into the same stitch, SC into the next stitch, TR into the next stitch, SC into the next stitch)] around, TR into the last stitch. (50 stitches)
R6: Chain 1, and turn. SC into the 1st 5 stitches, (2 SC into the next stitch, SC into each of the next 4 stitches) 9x, SC into the last stitch. Join. (60 stitches)
R7: Chain 1, and turn. SC into the 1st stitch, TR into the next stitch, SC into the next stitch, TR into the next stitch, SC into the next stitch, TR into the next stitch, (SC into the next stitch, TR into the same stitch, SC into the next stitch, TR into the next stitch, SC into the next stitch, TR into the next stitch, SC into the next stitch), and now the repeat: (TR into the next stitch, SC into the same stitch, TR into the next stitch, SC into the next stitch, TR into the next stitch, SC into the next stitch, TR into the next stitch) then (SC into the next stitch, TR into the same stitch, SC into the next stitch, TR into the next stitch, SC into the next stitch, TR into the next stitch, SC into the next stitch)] around, TR into the last stitch. (70 stitches)
R8: Chain 1, and turn. SC into the 1st 7 stitches, (2 SC into the next stitch, SC into each of the next 6 stitches) 9x, SC into the last stitch. Join. (80 SC)
Checkpoint #2: Stop here, and measure the diameter to ensure the finished beanie will fit correctly. You’ll want your diameter to measure 5 5/8″.
R9: Chain 1, and turn. SC into the 1st stitch, (TR into the next stitch, SC into the next stitch) 39x, TR into the last stitch. Join. (80 stitches)
R10: Chain 1, and turn. SC into the 1st stitch, and each stitch around. Join. (80 SC)
R11 – 22: Repeat Rounds 9 and 10.
The current height of your beanie, laying flat, should be about 6 3/8″ tall. Now, you can choose to finish in the back loop only (Option #1), as shown on the original blue beanie, or continue in the same pattern as the body (Option #2) to finish. The finished height will be about 7″ – 7 1/8″ tall. Add or take away rounds as needed to reach this (or your desired) height.
Option #1, R23 – 25 (as shown in photos): Chain 1, but don’t turn. In the BLO: 1 SC into the 1st stitch, and each stitch around. Join only after the very last stitch. (80 SC)
Option #2, R23 – 24: Repeat Rounds 9 and 10.
Option #2, R25: Repeat Round 10.
Fasten off, and weave in ends.
Teen/Adult Small Size:
Chain 5. Slip stitch join to form a ring. Chain 1. Hold the tail end to what is currently the front side that you are looking at – this is not like you are used to working and that is because we are currently looking at the wrong side and the texture will pop out on the back side as we work. The tail end will begin by laying on top of the left side chains and move counter clockwise as you work around. (SC into the ring, TR into the ring) 5x. Join. (10 stitches)
R2: Chain 1, and turn. SC into the 1st stitch, 2 SC into each of the next 9 stitches, SC into the last stitch. Join. (20 SC)
R3: Chain 1, and turn. SC into the 1st stitch, TR into the next stitch, SC into the next stitch, TR into the same stitch, SC into the next stitch, [TR into the next stitch, SC into the same stitch, TR into the next stitch, then SC into the next stitch, TR into the same stitch, SC into the next stitch] around, TR into the last stitch. (30 stitches)
R4: Chain 1, and turn. SC into the 1st 3 stitches, (2 SC into the next stitch, SC into each of the next 2 stitches) 9x, SC into the last stitch. Join. (40 SC)
Checkpoint #1: Stop here, and measure the diameter to check gauge. You’ll want your diameter to measure 3 1/8″.
R5: Chain 1, and turn. SC into the 1st stitch, TR into the next stitch, SC into the next stitch, TR into the next stitch, (SC into the next stitch, TR into the same stitch, SC into the next stitch, TR into the next stitch, SC into the next stitch), and now the repeat: [(TR into the next stitch, SC into the same stitch, TR into the next stitch, SC into the next stitch, TR into the next stitch) then (SC into the next stitch, TR into the same stitch, SC into the next stitch, TR into the next stitch, SC into the next stitch)] around, TR into the last stitch. (50 stitches)
R6: Chain 1, and turn. SC into the 1st 5 stitches, (2 SC into the next stitch, SC into each of the next 4 stitches) 9x, SC into the last stitch. Join. (60 stitches)
R7: Chain 1, and turn. SC into the 1st stitch, TR into the next stitch, SC into the next stitch, TR into the next stitch, SC into the next stitch, TR into the next stitch, (SC into the next stitch, TR into the same stitch, SC into the next stitch, TR into the next stitch, SC into the next stitch, TR into the next stitch, SC into the next stitch), and now the repeat: (TR into the next stitch, SC into the same stitch, TR into the next stitch, SC into the next stitch, TR into the next stitch, SC into the next stitch, TR into the next stitch) then (SC into the next stitch, TR into the same stitch, SC into the next stitch, TR into the next stitch, SC into the next stitch, TR into the next stitch, SC into the next stitch)] around, TR into the last stitch. (70 stitches)
R8: Chain 1, and turn. SC into the 1st 7 stitches, (2 SC into the next stitch, SC into each of the next 6 stitches) 9x, SC into the last stitch. Join. (80 SC)
Checkpoint #2: Stop here, and measure the diameter to ensure the finished beanie will fit correctly. You’ll want your diameter to measure 5 5/8″.
R9: Chain 1, and turn. SC into the 1st stitch, (TR into the next stitch, SC into the next stitch) 39x, TR into the last stitch. Join. (80 stitches)
R10: Chain 1, and turn. SC into the 1st stitch, and each stitch around. Join. (80 SC)
R11 – 31: Repeat Rounds 9 and 10.
The current height of your beanie, laying flat, should be about 7 7/8″ tall. Now, you can choose to finish in the back loop only (Option #1), as shown on the original blue beanie, or continue in the same pattern as the body (Option #2) to finish. The finished height will be about 8 3/8″ – 8 1/2″ tall. Add or take away rounds as needed to reach this (or your desired) height.
Option #1, R32 (as shown in photos): Chain 1, and turn so the front side is facing. In the BLO: 1 SC into the 1st stitch, and each stitch around. Don’t join. (80 SC)
Option #1, R33 (as shown in photos): Chain 1, but don’t turn. In the BLO: 1 SC into the 1st stitch, and each stitch around. Join. (80 SC)
Option #2, R32 – 33: Repeat Round 10.
Fasten off, and weave in ends.
Adult Large Size:
Chain 5. Slip stitch join to form a ring. Chain 1. Hold the tail end to what is currently the front side that you are looking at – this is not like you are used to working and that is because we are currently looking at the wrong side and the texture will pop out on the back side as we work. The tail end will begin by laying on top of the left side chains and move counter clockwise as you work around. (SC into the ring, TR into the ring) 6x. Join. (12 stitches)
R2: Chain 1, and turn. SC into the 1st stitch, 2 SC into each of the next 11 stitches, SC into the last stitch. Join. (24 SC)
R3: Chain 1, and turn. SC into the 1st stitch, TR into the next stitch, SC into the next stitch, TR into the same stitch, SC into the next stitch, [TR into the next stitch, SC into the same stitch, TR into the next stitch, then SC into the next stitch, TR into the same stitch, SC into the next stitch] around, TR into the last stitch. (36 stitches)
R4: Chain 1, and turn. SC into the 1st 3 stitches, (2 SC into the next stitch, SC into each of the next 2 stitches) 11x, SC into the last stitch. Join. (48 SC)
Checkpoint #1: Stop here, and measure the diameter to check gauge. You’ll want your diameter to measure 3 3/8″.
R5: Chain 1, and turn. SC into the 1st stitch, TR into the next stitch, SC into the next stitch, TR into the next stitch, (SC into the next stitch, TR into the same stitch, SC into the next stitch, TR into the next stitch, SC into the next stitch), and now the repeat: [(TR into the next stitch, SC into the same stitch, TR into the next stitch, SC into the next stitch, TR into the next stitch) then (SC into the next stitch, TR into the same stitch, SC into the next stitch, TR into the next stitch, SC into the next stitch)] around, TR into the last stitch. (60 stitches)
R6: Chain 1, and turn. SC into the 1st 5 stitches, (2 SC into the next stitch, SC into each of the next 4 stitches) 11x, SC into the last stitch. Join. (72 stitches)
R7: Chain 1, and turn. SC into the 1st stitch, TR into the next stitch, SC into the next stitch, TR into the next stitch, SC into the next stitch, TR into the next stitch, (SC into the next stitch, TR into the same stitch, SC into the next stitch, TR into the next stitch, SC into the next stitch, TR into the next stitch, SC into the next stitch), and now the repeat: (TR into the next stitch, SC into the same stitch, TR into the next stitch, SC into the next stitch, TR into the next stitch, SC into the next stitch, TR into the next stitch) then (SC into the next stitch, TR into the same stitch, SC into the next stitch, TR into the next stitch, SC into the next stitch, TR into the next stitch, SC into the next stitch)] around, TR into the last stitch. (84 stitches)
R8: Chain 1, and turn. SC into the 1st 7 stitches, (2 SC into the next stitch, SC into each of the next 6 stitches) 11x, SC into the last stitch. Join. (96 SC)
Checkpoint #2: Stop here, and measure the diameter to ensure the finished beanie will fit correctly. You’ll want your diameter to measure 6″.
R9: Chain 1, and turn. SC into the 1st stitch, (TR into the next stitch, SC into the next stitch) 47x, TR into the last stitch. Join. (96 stitches)
R10: Chain 1, and turn. SC into the 1st stitch, and each stitch around. Join. (96 SC)
R11 – 31 (35) Repeat Rounds 9 and 10.
The Adult Large size has the biggest range for heights, and that is that it can be either 8 1/2″ tall (like the Adult Small version) or 9 1/2″ tall, and this varies depending on the recipient. The current height of your beanie, laying flat, should be either about 8″ or 9″ tall. Now, you can choose to finish in the back loop only (Option #1), as shown on the original blue beanie, or continue in the same pattern as the body (Option #2) to finish. The finished height will be either 8 1/2″ or 9 1/2″ tall, depending on the number of repeats you decide fits your recipient better. Add or take away rounds as needed to reach this (or your desired) height.
Option #1, R32 (as shown in photos) or R36: Chain 1, and turn so the front side is facing. In the BLO: 1 SC into the 1st stitch, and each stitch around. Don’t join. (96 SC)
Option #1, R33 (as shown in photos) or R37: Chain 1, but don’t turn. In the BLO: 1 SC into the 1st stitch, and each stitch around. Join. (96 SC)
Option #2, R32 – 33 (36 – 37): Repeat Round 10.
Fasten off, and weave in ends.
Feel free to use this information to make and sell your own items. When sharing, designer credit is appreciated, but not required. All Cre8tion Crochet Patterns, Photos and PDF’s are protected under copyright. They are not to be copied, distributed or sold – doing so is copyright infringement and stealing! DO NOT copy and paste my pattern anywhere, and DO NOT share the written pattern with others, share the link to the pattern instead so others can find it themselves.
Join one of our awesome Facebook groups to share your creations, and see what others are up to!
– Yarn Crafts & Coffee Community
– DIY Home On Rockwood Lane
– Alexandra Lane Lifestyle
Linked Up To…


I love your Little Pebbles beanie! This will be a blessing to so many folks who are fighting the fight! God Bless you, Krissy!
Thanks so much for hosting this great challenge, Krissy! It warms my heart to be able to participate and see all of the great beanies everyone is making to donate.
I am having trouble with the crown curling up, is this normal? Will it straighten out. I have tried 2 different yarns and both are curling.
Hi Regina! Sorry I didn’t see this sooner. Sometimes crocheted fabric does curl up. If the fabric is taking on quite the bowl shape, I would double check the stitch count first to make sure you aren’t missing any as that would make it curl into that bowl shape. If your stitch count is correct and the circle is just slightly curling and does lay flat when you assist (not stretch), it will work out in the end.