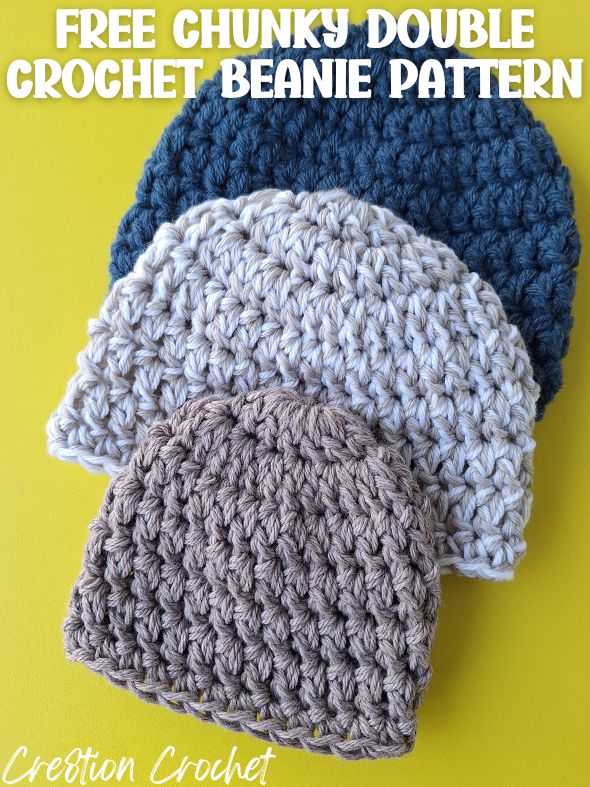
Learn how to crochet the Chunky Dylan Claire Beanie, which is an easy double crochet beanie worked in cozy chunky yarn that works up quickly! Sized from Newborn through Toddler.
This post contains affiliate links for Amazon, Etsy and Crochet Aweigh. If you make a purchase by clicking on them, I make a small commission at no extra cost to you. Thanks for your support!
Find the free crochet pattern instructions below, or purchase a printer-friendly, ad-free PDF on Ravelry by clicking here.
In a hurry? Pin this for later when you have more time.
This cozy crocheted beanie first made it’s appearance back in March of 2014 over on my EyeLoveKnots blog.
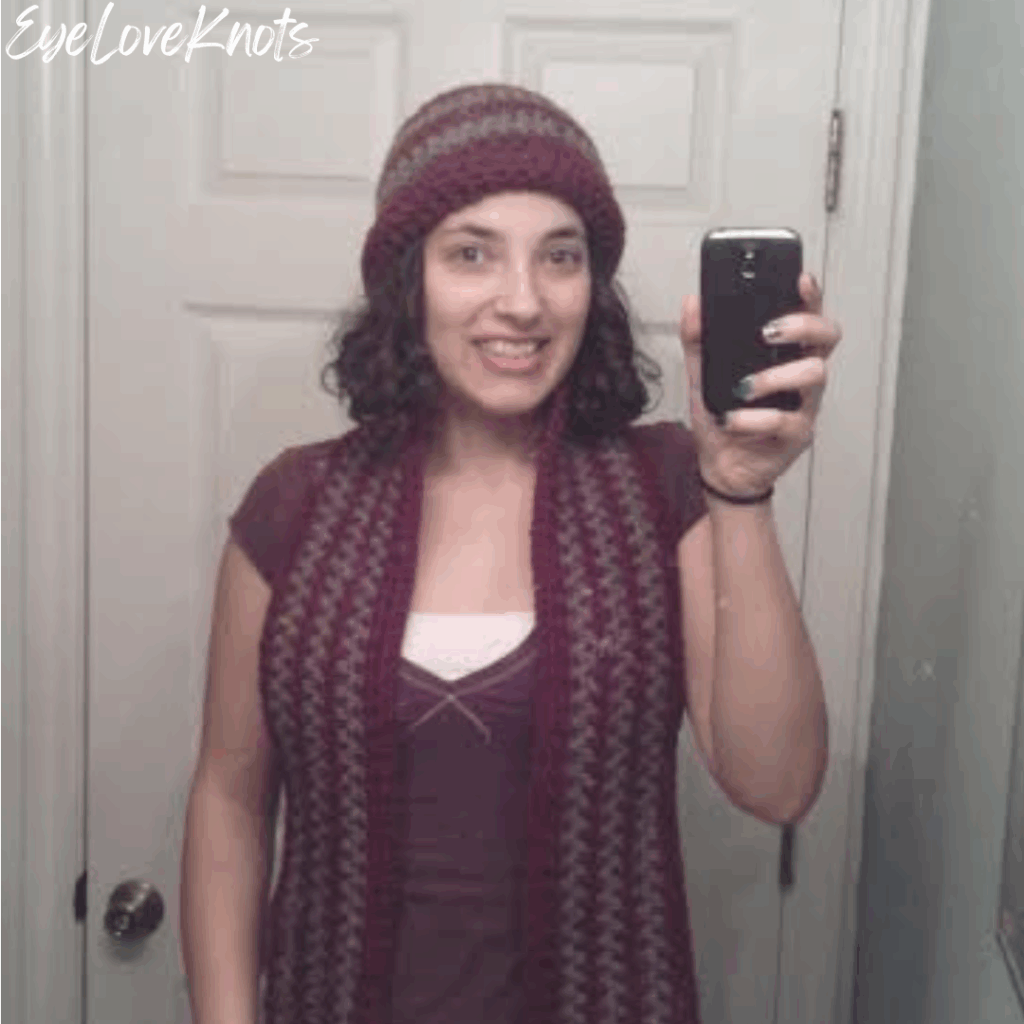
I made it in Bernat Roving Yarn, which was a great chunky weight #5 roving yarn that made really lovely beanies! Sadly, it’s been discontinued. As you can see, I also did stripes. The rolled brim comes from it being a 9 1/2″ length as I gifted this beanie to my brother in law for Christmas this year. I had also made this beanie to match the cute striped scarf you see paired with this beanie and I had shared a crochet pattern review of it, which I found on the Yarnspirations website, but with my update in November of 2025, it seems the scarf crochet pattern is no longer hosted on their website.
Fast forward to May of 2024, I planned to use some Lion Brand Hue + Me to update the pattern, but no matter what hook size I used and how I adjusted the crochet pattern, I could not get instructions worked out for all of the sizes I like to include – newborn through adult large – and so this update went on the back burner.
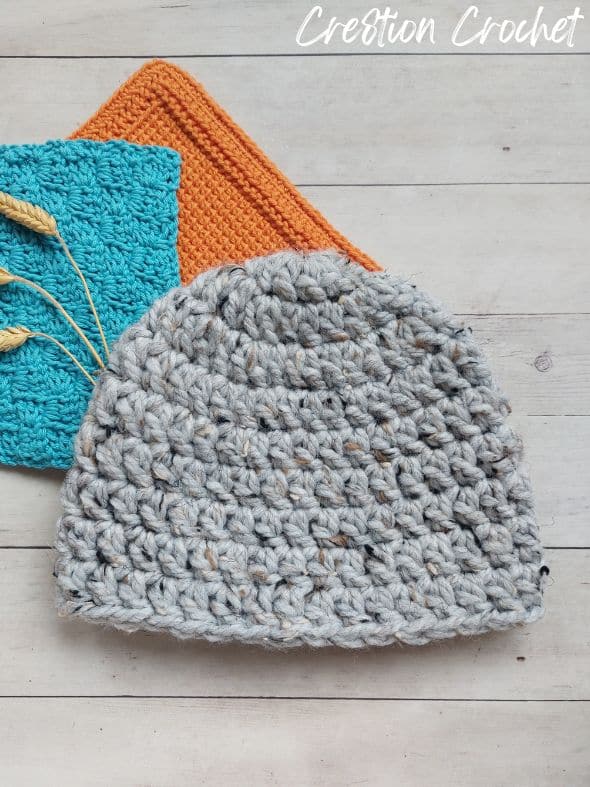
The 30 Days of Crochet Hats in November Event motivated me to revisit it again, and this time, I decided to go with a tried and true favorite – holding two strands of a worsted weight yarn together to create a chunky weight strand, and I love this because worsted weight is so easy to find so there are lots of options whereas a good chunky weight yarn can be hard to find.

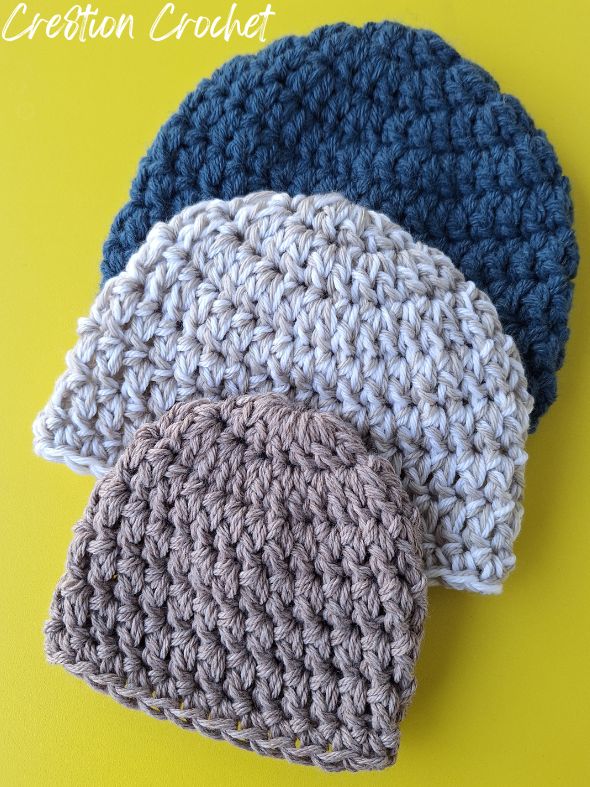
The other fun thing is if you hold two different colored strands together, you get a really cool marled effect! You’ll see an example of this in the beanie in the middle that is a cream and brown color.
Now, I will admit, even with changing the yarn, I still cannot work out all of the sizes just yet – I’m missing the Child/Adult Small size, so I’ve decided to continue with this update anyway, since the original pattern used a discontinued yarn, and add additional sizes I didn’t have before, and I will come back to this pattern at a later time to try to update it again with adult sizes. For now, this pattern comes in 4 sizes: Newborn, 3 – 6 Months, 6 – 12 Months and Toddler.
One other big change is that it’s now hosted here on Cre8tion Crochet, instead of on EyeLoveKnots where it lived for almost 12 years. Hard to believe it’s been that long!
Easy Double Crochet Patterns:
Dylan Claire is one of my easy, beginner friendly series that features simple double crochet stitches, though I don’t recommend starting with a project that is worked in the round as a beginner – try it after you are comfortable working back and forth in rows using the double crochet stitch pattern.
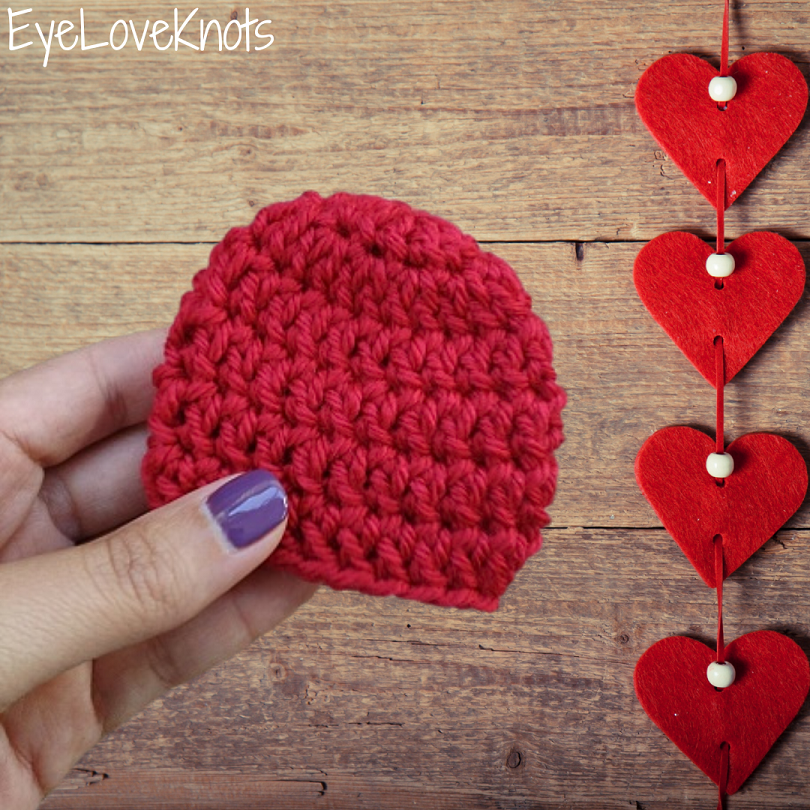
Dylan Claire Preemie Beanie (worsted weight)

Dylan Claire Beanie (Worsted Weight, Newborn – Adult)
Super Chunky Dylan Claire Beanie (Super Bulky Weight, Newborn – Adult)
Find accessory crochet patterns here on Cre8tion Crochet, and home decor and accessory crochet patterns over on my sister blog – EyeLoveKnots.
Ad-Free Printer Friendly PDF:
Cre8tion Crochet newsletter subscribers get access to Exclusive Subscriber Content, like the free PDF of this pattern via the Free File Library – you’ll find the tab on the top menu. The library is password protected so sign up for my newsletter and you’ll receive a Welcome email containing this month’s password, or if you are already a blog subscriber, reference your latest newsletter for this month’s password. From the library, you’ll be able to access the PDFs via Google Drive – you do not need to have a Google Drive account to view and download the PDF.
For a Limited Time:

Through 12/03/25 at 11:59pm EST, you can grab a free copy of the PDF for the Chunky Dylan Claire Beanie on Ravelry using code FREECROCHET202514. I earn my income from the number of pageviews my blog sees, so please do not share the code, but instead share the link to this post so others can find it. Thank you!
After 12/03/25 or for non-subscribers, if you would like a PDF version of this post, you may get one through either my Etsy Shop or Ravelry Shop for a small fee. This fee is to compensate for the views lost when you no longer need to return to the blog to for the information, as you will have your own copy.
In a hurry? Pin this for later when you have more time!


What Supplies Do I Need to Crochet a Chunky Double Crochet Beanie?
- 67 (73, 101, 116) Yards of Chunky Weight #5 Yarn – The solid blue beanie is 2 strands of Lion Brand Wool Ease, the marled beanie in the center is 2 strands of Cascade Pacific and the solid brown beanie is 2 strands of Berroco Vintage.
- L11/8mm Crochet Hook
- Tapestry Needle
- Soft Tape Measure – Gauge is Essential
Lion Brand Wool Ease is comprised of 80% Acrylic and 20% Wool, and comes in a skein that is 197 yards, or 85 grams.
Cascade Pacific is comprised on 60% Acrylic and 40% Superwash Merino Wool, and comes in a skein that is 213 yards, or 100 grams.
Berroco Vintage is comprised of 52% Acrylic, 40% Wool, and 8% Nylon and comes in a hank that is 218 yards, or 100 grams.
Yardage by Size:
- Newborn: 67 Yards or 29 Grams
- 3 – 6 Months: 73 Yards or 31 Grams
- 6 – 12 Months: 101 Yards or 43 Grams
- Toddler: 116 Yards or 50 Grams
Material Notes:
As a cold weather beanie, animal fibers are better for keeping warm against the wind, and while alpaca works great, my go-to is always a 100% superwash merino wool or a wool and acrylic blend, like Lion Brand Hue + Me. Acrylic yarns, like Lion Brand’s Mandala Impressions, do also work. Normally, I would stress that they’re good for cool, but not windy, weather as the wind tends to go right through, but a chunky weight yarn does provide better coverage, even in a 100% acrylic. If you don’t have a chunky weight yarn, or like me, you are having trouble finding one you like, you can hold 2 strands together of a Worsted Weight #4 Yarn – this is what I’ve done for my beanies.
I love my ergonomic clay hooks from SiennasBowtique and BronzeShepherdStudio! They both have so many fun designs – I have several from each shop because they’re so darn cute and nice to hold onto! We also have lots of beautiful, handcrafted crochet hooks in our Yarn Crafts and Coffee Yarn Shop as well!
Gauge – Measured in Pattern in the Crown:
- 13 to 26 DC = 3 7/8″
- 8 to 24 DC = 4 1/4”
- 12 to 36 DC = 5 3/8″
- 9 to 36 DC = 5 7/8″
Gauge it very important for beanies. If you do not meet gauge, and continue making your beanie, the finished size will either be too small or too big so make sure to check it at the end of increasing – that’s just 2 – 3 rounds in. If you’re measuring smaller than the given measurements, go up a crochet hook size and rework the sample. If you’re measuring larger than the given measurements, go down a crochet hook size and rework the sample. Take gauge again, and see where you are.
Measurements:
If you are concerned with the size (or want to make a different size), take your tape measure out and measure around your head just above your eyebrows. The distance around is the circumference. You will need to use this equation to figure out what size diameter you will need: Your Circumference – 2” / 3.14 (pi) = crown diameter. 2” is the amount of stretch for acrylic, wool, and similar.
The Newborn Size has a crown of 3 7/8″ in diameter, a circumference of just 12 1/8″ to fit a head size of 13″ – 14″, and is 5″ in length.
The 3-6 Month Size has a crown of 4 1/4″ in diameter (or as high as 4 1/2″), a circumference of nearly 13 3/8″ to fit a head size of 14″ – 16″, and is 5 3/8″ in length (or as low as 5 1/4″).
The 6-12 Month Size has a crown of 5 3/8″ in diameter, a circumference of nearly 16 7/8″ to fit a head size of 17″ – 19″, and is 5 5/8″ in length (or as high as 5 3/4″).
The Toddler Size has a crown of 5 7/8″ in diameter (or as low as 5 3/4″), a circumference of 18 1/2″ to fit a head size of 18″ – 20″, and is 6 5/8″ in length (or as low as 6 1/2″).
Abbreviations (US Terms):
- DC – Double Crochet (Photo Tutorial)
- SC – Single Crochet (Photo Tutorial)
Pattern Notes:

I work my crown and body differently than most to help keep my seam straight, and that is that the first stitch from the first set of increases is done in the first stitch of the round, which will appear just to left of the beginning chain, then the round will be worked as normal, and the final stitch of the round will be the second stitch of the first set of increases, and it will be worked into the same stitch as the first, and appear just to the right of the beginning chain. The photo above shows where the first and last stitch are worked, and I have a photo tutorial of this technique in my How to Keep a Straight Seam post. You can work in your preferred increase method as long as we end up with the same stitches at the end of the round.
In the crown, the beginning chain 2 does not count as a stitch, but in the body, the chain 2 does count.
Join to the first stitch, not the beginning chain 2 in every round except for the very last round of double crochet IF you are adding a round of single crochet after – then join to the top chain of the beginning chain 2.
Only some rounds have a final round of single crochet, and that is to get to the finished length we need. If you’re working a size that does not instruct to single crochet, but you want to, go ahead and add it – it will add 1/4”. On the flip side, if you’re working a size that does end on a single crochet round, but you don’t want to work in it, you can omit it for less length or work a round of double crochet in it’s place for a little bit more length.
If you want to add stripes, for the most seamless color change, after working the last stitch of the round, yarn over with the color you are switching to just to have it over your hook and complete the slip stitch of the round in the current color, then pull the new color through the loop on my hook, and pull that initial loop tail end to tighten down. The previous color will disappear, and it becomes a clean, seamless color change.
Carry the yarn up the inside of the beanie – there will be floats (the height of the row) along the inside of the seam, which is only visible from the inside of the beanie, otherwise:
- If you do not want to have smaller floats, for the last double crochet: yarn over, insert hook into the stitch, yarn over and pull through (3 loops on your hook), yarn over with the color you are switching to just so it’s over your hook and then complete the first half of the double crochet by yarning over and pulling through 2 loops. Yarn over, and pull through the remaining 2 loops, and you will find the color you’re switching to in the perfect place to grab it when you’re ready. This will cut the float in half heightwise.
- If you do not want to have visible floats, you can finish each row off with an invisible join, and reattach the new color for each row.
Chunky Double Crochet Beanie Crochet Pattern
Newborn Beanie Pattern:
Chain 6. Join to form a ring. Chain 2. 13 DC into the ring. Join. (13 DC)
R2: Chain 2. Work 1 DC into the first stitch, 2 DC in each of the next 12 DCs, and 1 DC into the last stitch. Join. (26 DC)
Checkpoint: Stop here, and measure the diameter to ensure the finished beanie will fit correctly. You’ll want your diameter to measure 3 7/8″.
R3: Chain 2. Work 1 DC into the second DC, and each DC around. Join. (26 DC)
R4: Chain 2. Work 1 DC into the first DC, and each DC around. Join. (26 DC)
R5 – 6: Repeat Rounds 3 – 4.
R7: Chain 1. 1 SC into the first stitch & each stitch around. Join. (26 SC)
Checkpoint: Before fastening off, stop and measure the height of the beanie. It should measure 5” tall. If needed, omit the last round to make it shorter, or switch it for another round of DC to make it taller.
Fasten off, and weave in ends.
3 – 6 Months Beanie Pattern:
Leave a slightly longer tail than usual when making the slip knot to accommodate the stitches being worked into the first chain. Chain 3. Work 8 DC into the 1st chain. Join. (8 DC)
R2: Chain 2. Work 1 DC into the first stitch, 2 DC in each of the next 7 DCs, and 1 DC into the last stitch. Join. (16 DC)
R3: Chain 2. Work 1 DC into the first 2 stitches, (2 DC into the next stitch, 1 DC into the next stitch) 7x, 1 DC into the last stitch. Join. (24 DC)
Checkpoint: Stop here, and measure the diameter to ensure the finished beanie will fit correctly. You’ll want your diameter to measure 4 1/4″, or as high as 4 1/2”.
R4: Chain 2. Work 1 DC into the second DC, and each DC around. Join. (24 DC)
R5: Chain 2. Work 1 DC into the first DC, and each DC around. Join. (24 DC)
R6 – 8: Repeat Rounds 4 – 5.
Checkpoint: Before fastening off, stop and measure the height of the beanie. It should measure 5 3/8” tall, or as low as 5 1/4”. If needed, omit the last round to make it shorter, or switch the last round for another round of DC to make it taller.
Fasten off, and weave in ends.
6 – 12 Months Beanie Pattern:
Chain 6. Join to form a ring. Chain 2. 12 DC into the ring. Join. (12 DC)
R2: Chain 2. Work 1 DC into the first stitch, 2 DC in each of the next 11 DCs, and 1 DC into the last stitch. Join. (24 DC)
R3: Chain 2. Work 1 DC into the first 2 stitches, (2 DC into the next stitch, 1 DC into the next stitch) 11x, 1 DC into the last stitch. Join. (36 DC)
Checkpoint: Stop here, and measure the diameter to ensure the finished beanie will fit correctly. You’ll want your diameter to measure 5 3/8″.
R4: Chain 2. Work 1 DC into the second DC, and each DC around. Join. (36 DC)
R5: Chain 2. Work 1 DC into the first DC, and each DC around. Join. (36 DC)
R6 – 7: Repeat Rounds 4 – 5.
R8: Chain 1. 1 SC into the first stitch & each stitch around. Join. (36 SC)
Checkpoint: Before fastening off, stop and measure the height of the beanie. It should measure 5 5/8” tall, or as high as 5 3/4”. If needed, omit the last round to make it shorter, or switch the last round for another round of DC to make it taller.
Fasten off, and weave in ends.
Toddler Beanie Pattern:
Leave a slightly longer tail than usual when making the slip knot to accommodate the stitches being worked into the first chain. Chain 3. Work 9 DC into the 1st chain. Join. (9 DC)
R2: Chain 2. Work 1 DC into the first stitch, 2 DC in each of the next 8 DCs, and 1 DC into the last stitch. Join. (18 DC)
R3: Chain 2. Work 1 DC into the first 2 stitches, (2 DC into the next stitch, 1 DC into the next stitch) 8x, 1 DC into the last stitch. Join. (27 DC)
Checkpoint: Stop here, and measure the diameter to ensure the finished beanie will fit correctly. You’ll want your diameter to measure 5 7/8″, or as low as 5 3/4”.
R4: Chain 2. Work 1 DC into the second DC, and each DC around. Join. (27 DC)
R5: Chain 2. Work 1 DC into the first DC, and each DC around. Join. (27 DC)
R6 – 9: Repeat Rounds 4 – 5.
Checkpoint: Before fastening off, stop and measure the height of the beanie. It should measure 6 5/8” tall, or as low as 6 1/2”. If needed, omit the last round to make it shorter, or switch the last round for another round of DC to make it taller.
Fasten off, and weave in ends.
Feel free to use this information to make and sell your own items. When sharing, designer credit is appreciated, but not required. All Cre8tion Crochet Patterns, Photos and PDF’s are protected under copyright. They are not to be copied, distributed or sold – doing so is copyright infringement and stealing! DO NOT copy and paste my pattern anywhere, and DO NOT share the written pattern with others, share the link to the pattern instead so others can find it themselves.


Leave a Reply